Jumping into a new game can feel like being thrown into the deep end of a pool. You see other players zipping around, abilities flying everywhere, and you’re just trying to figure out which button makes you jump. If that’s how you feel about SUPERVIVE, you’ve come to the right place. This isn’t just another list of tips; this is the complete SUPERVIVE beginner guide designed to take you from a confused newcomer to a confident Hunter, ready to dominate the skies of The Breach. We’re going to break down everything you need to know, step by step, in a way that actually makes sense. So grab your gear, because your training starts now.
What Is in Our Ultimate SUPERVIVE Beginner Guide
Welcome to The Breach: Understanding What SUPERVIVE Is
Before we dive into the nitty gritty, let’s get one thing straight: SUPERVIVE isn’t your typical battle royale. The team at Theorycraft Games, made up of folks who worked on massive titles like League of Legends, Apex Legends, and Overwatch, smashed together three different genres to create something entirely new.
Imagine the team based strategy and unique character abilities of a MOBA like League of Legends. Now, mix that with the frantic, last squad standing survival of a battle royale like Apex Legends. Finally, sprinkle in the chaotic, high flying combat of a platform fighter like Super Smash Bros. That wild combination is SUPERVIVE. It’s a game where aiming your shots is just as important as your team’s strategy, and knowing how to move around the floating islands is the key to staying alive.
Mastering the Fundamentals: Your First Steps in The Breach
You can’t win a fight if you can’t control your character. Mastering SUPERVIVE’s unique movement system is the absolute first thing you need to do.
Movement and Control: More Than Just Running
The basics are simple: WASD to move, Spacebar to jump. But the real game changer is verticality. The map, The Breach, is a collection of floating islands with cliffs, walls, and platforms everywhere. Learning to use these to your advantage is critical. A helpful visual cue is built into the game: ledges marked with a white line are climbable, while those with a red line are not.
Holding the Spacebar while in the air lets you glide, which is a great way to cover long distances. However, gliding comes with a massive risk, which brings us to the single most important mechanic for any new player to learn.
The Critical “Spiking” Mechanic: Survival Rule #1
This is the rule that separates the rookies from the veterans. It’s simple but brutal: if you take even a single point of damage from any source while gliding, you get “Spiked.” This means you lose all control and plummet downwards.
What happens next depends on what’s below you:
- If you’re over solid ground: You’ll be stunned for a short period, leaving you completely helpless against enemy attacks.
- If you’re over the abyss: You die instantly. No second chances.
This mechanic turns aerial combat into a tactical chess match. Gliding across open spaces is always a huge risk. Before you do it, you need to be aware of where every potential enemy is. In dangerous situations, using a movement ability like a dash is a much smarter choice than a slow, vulnerable glide.
Recommended Settings for a Better Experience
The default settings aren’t bad, but a few tweaks can make a world of difference, especially for new players.
- Separate Jump and Glide Keys: By default, both actions are tied to the Spacebar. This often leads to accidental glides in the middle of a fight, which gets you Spiked. Go into your settings and assign Glide to a different key (like Left Shift or a side mouse button). This one change will save you countless deaths.
- Adjust Your Camera: To get the best view of the battlefield, enable the “Dynamic Camera” option to let it move more freely. Also, turn on “Zoom out when gliding” to get a wider perspective when you’re in the air.
- Show Cooldowns on Cursor: This setting displays your ability cooldowns right on your mouse cursor. It helps you keep track of when your abilities are ready without having to look away from the center of the screen, which is a huge advantage in a chaotic fight.
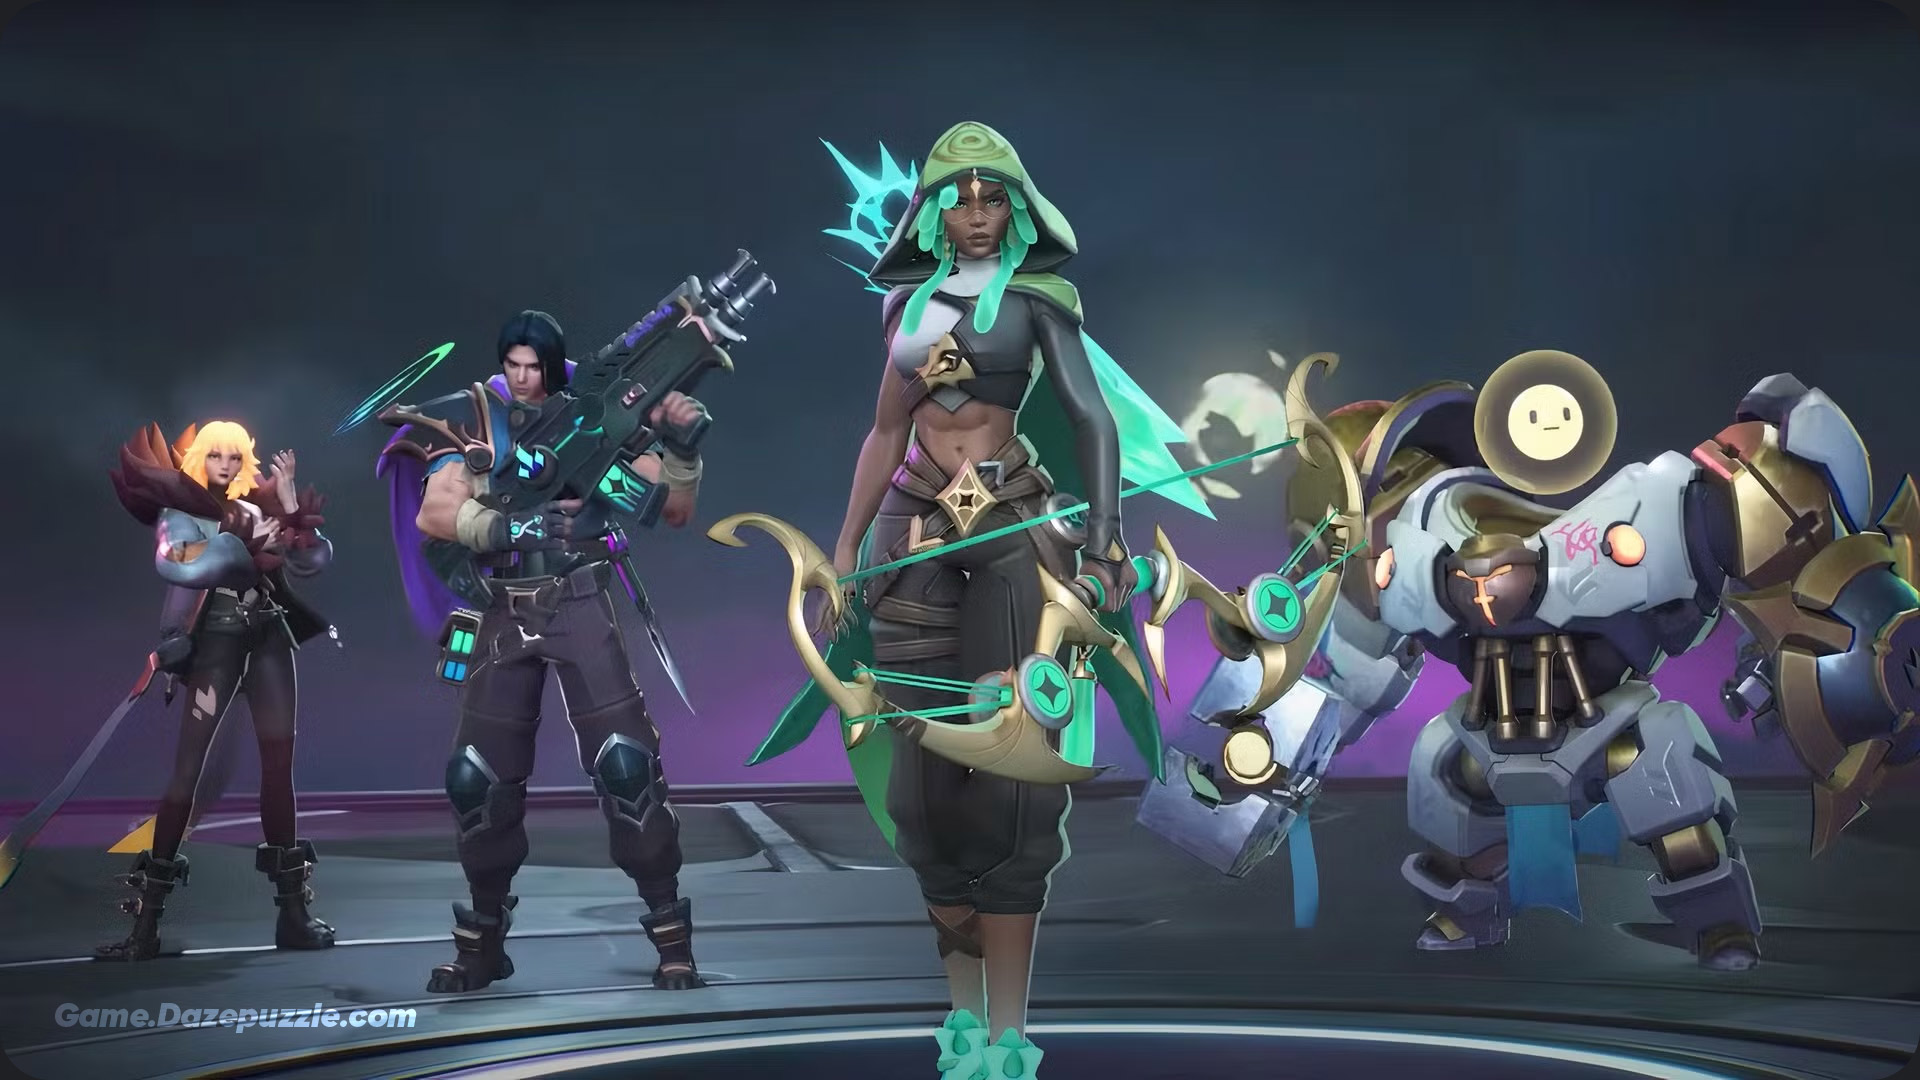
The Hunters of the Sky: Roles, Roster, and Abilities
With over 20 Hunters to choose from, finding the right one can be daunting. The first step is understanding the five main roles in the game, which will help you find a playstyle that suits you and build a balanced team.
- Fighter: These are your primary damage dealers, the core of your team’s offensive power.
- Initiator: Their job is to start fights on your team’s terms, often using powerful control abilities to catch enemies off guard.
- Frontliner: These are the tanks of the team, soaking up damage with their high health and defensive abilities to create space for their allies.
- Protector: The classic support role, focused on healing and shielding teammates.
- Controller: These Hunters manage the battlefield with crowd control abilities like slows and stuns, dictating the flow of a fight.
Great Hunters to Start With
Instead of trying to learn everyone at once, it’s best to start with a few Hunters who have more straightforward mechanics.
Ghost (Fighter)
A classic soldier character who will feel familiar to anyone with a background in shooter games. He uses an automatic rifle, has a Spike Grenade to stun enemies, and his ultimate calls down a devastating Napalm Strike. His Q ability is a long range laser shot that passes through walls, making him great for poking at enemies from safety.

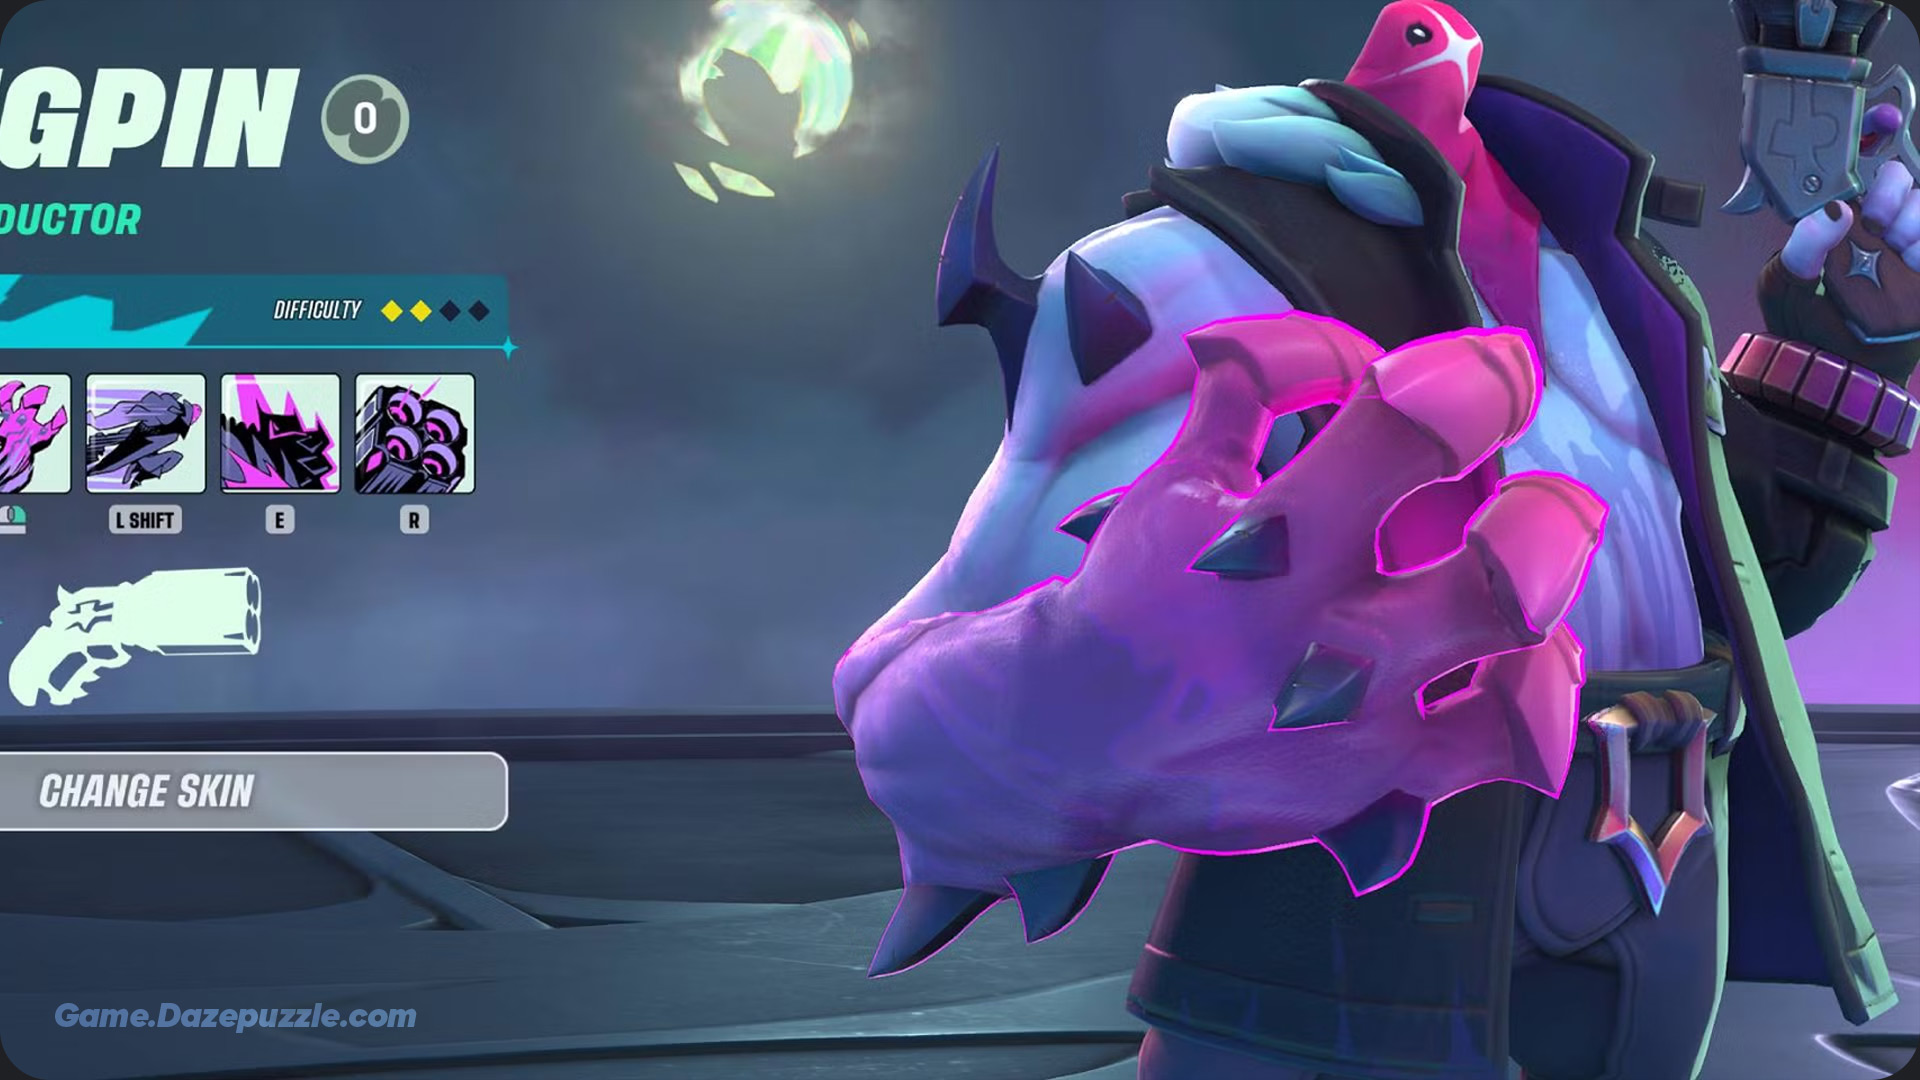
Kingpin (Initiator)
A tanky brawler who excels at starting fights. His signature ability is a long range hook that pulls enemies toward him. Combined with a close range stun and good mobility, he’s an incredibly strong and easy to learn choice for beginners.
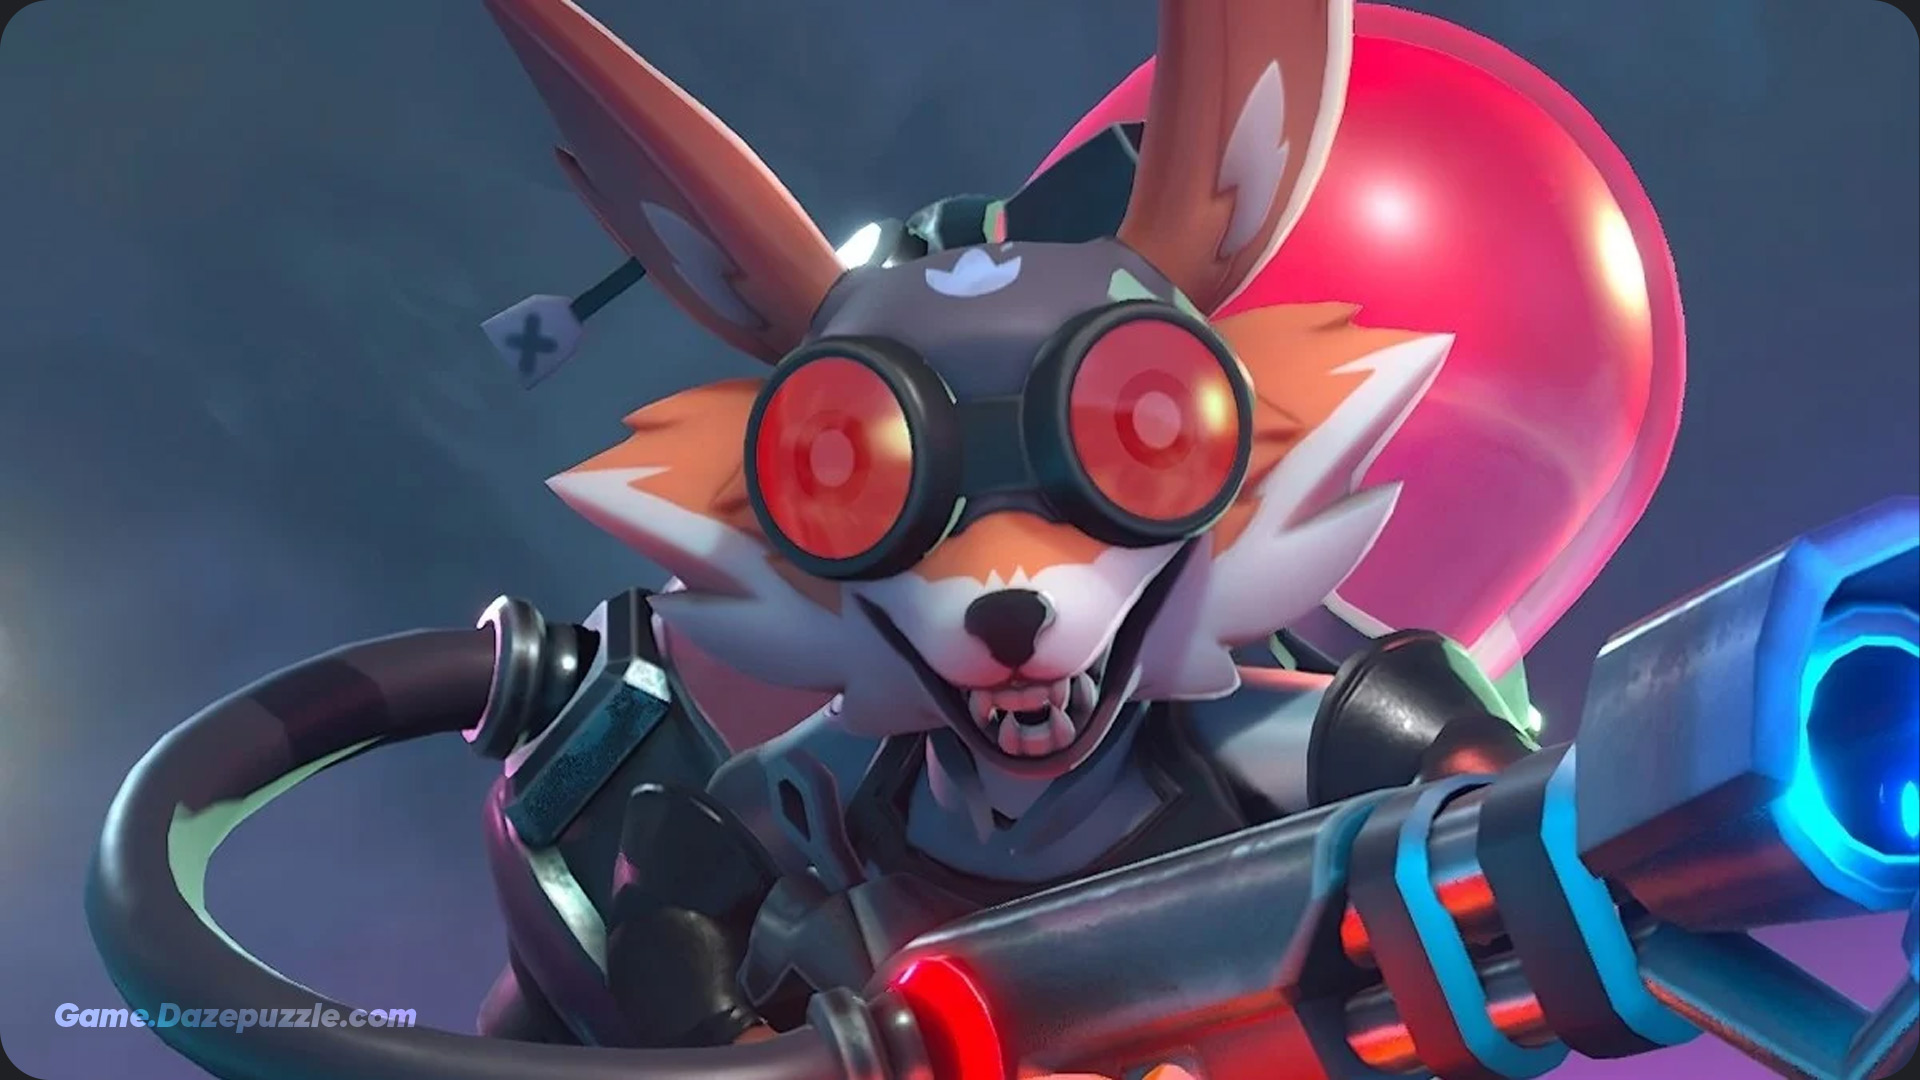
Felix (Frontliner)
A fiery fox who deals consistent damage with a flamethrower that doesn’t require precise aim. He’s perfect for causing chaos on the front line and pressuring enemies. His Q gives him a massive shield, and his ultimate lets him fly and set the ground ablaze.
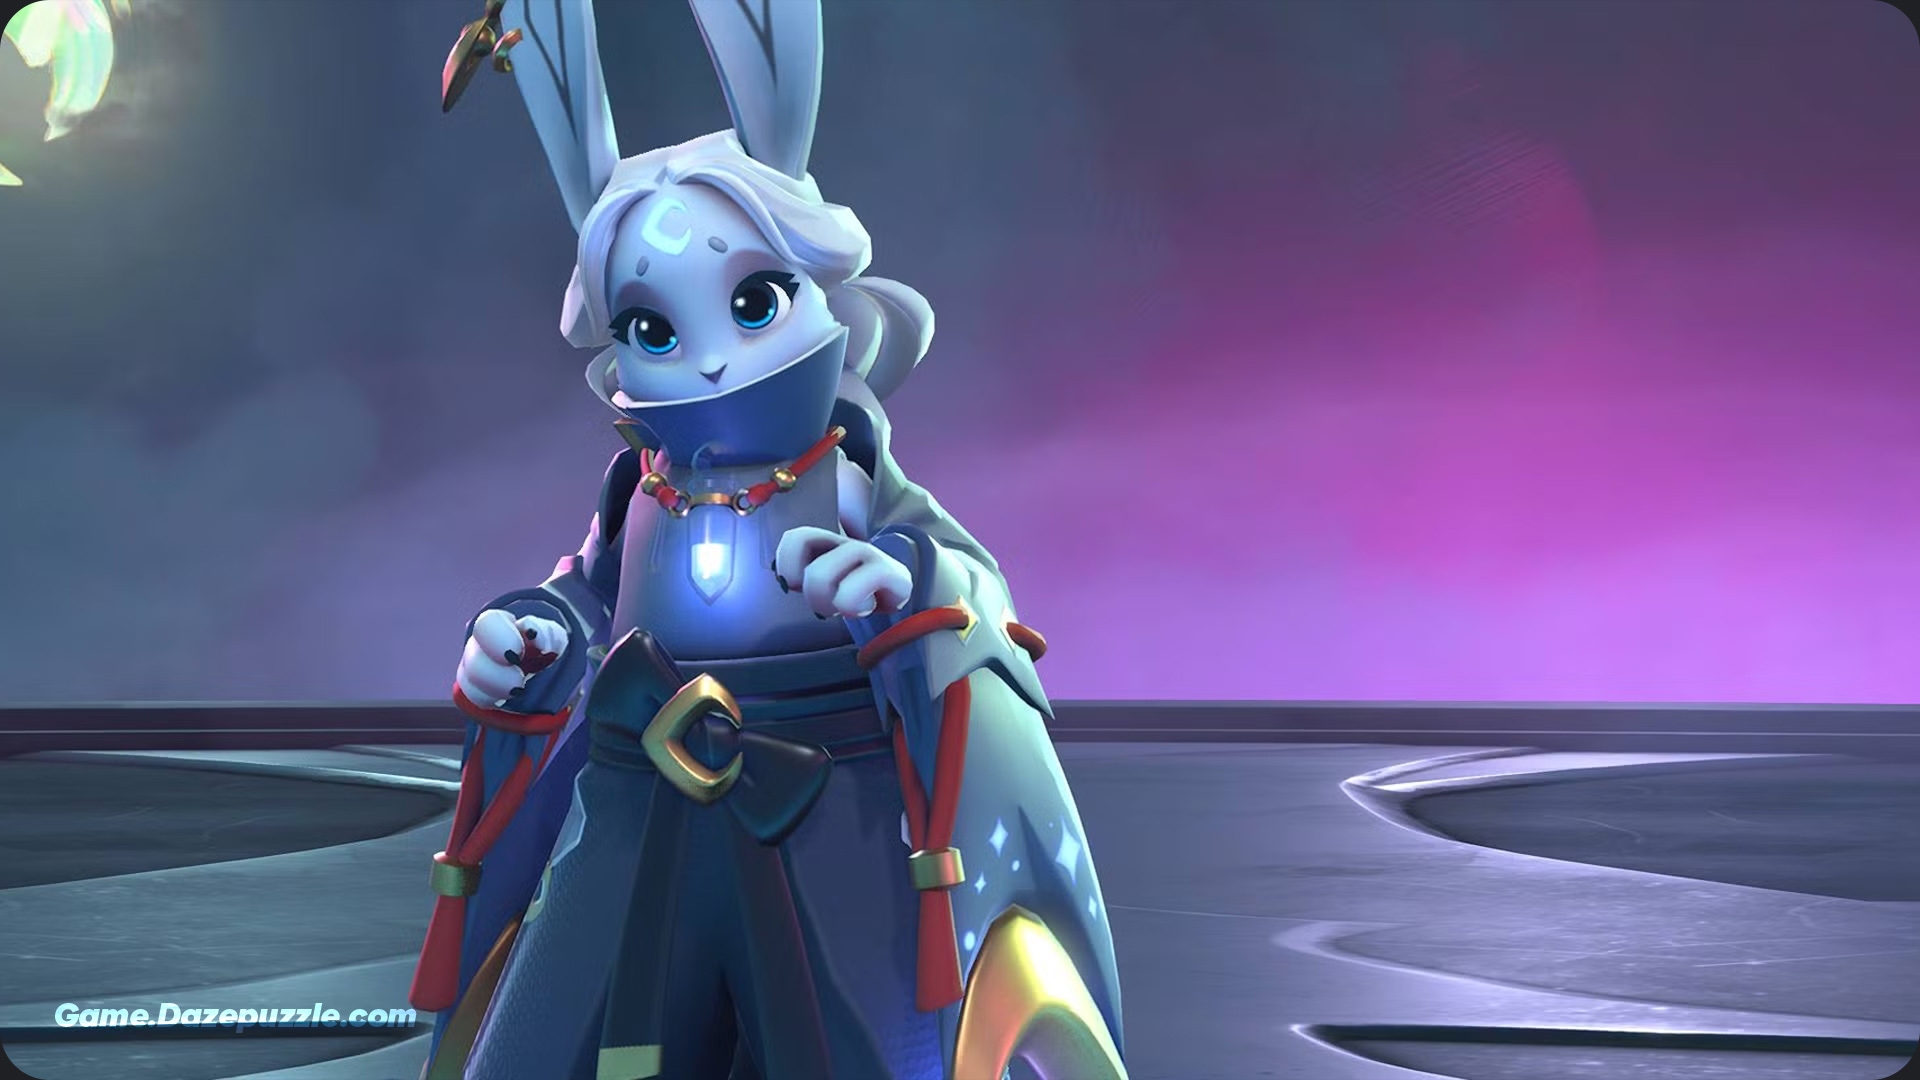
Elluna (Protector)
A combat medic who strikes a great balance between healing and damage. She can heal allies with her Q, root enemies with her Right Mouse Button ability, and her ultimate can directly heal or even resurrect a teammate. Her unique trait allows her to carry downed allies (in Wisp form) to safety for a revive.
Hunter Roster & Roles Table
This table serves as a quick reference for all the Hunters currently in the game. Use it to help decide who you want to unlock next based on your preferred playstyle.
| Hunter Name | Role | Difficulty (Est.) | Playstyle Summary |
|---|---|---|---|
| Brall | Fighter | Medium | Melee brawler with explosive potential and power up mechanics. |
| Ghost | Fighter | Easy | Ranged soldier with area control and focused damage. |
| Jin | Fighter | Hard | High mobility assassin focused on single target elimination. |
| Joule | Fighter | Hard | Lightning mage with extreme mobility and chain burst damage. |
| Myth | Fighter | Medium | Long range archer with chargeable shots and battlefield control. |
| Shiv | Fighter | Medium | Versatile fighter with healing abilities and sustained damage. |
| Shrike | Fighter | Medium | Sniper with high long range damage and enemy marking abilities. |
| Wukong | Fighter | Hard | Melee brawler with crowd control and disruptive abilities. |
| Bishop | Initiator | Medium | Rocket fist engage specialist with high mobility. |
| Kingpin | Initiator | Easy | Long range hook initiator with tanking capabilities. |
| Carbine | Initiator | Medium | Heavy soldier with defensive abilities and area denial. |
| Felix | Frontliner | Easy | Fiery tank with sustained damage, perfect for causing chaos. |
| Oath | Frontliner | Medium | Protective paladin with shields, heals, and a powerful survival ult. |
| Hudson | Frontliner | Easy | Control tank with a minigun, barbed wire, and a hook. |
| Elluna | Protector | Easy | Combat medic with strong heals, crowd control, and ally transport. |
| Zeph | Protector | Medium | Support with healing/shielding abilities and a global ultimate. |
| Beebo | Controller | Hard | Explosives expert with control oriented bombs and area damage. |
| Celeste | Controller | Medium | Ice mage with slows, an ice wall, and a defensive ultimate. |
| Saros | Controller | Hard | Space bending controller with displacement and hazard creation. |
| Void | Controller | Hard | Shadow mage who can teleport allies/enemies and has a black hole ult. |
The Armory: Your Personalized Path to Power
One of SUPERVIVE’s most innovative and important systems is the Armory. This is a meta progression system that lets you collect and upgrade gear outside of a match. Then, during a match, you spend in-game currency to buy the gear you’ve already unlocked and planned out. This fundamentally solves the biggest problem in the battle royale genre relying on random luck (RNG) to find good items and instead puts strategy and theorycrafting at the heart of the gameplay.
The Dual Economy: Prisma and Coin
The Armory system runs on two different currencies:
Prisma
This is your out of match progression currency. You earn Prisma only by playing the game getting kills, completing objectives, placing high in matches, and finishing weekly bounties. Crucially, you cannot buy Prisma with real money, which prevents the game from becoming pay to win. You use Prisma to buy Prismatic Capsules (which randomly grant gear) or to purchase specific items directly.
Coin
This is your in-match currency. You start every match with zero Coin and earn it by killing monsters, opening vaults, and defeating enemies. You then visit shops scattered across the map and spend your Coin to buy the gear you’ve unlocked in your Armory for that specific match.
This system shifts the focus from “lucky looting” to “strategic economic management.” The team that farms Coin more efficiently and spends it more wisely can become an unstoppable force in the late game, even if they were weaker in early fights.
Types of Gear: Building Your Loadout
Your loadout in the Armory is made up of four main types of gear:
Relics
These are your most powerful items, providing major, build defining effects.
Grips
These items offer smaller but broader effects that generally increase your power.
Perks
These are minor passive effects that help you fine tune your build.
Kicks
These items increase your movement speed and may have other mobility related effects.
Each piece of gear (Relics and Grips) starts at 1 star and can be upgraded to a maximum of 3 stars by getting duplicates, with each star level unlocking additional power.
Sample Armory Builds to Get You Started
With nearly 100 different items, the Armory can be overwhelming at first. This table provides a few simple and effective builds for the recommended beginner Hunters to give you a strong starting point.
| Hunter | Build Focus & Key Items | Strategy |
|---|---|---|
| Ghost | Laser Sniper: Focus on Cooldown Reduction & Ability Power. Relic: Amplifier Grip: Power Conduit Kicks: Swift Kicks | Maximize cooldown reduction on the Q ability (Arcane Railgun) to fire a constant stream of long range lasers. |
| Kingpin | Hook Tank: Focus on Health & Mana Regeneration. Relic: Helm of Gigantism Grip: Manaflow Grip Kicks: Plated Kicks | Increase survivability and mana management to constantly use the hook and initiate fights for the team. |
| Felix | Burn Machine: Focus on Ability Power & Omnivamp. Relic: Burning Core Grip: Vampiric Grip Kicks: Agile Kicks | Maximize fire damage and gain some survivability through lifesteal for prolonged fights on the front line. |
| Elluna | Healing Guardian: Focus on Ability Haste & Healing Power. Relic: Bubble Blade Grip: Interweaver Kicks: Mage Kicks | Focus on reducing the cooldown of healing abilities and granting shields to allies with every heal. |
The Battlefield: Navigating The Breach and Its Objectives
The main battleground in SUPERVIVE is a massive map called The Breach. It’s filled with objectives that dictate the flow of the game. Prioritizing these is vital for your team’s success.
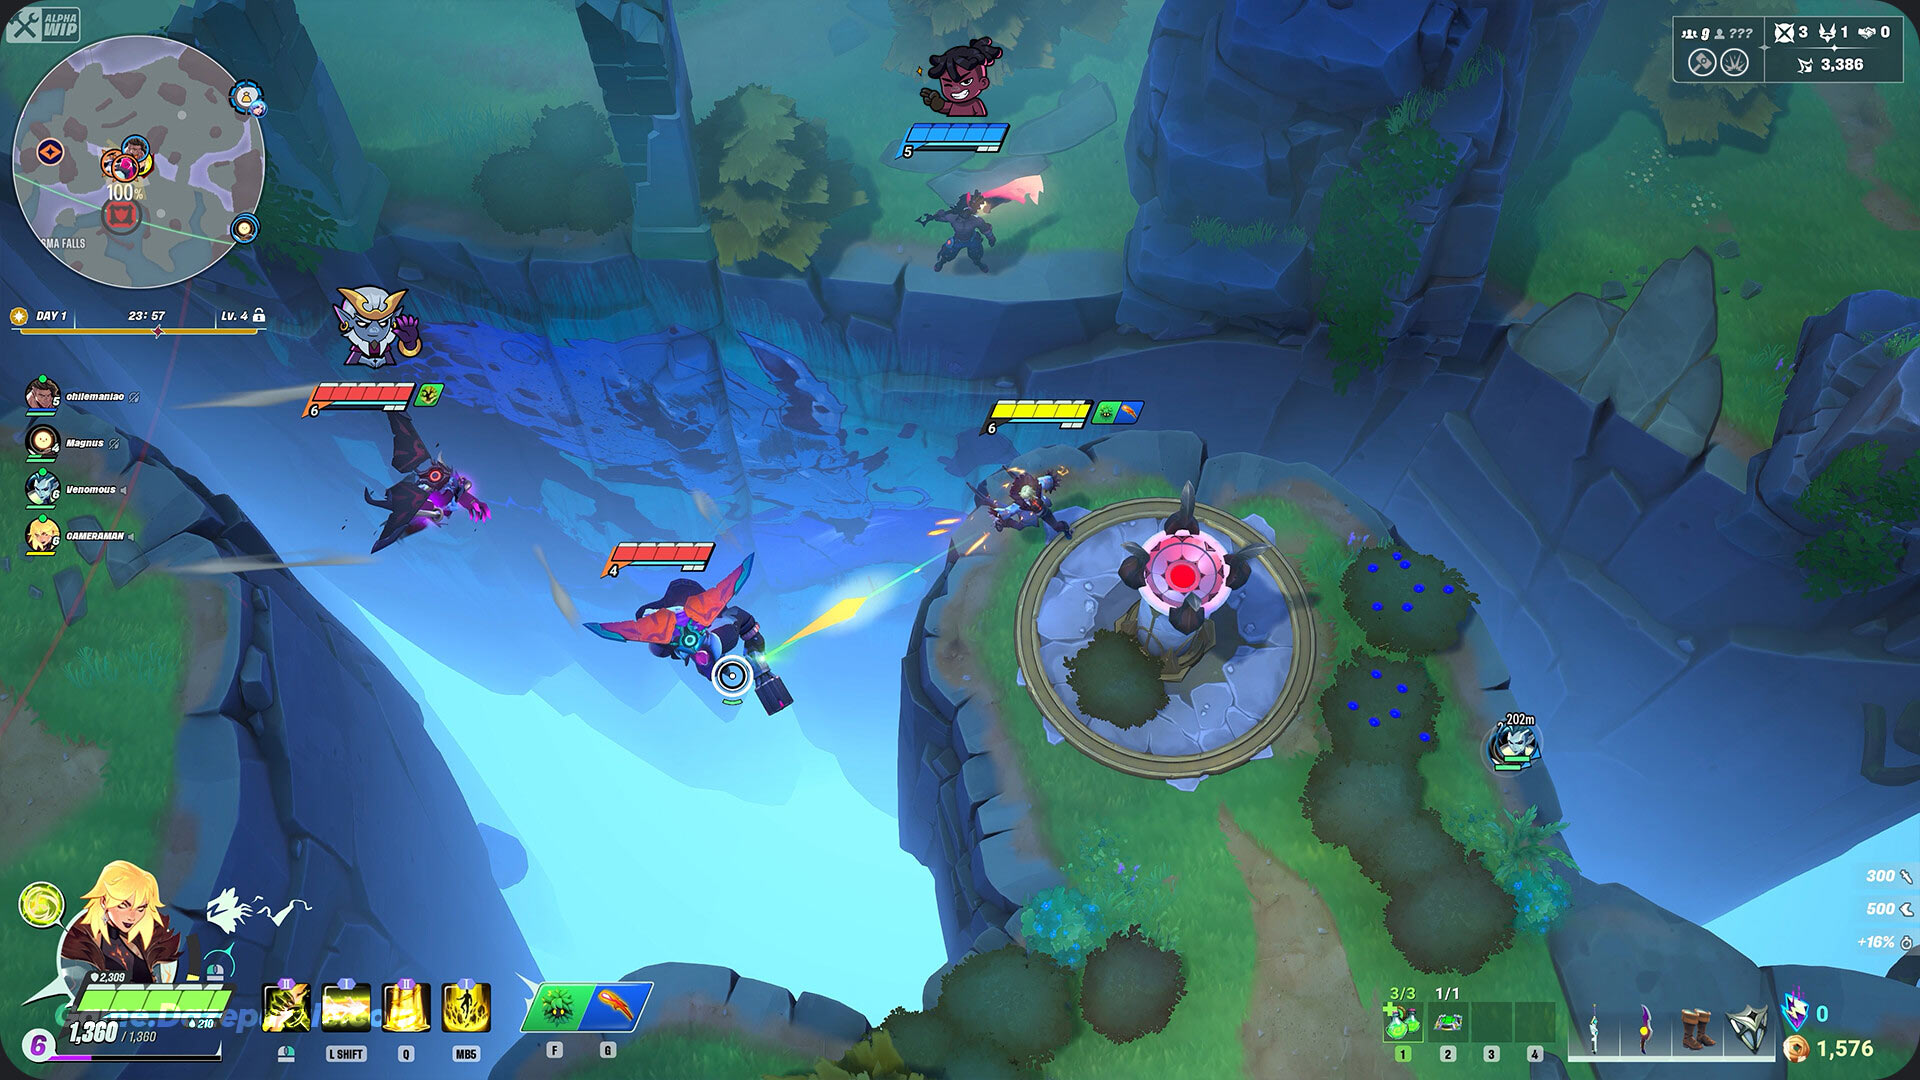
Key Objectives: Your Guide to Gaining an Advantage
Creep Camps
Marked by purple dots on the map, these monster camps are your primary source of XP and Coin. The best opening strategy is to land directly on a creep camp so your whole team can hit Level 2 instantly, unlocking your second ability and giving you a huge edge in early fights.
Vaults
These locations contain high value loot, especially powerful abilities and gear. To open one, a player must complete a hacking minigame, which can be sped up significantly if their teammates shoot the pillars that appear around it.
Basecamps
These are incredibly important strategic points. By standing in the center for a few seconds, you capture the base. A captured base provides vision, health/mana regeneration, an armor repair station, and allows you to recall back to it from anywhere on the map by pressing ‘B’.
Oracles (Scanners)
These radars, marked with a UAV symbol, can be activated to reveal the general location of enemy teams in a large area for a short time. Using one before rotating or starting a fight is a very smart move.
Bosses
Powerful monsters appear throughout the match. The mid game Soul Bosses grant the team that defeats them a massive, permanent buff that can completely change the game (like infinite healing items or a map wide teleport). Later game Major Monsters drop unique, powerful loot.
The Art of Survival: Game Modes and Match Flow
SUPERVIVE offers a few different ways to play.
- Trios (Ranked & Unranked): This is the main battle royale mode where 12 teams of three fight to be the last one standing.
- Arena: A 4v4 team based mode on smaller maps where teams fight to win 5 rounds. It’s excellent for practicing team fights and warming up.
- Practice Mode / Warm Up: A stress free environment to test out any Hunter and item. You also automatically enter a non stop deathmatch Warm Up mode while queuing for a match, which is perfect for keeping your mechanics sharp.
The Flow of a Battle Royale Match
A typical match can be broken down into three main phases:
Early Game (Day 1)
Your priority is to survive and power up. Land in a relatively quiet area with plenty of creep camps. Your main goal is to farm Coin to buy your first key Armory items and reach Level 5 to unlock your Ultimate ability. Avoid unnecessary fights unless you have a clear advantage.
Mid Game (Night 1 & Day 2)
The game becomes more strategic. Teams start rotating to control key objectives. The appearance of the Soul Boss is a major turning point. Use Oracles to track enemy movements and make informed decisions about when to fight and when to avoid conflict.
Late Game (Final Circles)
As the storm closes in, positioning becomes the most important factor. Try to secure high ground or locations with good cover. Fights are fast, chaotic, and deadly. One small mistake can cost your entire team the game.
Comeback Mechanics: You’re Never Truly Out of the Fight
One of SUPERVIVE’s more forgiving features is that there are multiple ways to bring back fallen teammates.
Wisp Form
When you’re downed for the first time, you turn into a small, vulnerable Wisp. A teammate can stand over you for a few seconds to revive you. Conversely, an enemy can stand on you to finish you off.
Respawn Beacons
If a teammate is fully eliminated, any living member of the team can interact with a Respawn Beacon to bring them back. This process is very loud and creates a giant visual signal on the map, so be prepared to defend yourself.
Most Wanted
In the mid game, a golden crown will appear. If your team is missing a member, a living player can pick it up. This reveals their location to everyone on the map, but if they can survive for two minutes, all of their dead teammates are automatically brought back into the game.
From Novice to Hunter: Advanced Tips and Strategies
Once you’ve got the basics down, it’s time to start thinking like a veteran.
The Winning Mindset: Fight Smarter, Not Harder
One of the biggest traps new players fall into is trying to fight everyone they see. In a battle royale, survival is often more valuable than a high kill count. Learn to pick your battles. Only fight when you have an advantage (numbers, level, position, or gear). If you’re at a disadvantage, retreating to a safe spot is always the better play. A highly effective strategy is “third partying.” Instead of starting a fight yourself, wait for two other teams to engage. Then, once they’re both weakened and low on resources, swoop in and clean up the survivors.
The Importance of Sound: Your Ears Are Your Best Weapon
SUPERVIVE is filled with tactical audio cues. The sound of an enemy gliding nearby, the loud activation of a Respawn Beacon, or even the subtle sound of enemy footsteps can give you valuable information about their location and intentions. Playing with a good headset and learning to rely on these sounds as a natural radar will give you a massive edge.
Effective Team Communication
This is a team game, and communication is key. Even without a microphone, use the robust ping system to mark enemy locations, suggest moving to an objective, or ask for help. Pay attention to your teammates’ pings and try to move as a cohesive unit. A coordinated team with an average strategy will almost always beat a disorganized team of skilled players.
Improving at SUPERVIVE is a gradual process. Focus on mastering one or two Hunters at first, use the Arena mode to practice your fighting skills, and watch experienced players on platforms like YouTube and Twitch to learn advanced strategies. The most important thing is to be patient, learn from your mistakes, and remember that every loss is a lesson. Welcome to The Breach, Hunter. Good luck.
Thanks for keeping up with Game.Dazepuzzle.com