Rain pelts the forest, and your boots sink into the mud as you survey the wild, untamed land. Welcome to Against the Storm, where you’re not just building a village, you’re defying a world that never stops pouring. As the Viceroy, you’ll lead a ragtag crew of humans, beavers, and lizards to carve out a settlement under the Scorched Queen’s watchful eye. Sounds daunting? Don’t sweat it. This Against the Storm Beginner’s Guide is your map through the soggy chaos, packed with tips to keep your villagers alive, your resources stocked, and the Queen happy. Let’s roll up our sleeves and turn this rainy mess into a thriving outpost.
What’s in Our Against the Storm Beginner’s Guide?
Getting Started: Your Role as Viceroy
In Against the Storm, you’re the Viceroy, hand picked by the Scorched Queen to tame a drenched wilderness. Your mission is to build settlements, gather resources, and keep a diverse crew of villagers, humans, beavers, lizards, and sometimes harpies working together. The game throws you into a roguelite loop where every run is a fresh challenge, and failure is just a lesson for the next attempt. Your main goal is to earn Reputation Points, which you get by completing Orders (tasks from the Queen) or boosting your villagers’ Resolve, their measure of happiness. Rack up enough Reputation, and you’ll complete the settlement, unlocking new perks for future runs. Mess up, and the Queen’s Impatience meter runs out, ending your run.
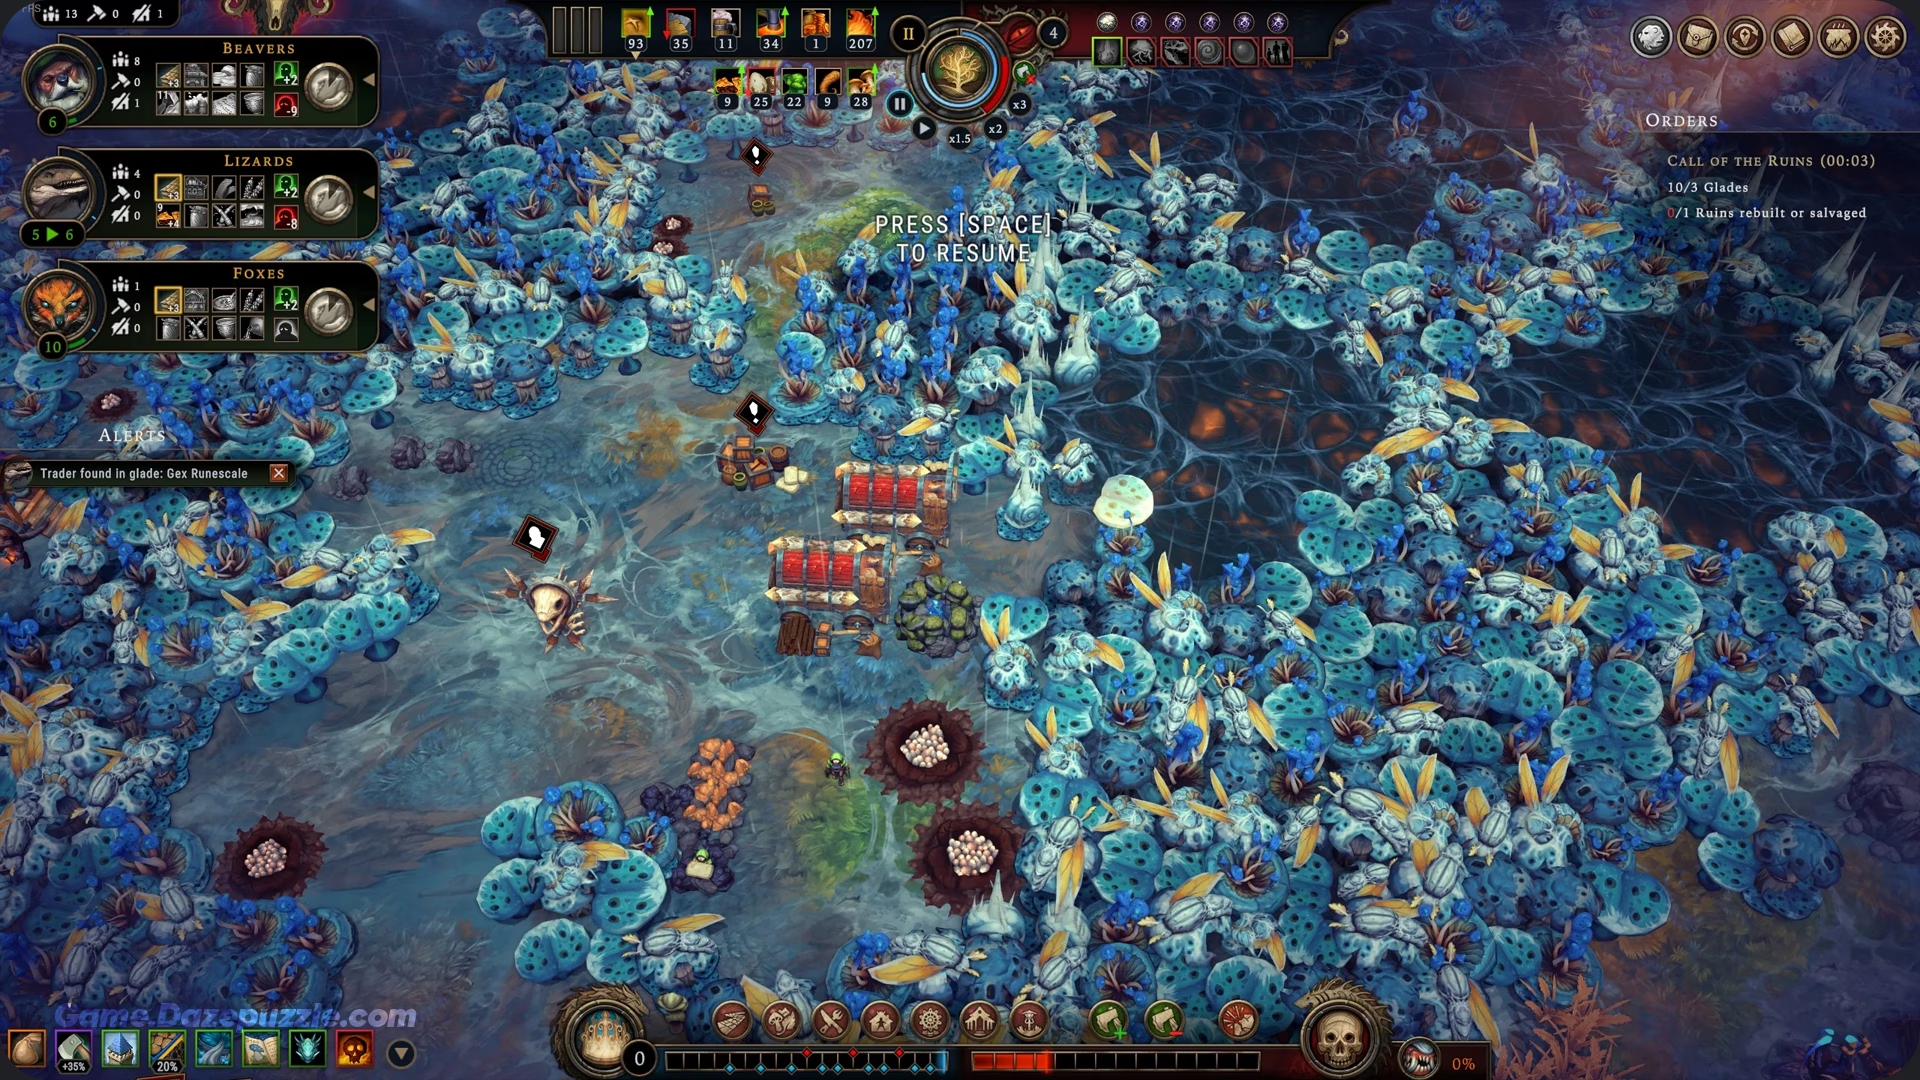
When you start a new settlement, you’ll see a map centered around the Hearth, a cozy fire where your villagers gather. Surrounding it are resource nodes, trees for wood, deposits for stone or clay, and foggy glades hiding treasures and dangers. Your first move is to build a Crude Workstation and assign workers to gather wood. Wood is your early game lifeline, used for buildings, fuel, and crafting. Don’t overcomplicate things at the start. Focus on setting up a small, functional base with a few workers chopping trees and gathering basic materials. The game’s UI is straightforward, showing you what each building needs and produces, so lean on it to guide your early decisions.
As a beginner, it’s easy to feel overwhelmed by the game’s systems. The key is to take it one step at a time. Build a couple of gathering posts, assign workers, and keep an eye on the Queen’s Impatience bar at the top of the screen. Every action you take, like opening glades or failing to meet villager needs, increases Impatience, so plan carefully. The roguelite nature means you’ll carry over some progress, like blueprints or perks, even if you fail, so don’t be afraid to experiment.
Managing Resources: The Heart of Survival
Resources are the backbone of your settlement, and managing them well is the difference between a bustling village and a ghost town. In the early game, focus on three core resources: wood, stone, and food. Wood is your go to for building and fuel, stone is needed for more advanced structures, and food keeps your villagers from starving. As you progress, you’ll unlock complex materials like planks, bricks, and flour, but don’t worry about those until you’ve got the basics down.
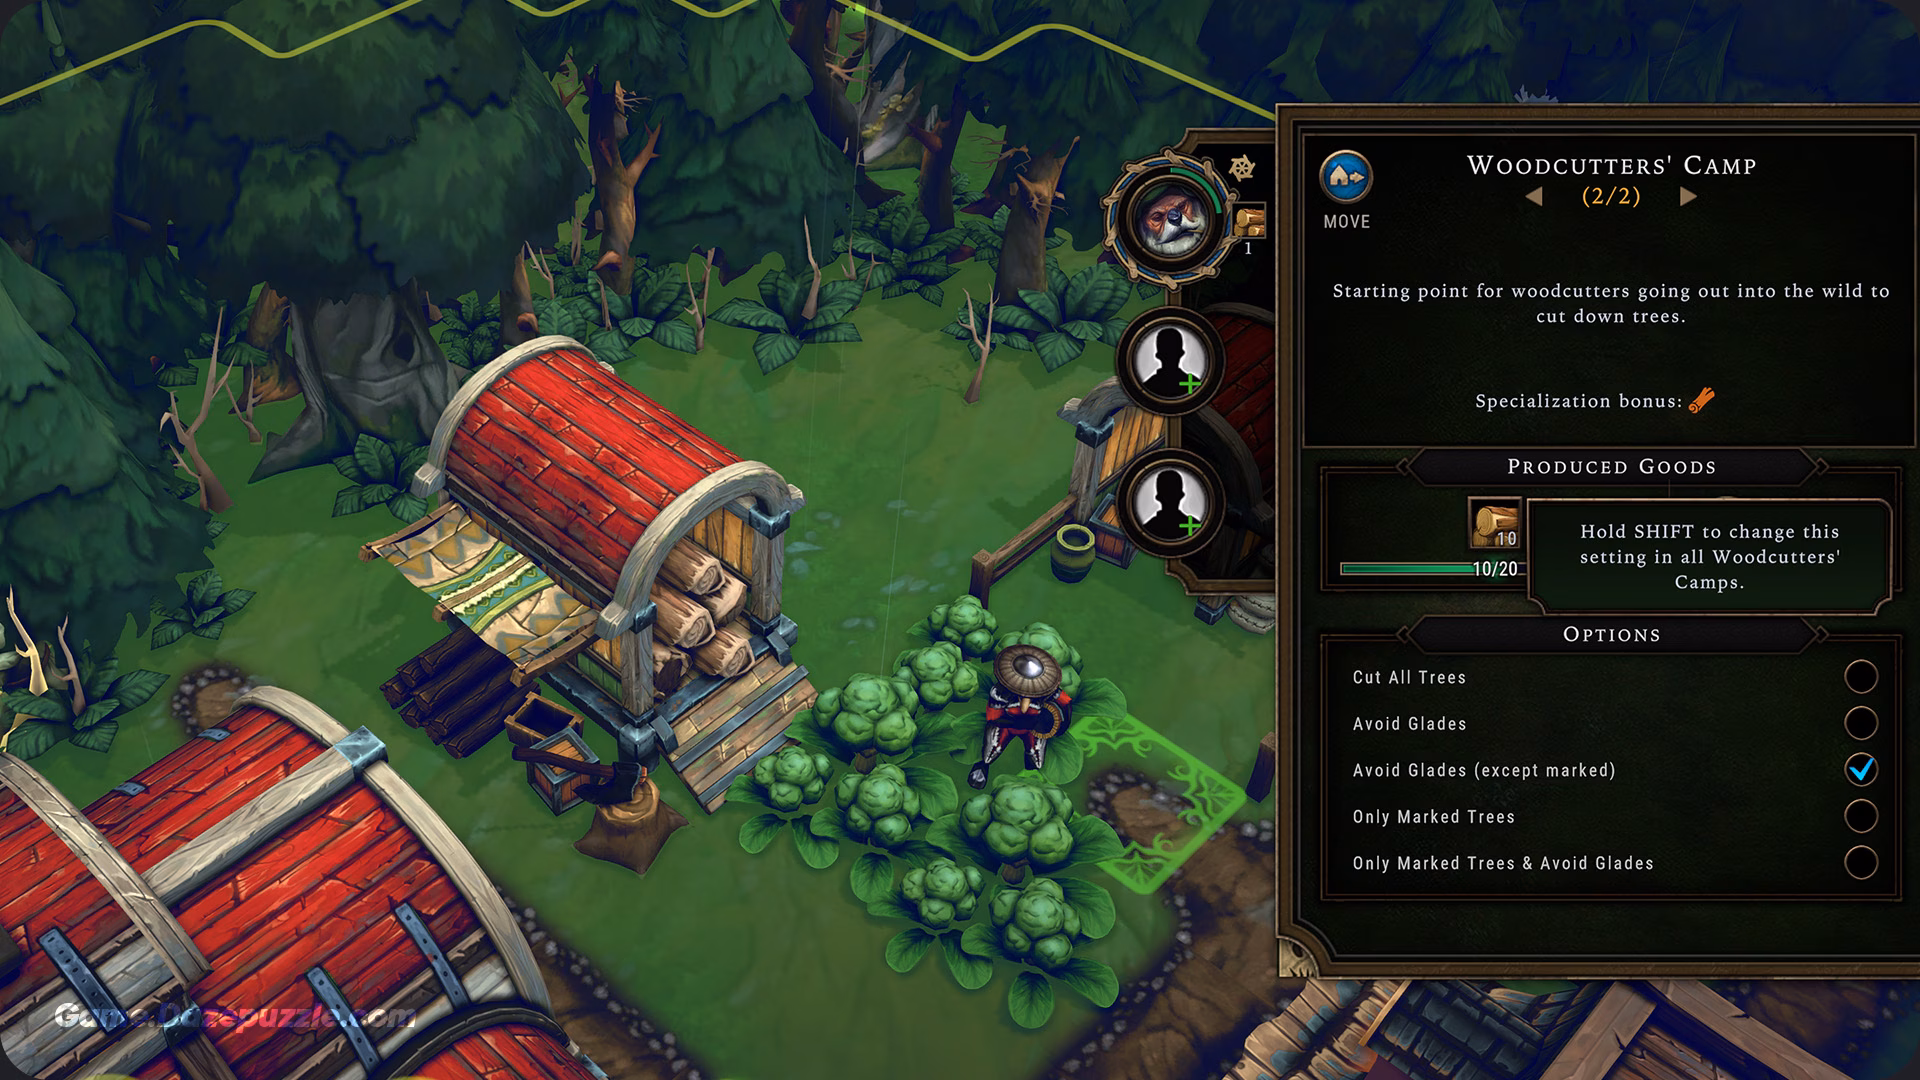
Start by building gathering posts near resource nodes. A Woodcutter’s Camp near a forest ensures a steady wood supply assign two workers to keep it flowing. For stone or clay, a Stonecutter’s Camp works the same way. Food is trickier since it depends on what’s available. You might find wild plants or animals near your starting area, so build a Forager’s Camp or Hunter’s Camp to collect them. If you spot fertile soil, a Small Farm can grow crops like grain or vegetables, but these take time to yield, so don’t rely on them early on.
Balancing resources is critical. If you’ve got stacks of wood but no food, your villagers will leave faster than you can say “famine.” The resource bar at the top of the screen is your best friend check it often to spot shortages. For example, if you’re low on food, pause and redirect workers to a Forager’s Camp. Storage is another key factor. Build a Warehouse early to store excess goods, or you’ll lose them to spoilage during the storm season. A good early setup is one Warehouse, a Woodcutter’s Camp, and a food gathering building to cover your bases.
One common mistake is overbuilding. Every building costs resources to construct and sometimes maintain, like fuel for the Hearth or materials for upkeep. Stick to essentials early on: a Woodcutter’s Camp, a gathering post, and a couple of shelters for your villagers. As you unlock blueprints, you can start crafting processed goods, like turning wood into planks at a Crude Workstation or grain into flour at a Granary. These production chains are vital for meeting villager needs and completing Orders, but they require workers and resources, so don’t rush into them blindly.
Another tip is to pay attention to the map’s layout. Resource nodes are finite, so don’t waste workers on a nearly depleted forest. If you’re running low, explore a Small Glade for new nodes, but more on that later. For now, keep your resource production steady and your storage full to weather any surprises.
Surviving the Storm: Handling Hostility
The storm is the heartbeat of Against the Storm, setting it apart from other city builders. Every year, you’ll face the Drizzle or Clearance season, where the forest’s Hostility spikes. Hostility measures how much the environment is out to get you, and during the storm, it makes villagers grumpier and triggers negative events like plagues or spoiled resources. Your Hearth needs a constant supply of fuel wood or coal to keep burning, or Hostility will soar, and your villagers will start packing.
Preparation is everything. The top right corner of the screen shows a timer counting down to the next storm. Before it hits, stockpile fuel in your Warehouse and ensure your Hearth is fueled. Early on, wood is your main fuel source, so keep those Woodcutter’s Camps busy. Upgrading your Hearth can help it burn more efficiently, saving resources in the long run. During the storm, gathering slows down, so don’t expect to replenish resources as quickly. Instead, focus on maintaining what you’ve got and keeping your villagers happy.
Negative events are a pain but part of the game. You might get a prompt about a cursed relic or a sudden food shortage, with choices that always cost something, resources, Resolve, or workers. As a beginner, pick the option that hurts least. For example, losing a bit of wood is better than losing a villager. These events often tie to glades or Hostility, so avoid opening too many glades early on to keep things manageable. Over time, you’ll learn to anticipate and mitigate these events, but for now, focus on having a resource buffer before the storm hits.
A pro tip is to use the storm to your advantage. Some buildings, like the Rain Collector, produce water during rainy seasons, which you can use for advanced production like brewing or crafting. If you’ve got a blueprint for one, consider building it before the storm to diversify your resources. Just don’t stretch yourself too thin. Stability is key in your first runs.
Keeping Villagers Happy: Mastering Resolve
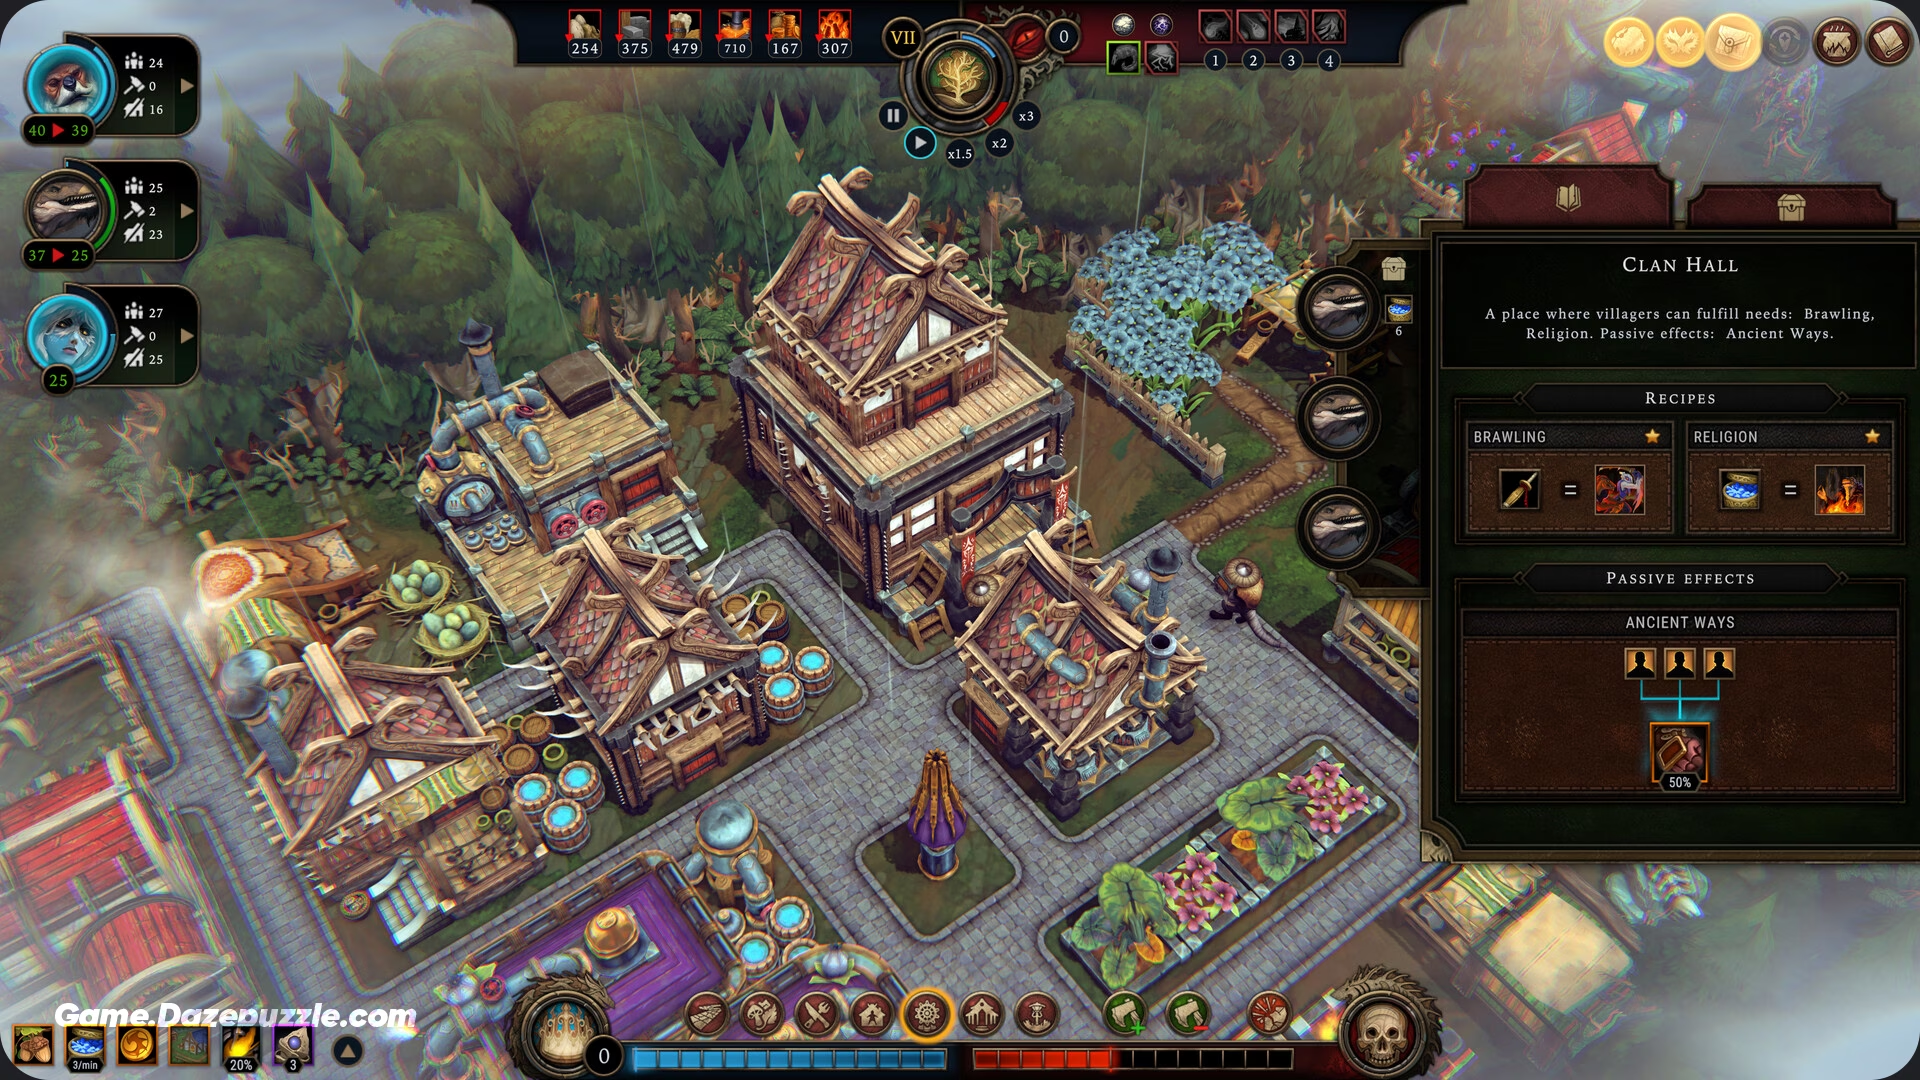
Your villagers aren’t just cogs in a machine, they’re picky creatures with specific needs. Humans, beavers, lizards, and other species each have unique preferences for food, shelter, and services, and meeting these keeps their Resolve high. Resolve is the happiness stat, and if it drops too low, villagers leave, crippling your workforce. High Resolve, on the other hand, can earn you Reputation Points, pushing you closer to victory.
Start with the basics: shelter. Build a couple of shelters early to house your villagers, as this boosts Resolve and protects them from the storm’s effects. Check the Needs tab in the UI to see what each species wants. Humans might crave vegetables or clothing, while beavers go nuts for biscuits. Lizards might demand mushrooms or even religion, which requires a Temple later on. You can’t meet every need right away, so prioritize one or two. For example, if you’ve got a Forager’s Camp producing vegetables, assign it to humans to keep them happy.
Low Resolve is a death spiral. If one species’ Resolve tanks, they’ll leave, reducing your workforce and making it harder to produce goods, which lowers Resolve further. To avoid this, monitor the Resolve bar for each species. If it’s dipping, pause and address the issue, maybe cook jerky in a Cookhouse or trade for goods they like. Completing the Queen’s Orders also gives a Resolve boost, so pick tasks that align with your resources, like gathering 50 wood if your Woodcutter’s Camp is humming.
The Hearth plays a big role in Resolve. Upgrading it or adding decorations like lanterns creates a “warmth” effect that lifts everyone’s mood. You can also use festivals or services like a Tavern to keep villagers content, but these come later. For now, focus on food and shelter. A hungry, homeless villager won’t care about a shiny new lamp.
As you progress, you’ll unlock more ways to meet needs, like producing cloth for clothing or setting up a Market for luxury goods. Each species has a preferred work style too beavers are great at woodworking, while lizards excel at foraging. Assign them to tasks they’re good at to boost efficiency and keep Resolve steady. It’s a balancing act, but once you get the hang of it, your settlement will feel like a well oiled machine.
Exploring Glades: Risks and Rewards
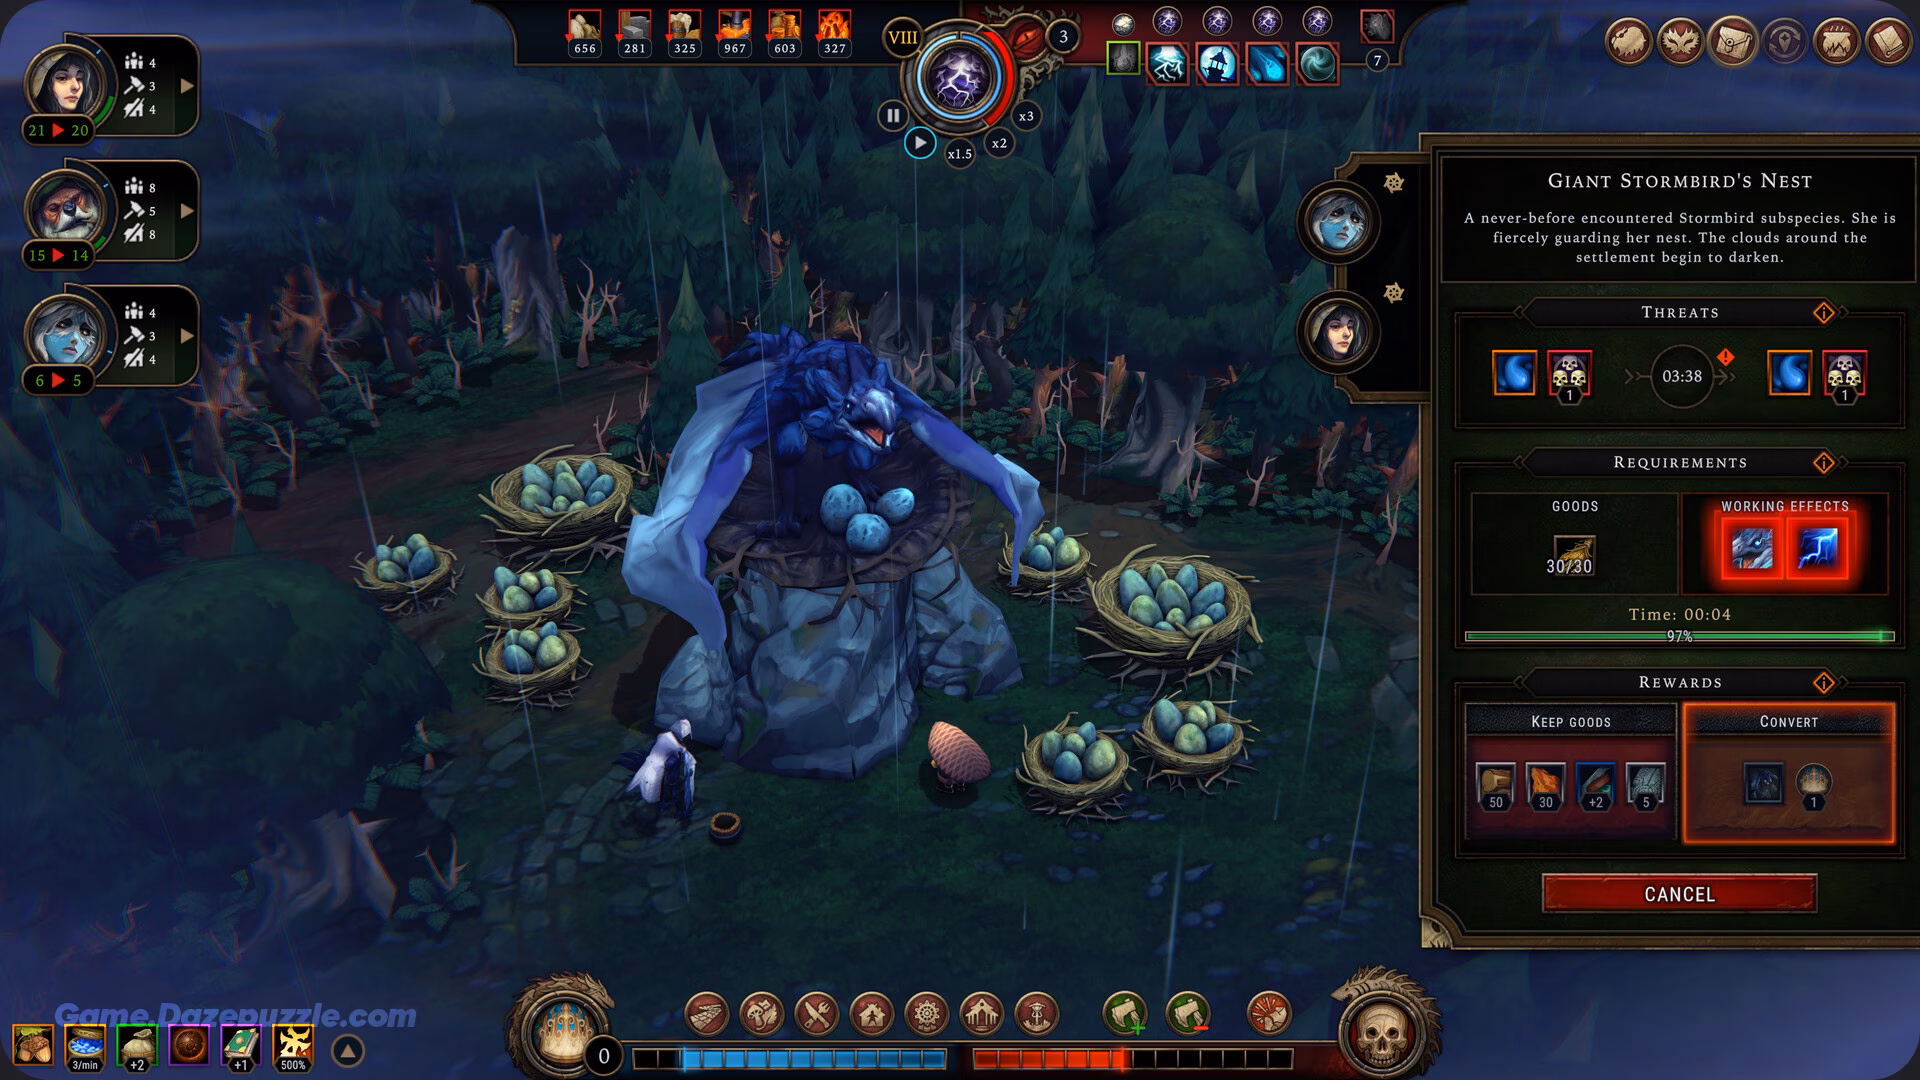
Glades are the foggy, mysterious patches on the map that make Against the Storm’s roguelite heart beat. They’re packed with resources, treasures, and risks, but they’re not for the faint of heart. Opening a glade costs resources, usually wood, and can trigger events like hostile creatures, cursed relics, or even new resource nodes. As a beginner, stick to Small Glades, which are safer and less likely to wreck your settlement.
When you open a Small Glade, you might find a resource deposit, like a new forest for wood or a clay pit, which can give your settlement a big boost. You could also uncover treasure chests or abandoned caches with rare materials or blueprints. But there’s always a catch; some glades spawn negative events that demand resources or workers to resolve. For example, you might find a cursed idol that lowers Resolve unless you spend amber to cleanse it. Always have a resource buffer before opening a glade, and don’t rush to explore multiple at once.
Dangerous Glades are a step up and should be avoided early on. They can spawn tougher events, like enemies that require specific buildings or resources to handle. A good strategy is to open one or two Small Glades in your first year to grab extra resources, then focus on building up your settlement before tackling more. The game’s Codex has details on glade events, so check it if you’re unsure about a choice.
Exploration also ties into Hostility. Every glade you open increases the forest’s anger, making storms tougher. Balance exploration with stability, don’t bite off more than you can chew. As you gain experience, you’ll learn which glades are worth the risk and when to push your luck.
Trading Basics: Making the Most of Amber
Trading is your safety net when resources run dry. The Trading Post lets you buy and sell goods using amber, the game’s currency. Traders visit your settlement periodically, offering food, tools, blueprints, or even new villagers. Check the Trading Post regularly to see what’s available and how long the trader will stay.
You earn amber by selling surplus goods or completing Orders. Early on, you might sell extra planks or cloth to get amber, then use it to buy vegetables for your villagers or tools to speed up gathering. Be strategic, don’t sell resources you’re short on, like wood if your stockpile is low. Instead, trade goods you have in excess to keep your economy balanced.

Blueprints are a great investment. Buying a blueprint for a Cookhouse or Workshop can unlock new production options, like turning grain into biscuits or wood into tools. Traders don’t stick around forever, so act fast when they arrive. The Trader’s Caravan tab in the UI shows their inventory and timer. A beginner friendly move is to prioritize goods that meet your villagers’ needs or help complete Orders, as these give you the biggest bang for your buck.
As you progress, trading becomes more complex. You might unlock trade routes or special traders with better deals, but for now, focus on keeping your Trading Post active and your amber flowing. It’s a lifeline when the storm hits or when you’re short on a critical resource.
Tips for Long Term Success
You’ve got the basics down, so here are some extra tips to help you shine in Against the Storm:
- Prioritize Orders: The Queen’s Orders are your ticket to Reputation and rewards. Choose ones that match your strengths, like gathering wood if you’ve got a solid Woodcutter’s Camp. Completing Orders also boosts Resolve, so they’re a win win.
- Upgrade Smartly: Blueprints are random, so pick buildings that fit your needs. A Rain Collector is great for water based production, but skip it if you’re not ready. Check the Codex to see what each building does before committing.
- Balance Work and Rest: Overworked villagers lose Resolve fast. Unassign them from tasks during quiet moments to let them rest, especially before a storm.
- Embrace Failure: This is a roguelite, so losing is part of the journey. Each failed run unlocks perks or blueprints, making your next attempt easier.
- Use the Pause Button: The game can feel hectic, but you can pause anytime to plan your next move. Use it to check the Codex, review Orders, or reassign workers without pressure.
If you’re struggling, the in game Codex is a goldmine of info on buildings, resources, and events. Don’t hesitate to restart a settlement if things go sideways, your progress carries over, so every run makes you stronger.
Expanding Your Strategy: Unlocking New Possibilities
As you get comfortable with the basics, it’s time to think bigger. Against the Storm rewards players who adapt to its random challenges, and part of that is unlocking new tools to make your settlement thrive. Blueprints, which you earn from Orders, traders, or glades, are the key to expanding your options. For example, a Workshop lets you craft tools or cloth, while a Brewery can produce ale to boost Resolve for certain species. When choosing blueprints, think about your settlement’s weaknesses. If food is a constant issue, prioritize a Cookhouse or Granary. If Resolve is low, a Tavern might be the answer.
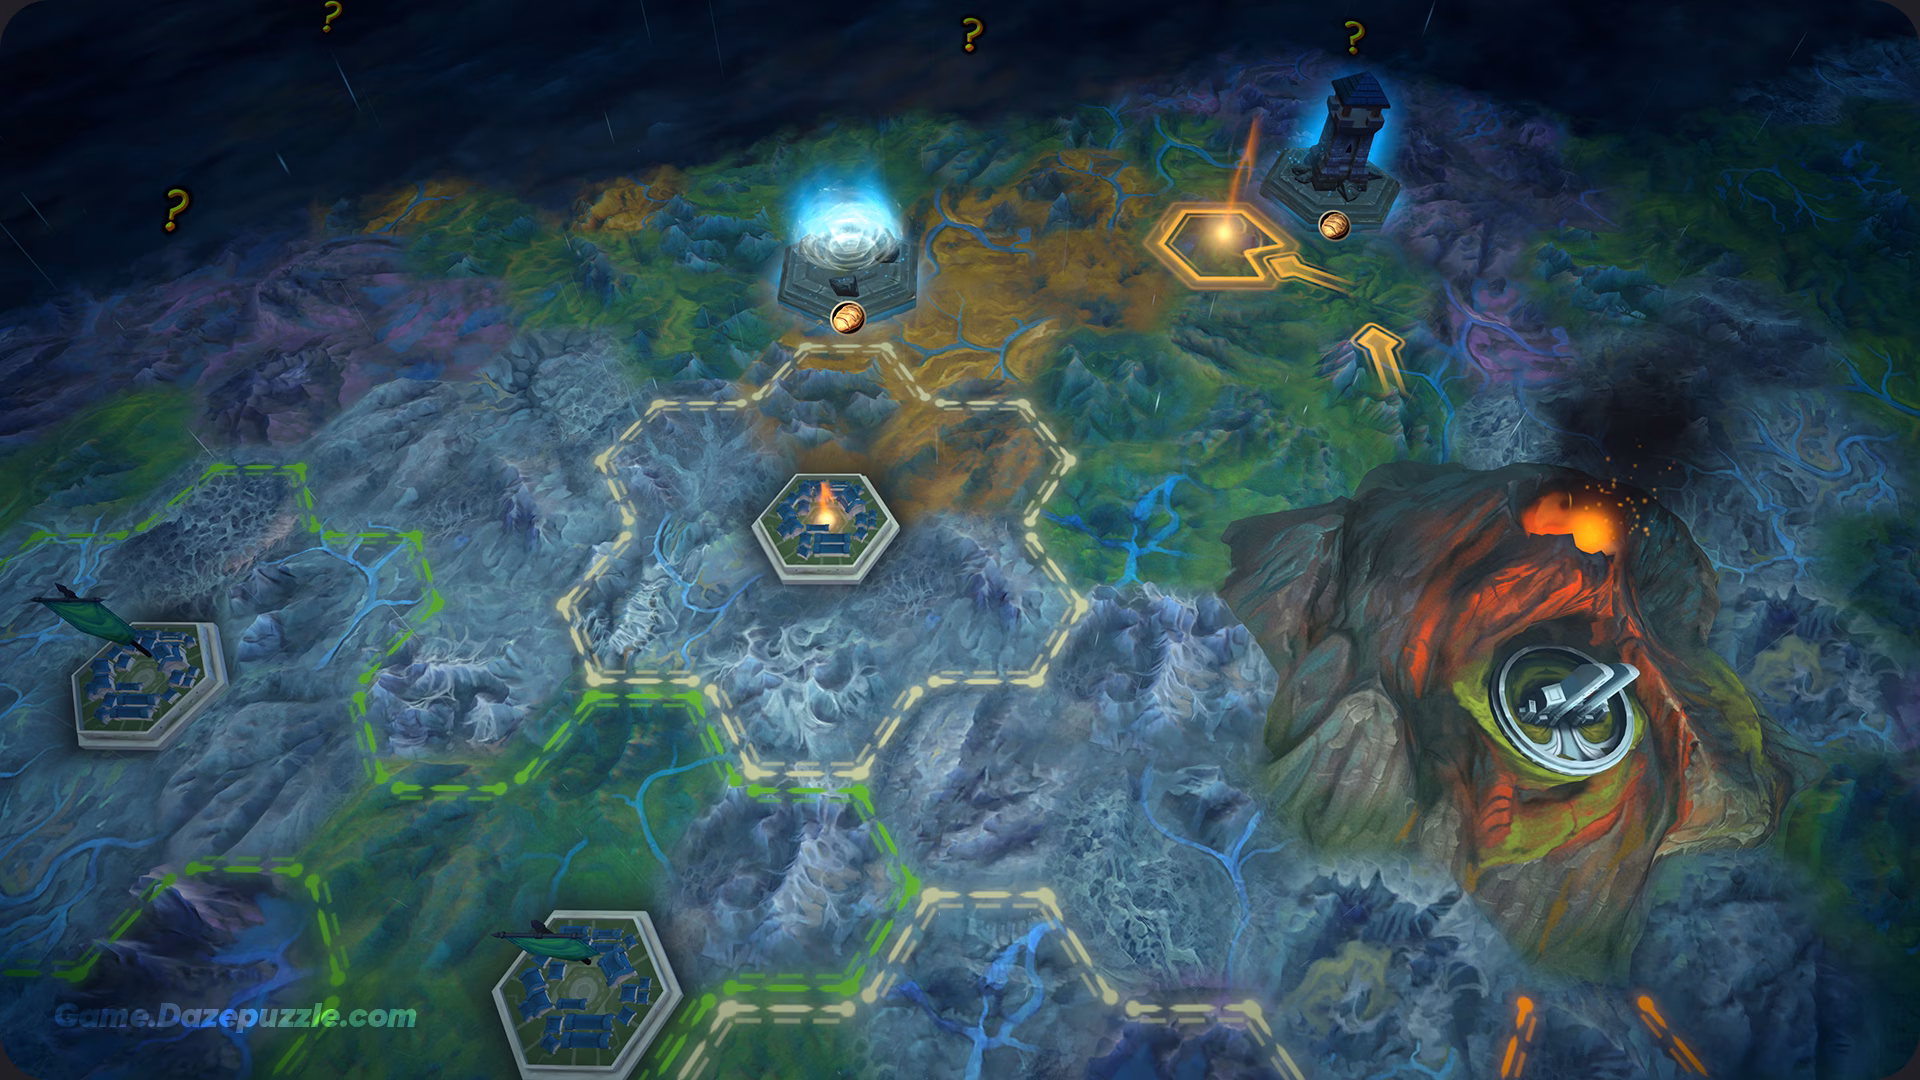
Another layer to master is the world map. Between runs, you’ll return to a strategic map where you can spend resources to upgrade your settlements or unlock new perks. These perks, like faster resource gathering or lower Hostility, can make future runs easier. As a beginner, focus on perks that boost early game survival, like extra starting resources or better worker efficiency. Don’t stress about optimizing the world map right away; it’s a long term system that becomes more important as you progress.
Events and random encounters also add spice to your runs. You might find a wandering merchant offering a rare deal or a mysterious ruin that boosts production at a cost. These are often tied to glades or the storm, so weigh the risks carefully. For example, a ruin might increase your wood output but lower Resolve, decide if it’s worth the trade off. The game’s randomness is part of its charm, so embrace the chaos and learn from each choice.
Finally, experiment with production chains. Turning raw materials into processed goods, like grain into flour and then biscuits, is a game changer. These chains not only meet villager needs but also give you valuable goods to trade or use for Orders. Start simple, build a Crude Workstation to make planks, then add a Cookhouse for food production. As you unlock more buildings, you’ll create complex systems that make your settlement feel alive.
Wrapping Up Your First Run
Against the Storm is a wild, rainy ride, but with this Against the Storm Beginner’s Guide, you’re ready to build a settlement that stands tall against the elements. Start with the basics: wood, food, shelter, then branch out to glades, trading, and production chains as you gain confidence. Keep your villagers happy, stockpile resources for the storm, and don’t be afraid to fail. The roguelite loop means every run teaches you something new, and before long, you’ll be taming the wilds like a pro. So grab your umbrella, Viceroy, and dive into the storm. Your settlement’s waiting to shine!
Thanks for keeping up with Game.Dazepuzzle.com