So, you’re thinking about climbing Celeste Mountain? Awesome choice! But let’s be real, this mountain bites back. It’s beautiful, the music slaps, the story hits you right in the feels, but man, it can be tough. Don’t sweat it, though. Loads of us have been there, staring at a screen full of spikes, wondering how Madeline is ever gonna make it.
Table of Contents
This guide is your sherpa, your energy drink, your cheat sheet (well, not really cheating) to get you started on this epic climb. We’re gonna break down the basics, understand the tools you’ve got, figure out how not to rage-quit on screen 3, and learn why falling down is actually part of getting up in Celeste. Forget those stuffy, formal guides; this is just us talking, gamer to gamer, figuring out this mountain together. Ready to take the first step? Let’s do this.
Getting Your Boots On: The Absolute Basics
Okay, first things first. Celeste doesn’t bog you down with a million tutorials. It respects your intelligence (maybe a bit too much sometimes, ha!). It throws you in, gives you the basic tools, and lets you figure things out. The controls are usually pretty simple: move, jump, dash, and climb. You can check ’em in the options, but honestly, you’ll pick them up fast just by playing.
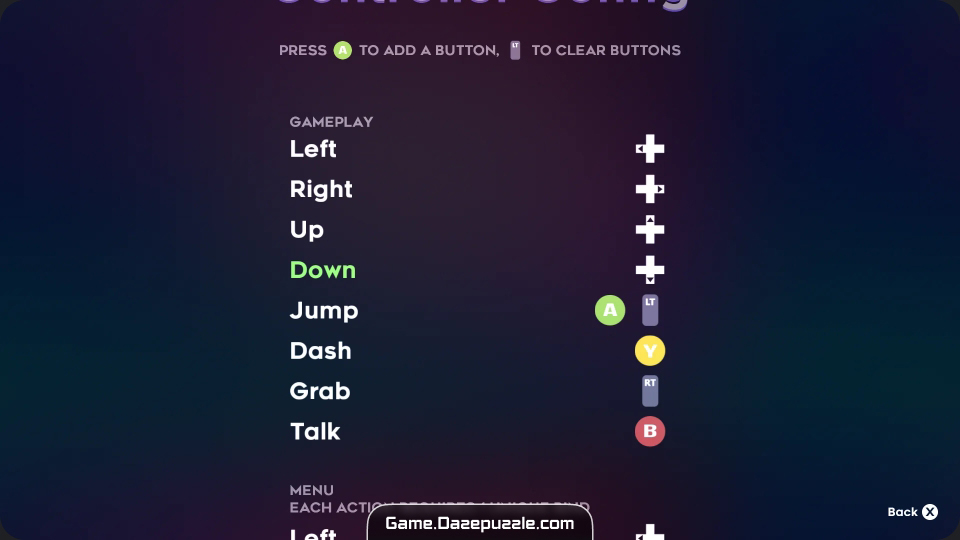
The game feels good to control – Madeline is responsive, and her moves become second nature pretty quickly. The real challenge isn’t knowing the buttons; it’s knowing when and how to use them like a platforming god. So, jump in, run around the first screen, get a feel for it. Don’t worry about dying – trust me, you’ll be doing plenty of that, and it’s totally okay.
Madeline’s Moves: Your Core Toolkit
Madeline might look like a regular person (well, a regular person with awesome pink hair), but she’s got some serious parkour skills. Mastering these is your ticket up the mountain. Let’s break down what she can do.
Hopping and Skipping: Basic Movement and Jumping
This sounds simple, right? You move left and right, you press jump to jump. Easy peasy. But Celeste adds layers. Madeline has a really satisfying weight and momentum. You’ll feel how she speeds up, how she lands. The basic jump is your bread and butter, getting you over small gaps and onto ledges.
But the real game-changer is the Wall Jump. Run or jump into a wall, and Madeline grabs on (we’ll talk more about grabbing in a second). From the wall, hit jump again, and she kicks off, gaining height and distance. This is fundamental. You’ll be chaining wall jumps, navigating tight corridors, and saving yourself from deadly falls with this move constantly.
Get comfortable with the rhythm of hitting a wall, jumping off, hitting another wall, jumping off. It feels amazing when you nail a sequence. Pay attention to how long you hold the jump button, too – a quick tap gives a small hop, while a longer press gives you more height. This subtle control matters more than you think.
Hanging On For Dear Life: Climbing and Stamina
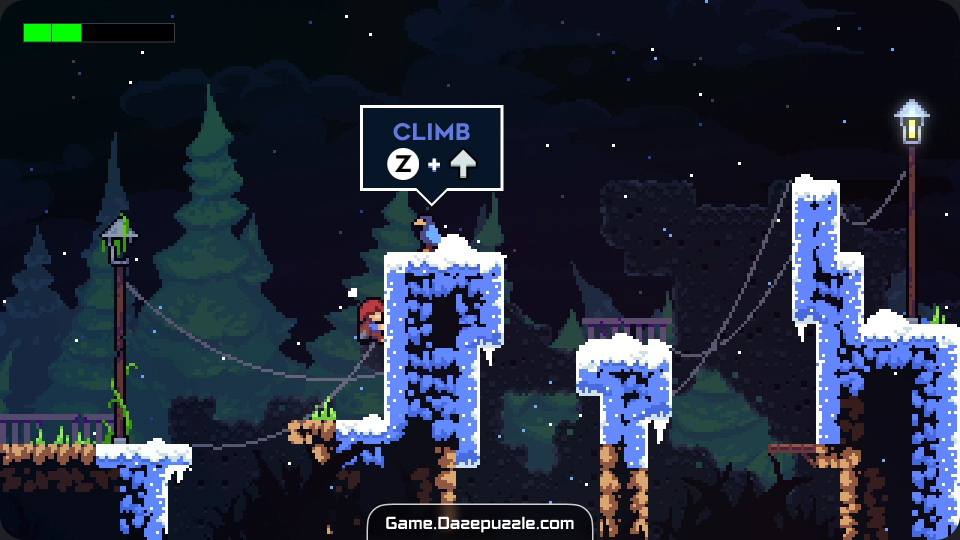
When Madeline hits a wall, she doesn’t just bounce off (unless you want her to); she can grab hold. Holding the climb button lets you cling to vertical surfaces. From here, you can shimmy up, down, or sideways. This is essential for getting over obstacles taller than a single jump or for pausing mid-air to figure out your next move.
But here’s the catch: Stamina. See that little icon that appears, or notice Madeline flashing and breathing heavily? That’s your stamina draining. When it runs out, poof, you lose your grip and fall. This adds a layer of tension to every climb. You can’t just hang out forever. You need to move purposefully. Climbing upwards drains stamina faster than just hanging or moving sideways.
Managing stamina becomes a mini-game in itself. You’ll learn to use Neutral Jumps – jumping straight up off a wall without holding left or right – to gain height without moving away from the wall, conserving stamina compared to climbing directly upwards. You’ll learn to spot small ledges where you can briefly stand to let your stamina recharge fully (it comes back super quick when you’re grounded).
Pay attention to the visual cues – Madeline flashing yellow is a warning, red means you’re about to slip! This system forces you to be efficient and plan your climbs, even short ones. It stops you from cheesing sections by just slowly scaling everything. You gotta be quick, smart, and sometimes, just take a leap of faith.
The Star of the Show: The Dash
Okay, listen up, because this is it. The Dash is arguably Celeste’s defining mechanic. It’s versatile, powerful, and mastering it is the key to unlocking the game’s incredible platforming potential. When you press the dash button, Madeline shoots forward in one of eight directions (up, down, left, right, and the diagonals). It’s fast, covers a decent distance, and can be done on the ground or, crucially, in mid-air.
Here’s the most important rule you need to internalize: You typically only get ONE air dash. Once you use it, Madeline’s hair turns grey (or blue, depending on your settings), signaling you can’t dash again until you ‘refresh’ it. How do you refresh?
There are several ways, and learning to spot and use these refreshers is critical:
- Touching the Ground: The simplest way. Land on any solid surface, and boom, your dash is back. Madeline’s hair goes pink again.
- Screen Transitions: Moving from one screen (or room) to the next automatically refills your dash. This is super important for chaining moves across screen boundaries.
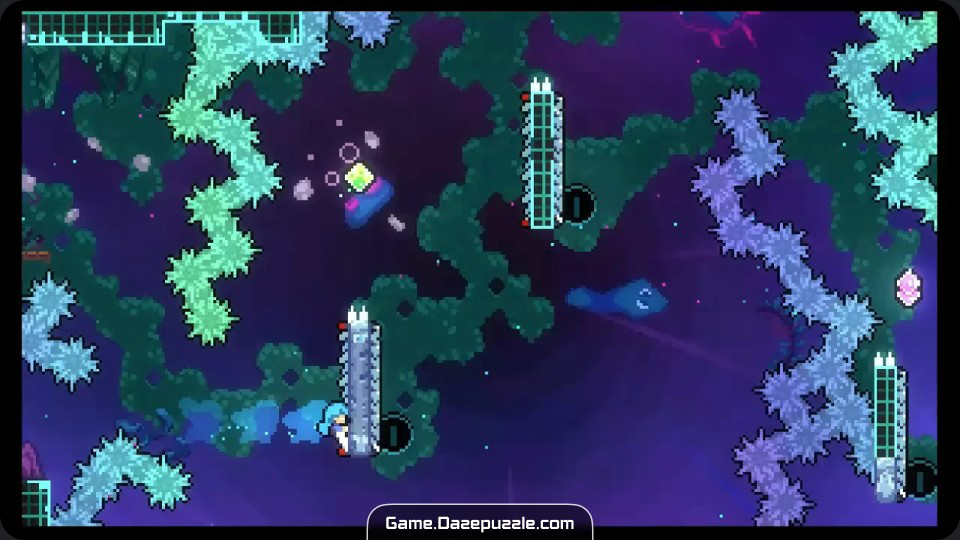
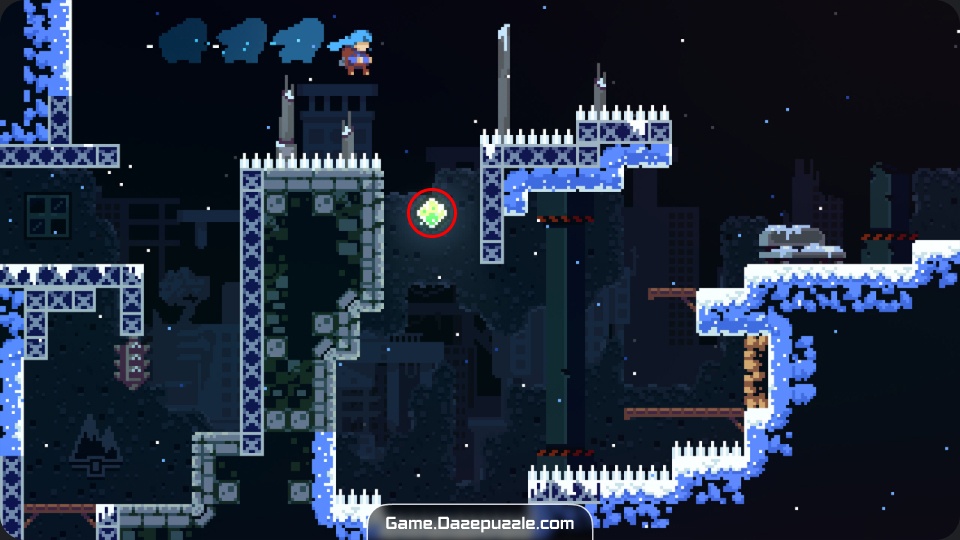
- Dash Crystals: These floating green diamonds are your best friends. Dashing through one instantly refreshes your dash, allowing you to chain multiple air dashes together. You’ll see sequences where you dash, hit a crystal, dash again, hit another crystal, and so on. It feels like flying!
- Bubbles and Springs: Later objects like bubbles (which carry you along a path and refresh your dash when they pop) and springs/bumpers also often refresh your dash. Keep an eye out for anything that seems to react to your dash or movement.
The dash isn’t just for crossing gaps. It’s for dodging hazards, breaking certain blocks, activating switches, gaining extra height or momentum out of a jump, and performing advanced techniques later on. Experiment with it! Dash upwards out of a jump for maximum height. Dash diagonally to cut corners. Dash downwards sometimes to quickly reach the ground or avoid something above you. The eight-way control gives you incredible precision. Learning the exact distance and speed of the dash, and internalizing how to get it back, is probably the single biggest skill leap you’ll make in Celeste.
Don’t Run on Empty: Mastering Stamina Strategy
We touched on stamina with climbing, but let’s dig a bit deeper because it really dictates the pace of vertical sections. Running out of stamina at the wrong moment is a super common way to meet the spikes. Think of it like a resource you constantly need to budget.
Don’t just automatically hold the climb button whenever you touch a wall. Sometimes, a quick wall jump is all you need, saving your grip for when you really have to hang on. Plan your routes up walls – look for those little outcrops, the one-tile ledges where Madeline can stand. Landing on one, even for a split second, fully restores your stamina. Use them!
Neutral jumps are your secret weapon for climbing efficiency. Jumping straight up and grabbing again uses way less stamina than slowly crawling up the same distance. Get the rhythm down: jump, grab, jump, grab. It’s faster and saves that precious grip.
Listen to the audio cues and watch Madeline’s sprite. The game clearly tells you when your stamina is low. When she flashes red, you have maybe a second before she lets go. Sometimes that means making a desperate leap to safety; other times, it means accepting the fall and planning better next time. Don’t panic climb! It often drains stamina faster and leads to mistakes. Take a breath, assess, and move decisively.
Reading the Room: Understanding the Mountain’s Tricks
Celeste Mountain isn’t just rock and snow; it’s packed with weird, wonderful, and often deadly contraptions. Learning to quickly identify and understand how these environmental pieces work is crucial. Think of each screen like a small puzzle where the mechanics are the rules.
You might also like this: Monster Hunter Game Review
Spikes, Pits, and Other Ouchies: The Hazards
Let’s get the obvious one out of the way: Spikes. They’re everywhere. On the floor, on the walls, on the ceiling. Touch them, and you’re instantly sent back to the last checkpoint. There’s no health bar; spikes are absolute. Learn to spot them instantly and give them a wide berth. Your dash will be your best friend for navigating spike-filled corridors.
Beyond spikes, you’ll encounter Bottomless Pits (falling off-screen usually means respawn), Crushing Blocks (don’t get squished), and later, things like Frigid Water or Weird Purple Goop that have their own nasty effects. The key is quick recognition. The game usually introduces new hazards in a relatively safe environment first, letting you understand the danger before it starts combining them in complex ways. Pay attention during these introductions!
Springs, Crystals, and Helping Hands: Useful Objects
It’s not all doom and gloom! The mountain also provides tools to help you progress.
Springs are pretty straightforward – jump on them, and they launch you upwards or sideways, often much further than a normal jump. Sometimes you need to land on them just right, other times you might need to dash into them.
We already talked about Dash Crystals (green diamonds), your dash-refreshing buddies. Learn their locations on tricky screens; they are often the key to the intended path.
You’ll encounter Moving Platforms of various types. Some move continuously, others start moving when you land on them, and some might crumble after a short time. Adapt your timing accordingly.
Traffic Light Blocks (as the community often calls them) are platforms that cycle between different states (e.g., solid, non-solid, or moving). They often move when you dash. Understanding their cycle or trigger mechanism is essential for sequences built around them.
Bubbles (usually red or green) appear later. Entering one typically sends you traveling in a straight line. You usually have limited directional control within the bubble, and exiting it (often by jumping or dashing) pops it and refreshes your air dash. They allow for traversing huge gaps or complex paths when chained together or used with crystals.
The game constantly introduces new elements chapter by chapter. The core principle remains the same: observe how it works in a safe context, then figure out how to incorporate it into your platforming flow.
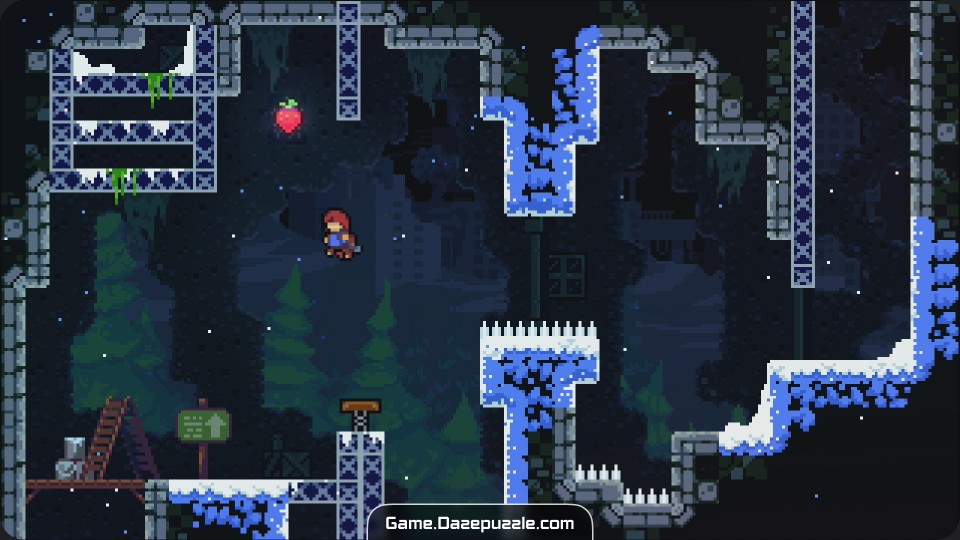
Shiny Red Things: Let’s Talk Strawberries
Ah, strawberries. You’ll see these bright red collectibles floating all over the place, often in hard-to-reach spots off the main path. They look tempting, they make a satisfying shwing sound when you collect them, and the end-of-chapter screen keeps track of how many you found.
So, should you go for them? Here’s the deal for beginners: Mostly, no. Strawberries are almost entirely optional bonus challenges. They add bragging rights and contribute to a few minor cosmetic things later, but they do not unlock progress, give you new abilities, or make the game easier.
Trying to grab every strawberry on your first playthrough, especially when you’re still learning the basic mechanics, can lead to massive frustration. Many strawberries require precise execution of advanced techniques or navigating incredibly difficult optional mini-challenges.
My advice? If a strawberry looks easily reachable, sure, grab it! If it looks like a nightmare trap designed by a platforming demon, ignore it for now. Focus on understanding the core mechanics, getting through the screens, and reaching the end of the chapter. You can always come back later, once you’re a seasoned climbing pro, and tackle those optional berry challenges. Don’t let the allure of collectibles distract you from the main goal: climbing the mountain and experiencing the story. Seriously, save yourself the headache early on. Focus on survival first, berries later.
The Art of Falling: Why Dying is Good, Actually
You’re going to die in Celeste. A lot. Like, a lot a lot. Hundreds, maybe thousands of times by the end. And that’s not just okay; it’s part of the design. It’s expected. It’s how you learn.
Celeste has incredibly quick respawns. You die, you instantly reappear at the start of the current screen, usually just seconds later. There’s very little penalty or downtime. This isn’t about punishment; it’s about iteration. Each death is feedback. “Okay, jumping from there didn’t work.” “Dashing that way leads into spikes.” “I need more speed to clear that gap.”
Think of each screen as a problem to solve. Your first few attempts might just be gathering information. Where are the hazards? Where do I need to go? What objects are involved? Then you start experimenting with solutions. Maybe you try wall jumping up one side. Doesn’t work. Okay, maybe you need to use that dash crystal on the other side. You try that, get a bit further, die again. But you learned something!
This loop of try-die-learn-repeat is the core Celeste experience. It can feel tough, but when you finally nail that sequence, clear that screen that’s been kicking your butt for ten minutes… oh man, the satisfaction is immense. It’s earned.
So, try not to get tilted. If a screen feels impossible, take a short break. Look away, breathe. Come back and observe. What are you missing? Is there a different approach? Sometimes the solution is simpler than you think, just requiring precise timing. Other times, it demands a sequence of moves you haven’t quite mastered yet. Be patient with yourself. Every death is a step closer to understanding. The mountain isn’t mocking you; it’s teaching you.
Your Climb, Your Way: Don’t Sleep on Assist Mode
Okay, real talk. Celeste is hard. For some players, the default difficulty might feel like hitting a brick wall, leading to frustration rather than fun. The developers understood this, and they included something brilliant: Assist Mode.
You can access Assist Mode from the main menu or pause screen at almost any time. It’s not a single “easy mode” toggle; it’s a suite of options you can adjust individually to tailor the challenge to your liking. There’s absolutely zero shame in using it. The game even tells you this! It’s about making the experience accessible and enjoyable for you.
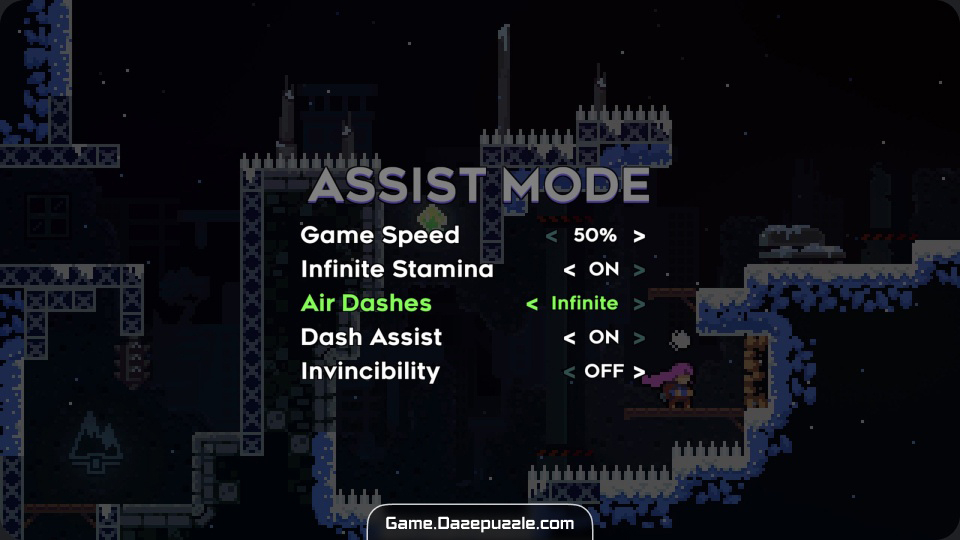
What can you change?
You can adjust the Game Speed, slowing things down to give you more time to react and execute precise movements. Even a small reduction, like 90% speed, can make a big difference without drastically changing the feel.
You can grant yourself Infinite Stamina, removing the tension of climbing limits. This can be great if you enjoy the platforming but find stamina management stressful, or if you want to explore more freely.
You can increase the number of Air Dashes you get – two instead of one, or even infinite dashes! This fundamentally changes how you navigate levels, opening up new paths and bypassing many challenges. It can be fun just to fly around!
You can even turn on Invincibility. Spikes? Who cares! Bottomless pits? Still deadly, but you won’t die from hitting hazards. This lets you focus purely on the platforming puzzles or simply experience the story without the constant threat of death.
You can mix and match these settings however you like. Maybe you just want infinite stamina. Maybe you want slightly slower game speed and two dashes. Maybe you hit one particular screen that feels utterly impossible, turn on invincibility just to get past it, and then turn it off again. It’s your game, your experience. Use the tools the game gives you to have fun. Anyone who tells you using Assist Mode is “not the real way to play” is missing the point of Celeste’s message about overcoming personal struggles in your own way.
First Steps on Icy Slopes: Early Game Reality Check
So you’ve got the moves, you understand the basics… what can you expect in the early chapters, like Forsaken City (Chapter 1) and Old Site (Chapter 2)?
Forsaken City is your introduction. It focuses heavily on the absolute fundamentals: basic jumping, wall jumping, and the single air dash. You’ll learn how dash crystals work and navigate relatively simple spike arrangements. The challenge ramps up, but most screens are about getting comfortable with Madeline’s core abilities. Pay attention to how the level design subtly teaches you things, like using a wall jump to get height or a dash to cross a gap you can’t jump.
Old Site starts mixing things up. It introduces dream blocks (those weird blocks you can dash through), which often require you to dash in specific directions and angles. It also features sections with moving platforms and slightly more complex combinations of hazards. Stamina management starts becoming a bit more important here too. This chapter tests your understanding of the dash mechanics learned in Chapter 1 and asks you to apply them in more intricate ways.
Don’t expect to breeze through even these early areas. They have their tricky spots! The key is applying what you’ve learned. If something seems impossible, ask yourself: Am I using all my tools? Have I considered wall jumping? Dashing? Is there an environmental object I’m not using correctly? Experiment! That weird-looking wall might be breakable. That background element might actually be a platform. Keep your eyes open.
Mindset is Everything: Climbing the Inner Mountain
Celeste isn’t just about pixel-perfect platforming; it’s got a surprisingly deep story about dealing with anxiety, depression, and self-doubt. Madeline’s journey up the mountain mirrors her internal struggles. You’ll see this unfold in the dialogue and cutscenes.
This ties back into the difficulty. The game wants you to struggle, to fail, and to keep trying. It wants you to feel that frustration Madeline feels, but also the triumph of overcoming it. Embrace the challenge, but don’t let it consume you.
If you’re getting genuinely angry or frustrated, take a break. Seriously. Step away for 10 minutes, an hour, even a day. You’ll often come back with fresh eyes and clear a screen you were stuck on immediately. Pushing through when tilted usually just leads to more mistakes.
Celebrate the small victories. Finally nailing that tricky dash sequence? Clearing a screen that took you 50 tries? Give yourself a mental high-five. You earned it! Recognizing your progress is key to staying motivated.
Remember Assist Mode is always there. There’s no trophy for suffering unnecessarily. The goal is to experience the journey, in whatever way works best for you.
You Got This!
Climbing Celeste Mountain is a challenge, no doubt about it. But it’s one of the most rewarding experiences in gaming. You’ll master intricate mechanics, overcome seemingly impossible obstacles, witness a beautiful story, and jam out to an incredible soundtrack.
Remember the basics: jump, climb, dash. Manage your stamina. Read the environment. Use death as a teacher, not a punishment. Play your own way, using Assist Mode if you need or want to. Be patient, be persistent, and don’t forget to breathe.
You’re ready. Now go climb that mountain! Good luck, gamer. You’ll smash it.
Thank you for keeping up with Game.DazePuzzle.com