The feeling is always the same. Your hand rests on the door, the wood cool and solid against your glove. On the other side, you don’t know what’s waiting. A terrified civilian? A trigger happy suspect with an automatic rifle? A trap, wired to blow the moment the lock turns? Your heart is hammering against your ribs, a frantic drumbeat in the sudden, sharp silence. This is the moment where every choice matters, where a split second decision separates a successful mission from a body bag. This is Ready or Not.
What Is in Our Ready or Not Complete Guide?
Getting to grips with this gritty, realistic tactical shooter can be tough. The game doesn’t hold your hand; it throws you into the decaying heart of Los Sueños and expects you to perform. That’s where this Ready or Not complete guide comes in. Think of it as your field manual, your partner, your guide through the dark underbelly of a city on the brink. We’ll cover everything from the absolute basics of movement to the high level strategies needed to secure that perfect, flawless S-Rank. Forget fumbling with commands or guessing which gun to bring; we’re here to turn you into a confident, effective SWAT operator.
Ready or Not: Beginner Tips & First Steps
Before you even think about kicking down doors on a mission, your first stop should be the LSPD Headquarters. This is your hub, the place where you prepare for the chaos to come. Get familiar with it. To the right of the main lobby, you’ll find the briefing room, where you select your missions and review the critical intel on your tablet. Pay close attention to this briefing; it contains invaluable information like the estimated number of suspects and civilians, known entry points, and potential mission specific objectives. Ignoring this is like going into an exam without studying. To the left are the locker rooms for customizing your look and, more importantly, the workshop bench where you’ll modify your weapons.
Don’t skip the training facilities. The shooting range is essential for getting a feel for your weapons. Recoil in this game is no joke, and understanding how your chosen rifle kicks is a prerequisite for survival, as controlling your spray is vital for both hitting your target and avoiding collateral damage to civilians in the background. There’s also a “killhouse,” a practice course where you can drill room clearing and close quarters battle (CQB) tactics until they become second nature. Use this area to build muscle memory for fundamental actions like leaning, clearing corners, and issuing commands. Practicing here allows you to master techniques like “slicing the pie”, incrementally clearing a room from outside the doorway, without any risk.
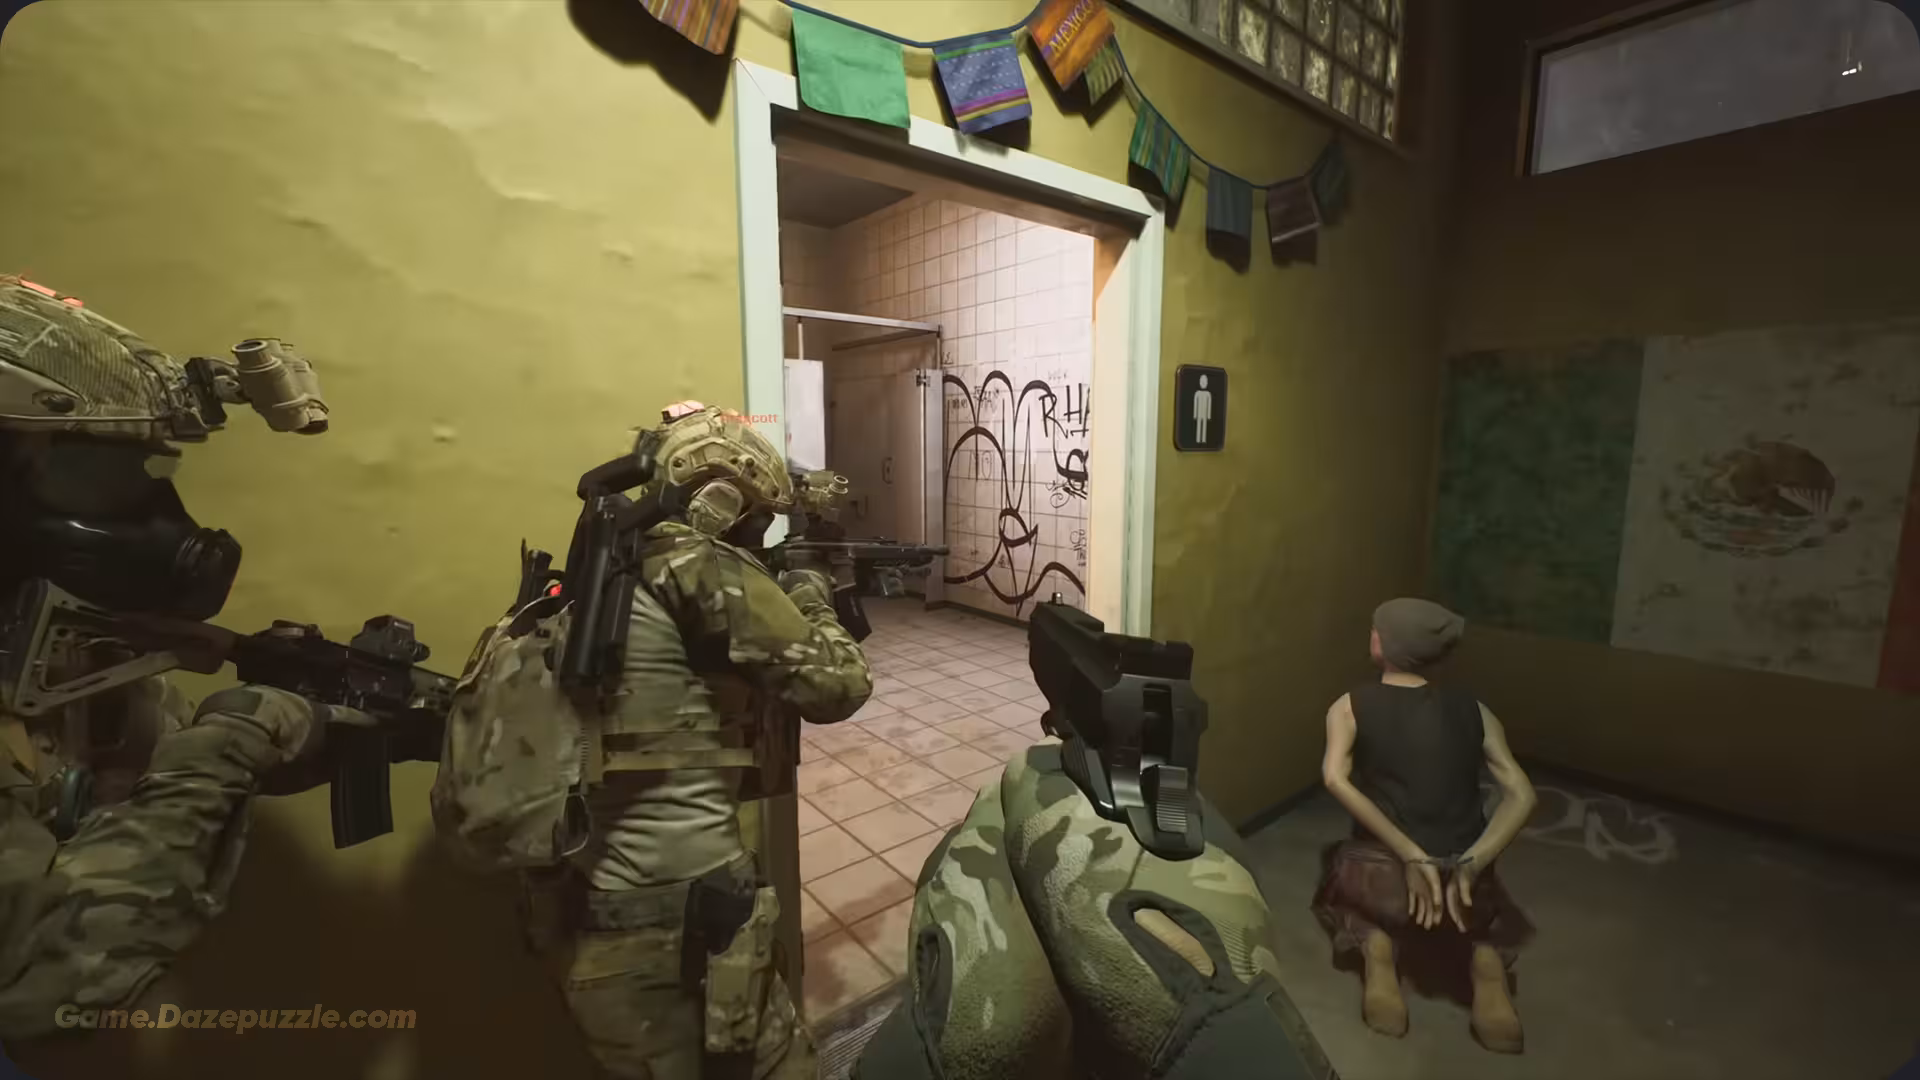
The core philosophy of Ready or Not is different from most shooters you’ve played. The goal here is not to rack up a high body count. The motto is “Bring Order to Chaos,” and the game rewards you for controlling situations and apprehending suspects alive. The scoring system heavily reinforces this: you get significant points for arresting suspects and rescuing civilians, but you receive harsh penalties for unauthorized use of force, injuring civilians, or killing suspects who could have been arrested. To get the highest ratings on a mission, you need to arrest everyone. This requires a shift in mindset; you are a specialized police officer trying to save lives, including the lives of the criminals, not a soldier clearing a warzone.
Core Rules of Engagement: How to Survive
The community has basically agreed on a few core principles for staying alive. These aren’t just tips; they are doctrines.
First, slow is smooth, and smooth is fast. This is the number one rule. Rushing into a room you haven’t cleared is the fastest way to get your whole squad killed. A slow, methodical pace gives you time to check your corners, communicate with your team, and make smart decisions. It feels counterintuitive, but being cautious will lead to faster and more successful missions than running in like a headless chicken. For example, rushing a door might get you shot by an unseen suspect and force a mission restart, whereas taking 10 extra seconds to use the mirror gun could save you minutes. The doorway itself is a “fatal funnel,” a chokepoint where you are completely exposed. The longer you stand in it, the more likely you are to get shot. Slowing down allows you to gather intel and clear as much of the room as possible before you even enter that funnel.
Second, silence is golden. The enemy AI is incredibly sensitive to sound. If you sprint, kick doors open, or fire unsuppressed weapons, you’re just telling every bad guy in the area exactly where you are. They’ll dig in, set up ambushes, or even harm hostages. You should walk, not run. Noise discipline is key to keeping the element of surprise. Sounds like reloading, your character’s heavy breathing after sprinting, or stepping on broken glass can also give away your position. These noises can change an AI’s status from “unaware” to “suspicious” (where they start investigating) or “hostile” (where they actively hunt you), making a peaceful arrest much harder. Even shouting for compliance too early can alert suspects in adjacent rooms.
AI Squad Command Guide
In single player, you’re not a lone wolf. You are the commander of a four officer AI team, and their effectiveness is a direct reflection of your leadership. If you give bad orders, they will follow you to failure.
Your squad is divided into two pairs: Blue Team and Red Team. You can issue orders to the entire group (Gold Team) or to each pair individually. This is crucial for advanced tactics. For instance, in a large room with two entrances, you can order Blue Team to stack on one door and deploy a flashbang, while you lead Red Team through the other door at the exact same moment for a synchronized breach. This “split breach” tactic can overwhelm enemies and is far more effective than funneling your entire team through one door.
The command menu (default middle mouse button) is your bread and butter. It’s contextual, meaning the orders you can give change based on what you’re looking at. Point at a door, and you’ll get options to breach, wedge it shut, or peek under it with a mirror gun. Point at a surrendered suspect, and you can order your team to restrain them. Point at a piece of evidence, and you can order it collected. It’s an intuitive system once you get the hang of it.
You also control your team’s formation with the “Fall In” command. A Wedge formation is great for entering large rooms as it maximizes your forward firepower. A Diamond formation provides 360 degree security and is essential when crossing dangerous open areas like the main floor of the Port Hokan map. A Single File line, while limiting firepower, is sometimes necessary for navigating extremely narrow corridors or catwalks where other formations would get stuck.
The Art of the Breach: A Step by Step Guide
Every closed door in Ready or Not is a problem waiting to be solved. How you open that door will often determine the outcome of the fight. A successful breach is a simple, five step process that you should repeat every single time.
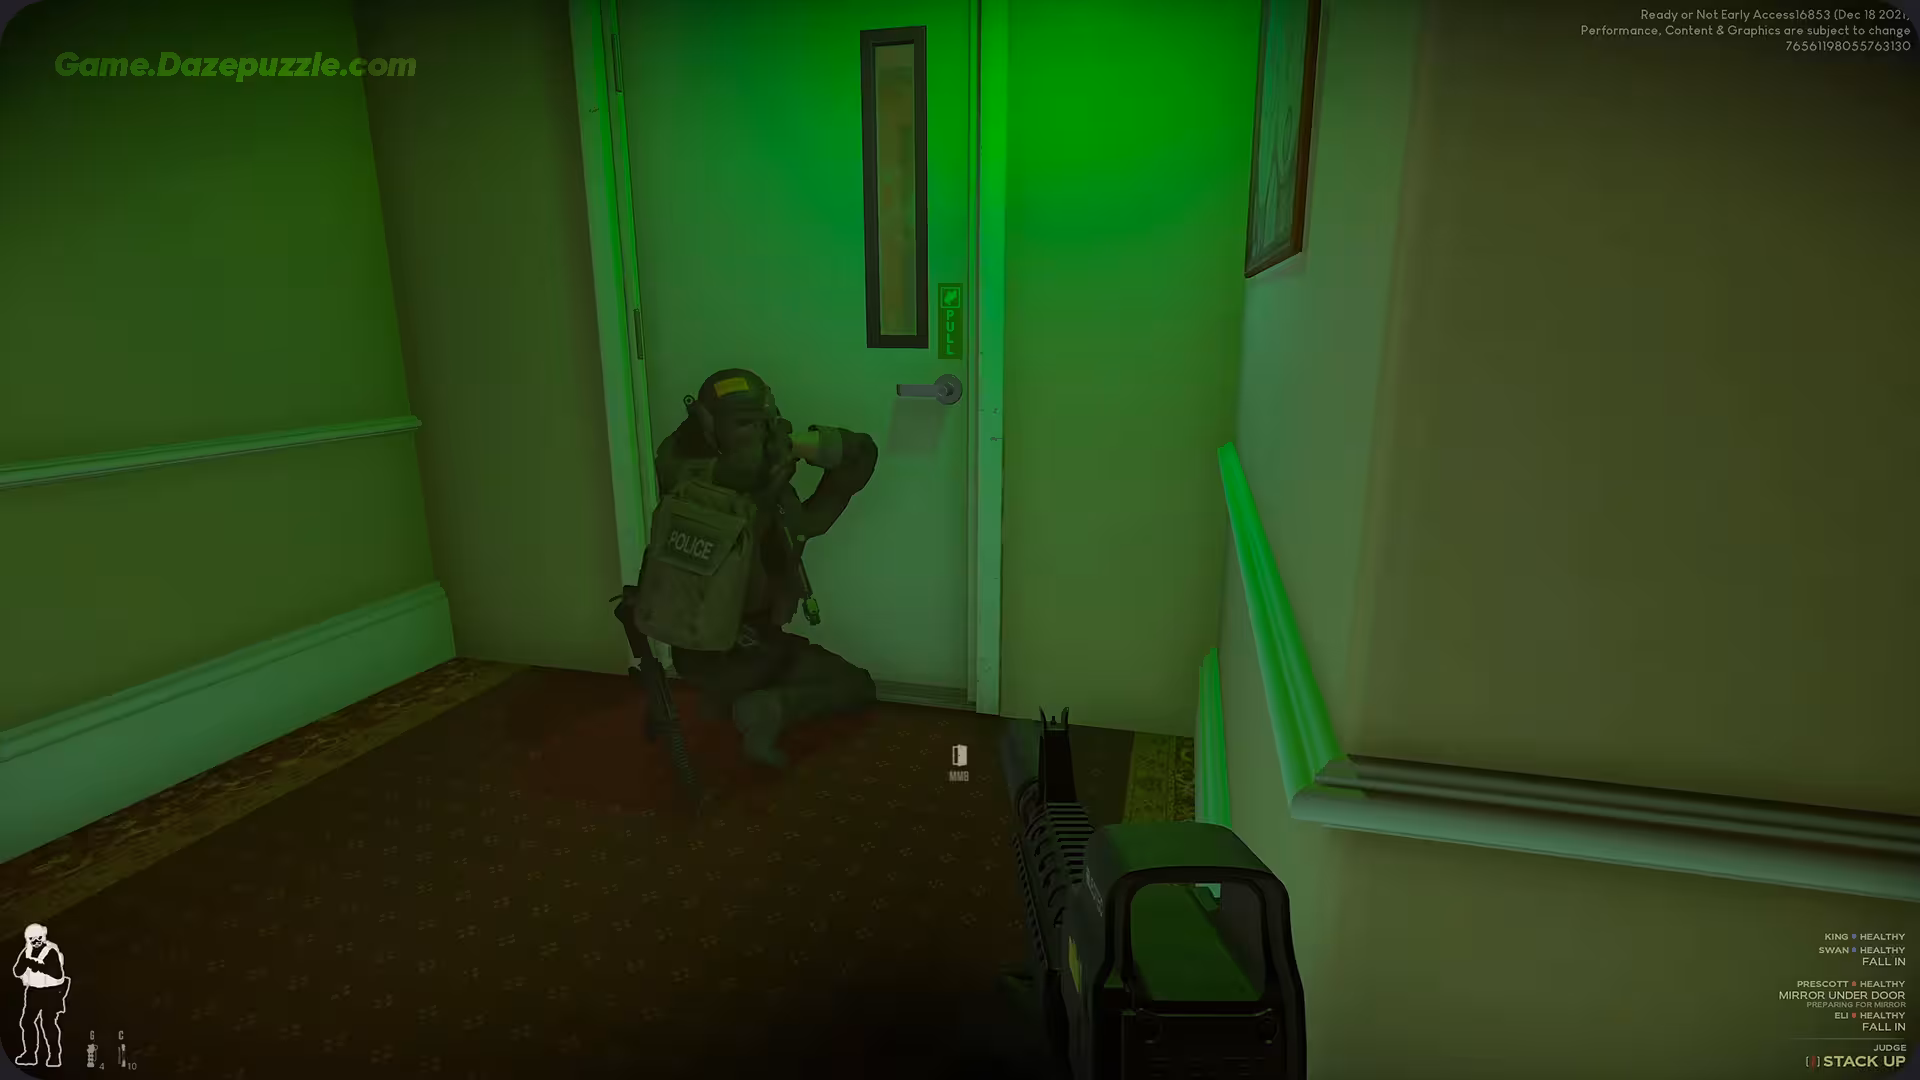
- Intelligence: Before anything else, use the Mirror Gun (also called an Optiwand). This is the single most important piece of gear in the game. Peeking under a door lets you see how many people are inside, where they are, if they’re armed, and most importantly, if the door is booby trapped. Look for the thin, barely visible line of a tripwire, usually near the bottom of the door. Going in blind is a gamble; using the mirror gun is a professional, calculated action. Also look for potential cover for suspects, other exits, and the state of any civilians (are they panicked or calm?).
- Stack Up: Once you know what you’re facing, order your team to “Stack Up” on the door. They’ll get into position, ready for entry. Try to stack on the non-hinge side of the door. This minimizes your team’s exposure when the door swings open, giving you a precious extra second before you are visible to those inside.
- Breach: Now you execute the entry. Your choice should be directly informed by what you saw with the mirror gun.
- Dynamic Entry: Use C2 explosives for their powerful stun and morale shock effect, making suspects more likely to surrender. Use a Breaching Shotgun to quickly destroy locks or, more importantly, to safely disable tripwire traps from a distance. A Battering Ram is loud and stuns anyone directly behind the door.
- Stealth Entry: A Lockpick Gun is your tool for silent entry. Use this when intel shows a low threat situation (e.g., only civilians inside) and you want to maintain the element of surprise on suspects in adjacent rooms.
- Enter and Clear: As soon as the door is open, your goal is to get out of the “fatal funnel”, the doorway itself, as quickly as possible. Move in, clear your corners, and neutralize any immediate threats. The first officer through the door should immediately move to one side and clear the nearest corner. The second officer moves to the opposite side, clearing their corner. This rapid, coordinated movement ensures the room is cleared efficiently and minimizes the time any single officer is exposed in the doorway.
- Secure: The job isn’t over when the shooting stops. Restrain everyone (both suspects and civilians), report their status to TOC, collect any dropped weapons as evidence, and use Door Wedges to secure the doors of the room you just cleared. This last step is vital. Wedging a door prevents cleared areas from becoming new threat zones, stopping suspects from flanking you later in the mission.
Best Ready or Not Loadouts for Any Mission
There is no single “best” loadout that works for every mission. The right gear depends entirely on your objective. Are you going for a lethal run just to complete the mission, or are you attempting a perfect non-lethal S-Rank? These require totally different approaches.
For your armor, Ceramic plates are generally the best choice. Unlike Kevlar or Steel plates which only reduce a percentage of incoming damage, a Ceramic plate will completely negate all damage from a single shot that hits it, breaking in the process. This one time use invulnerability can be the difference between life and death. Heavy Armor offers more protection at the cost of a couple of gear slots, but the movement penalty is so small it’s almost always worth it and can save you from a surprise burst of fire.
Your headwear choice should match your strategy. If you plan on using CS Gas, the whole team must wear Gas Masks. If you’re using flashbangs, Anti Flash Goggles will save your vision. For low light maps like the Farm or Tunnels, Night Vision Goggles (NVGs) are non-negotiable. Otherwise, the Ballistic Facemask offers the most raw protection.
The most powerful throwable, especially for getting high scores, is CS Gas. When you flood a room with it, anyone inside without a gas mask is completely incapacitated, coughing and unable to fight back. It allows your team to enter and safely restrain everyone. For a more aggressive approach, Flashbangs are great for stunning enemies right before a dynamic entry. Stinger Grenades, which explode and release painful rubber pellets, are good for forcing compliance without the visual obstruction of gas.
Here are a few sample loadouts for different playstyles:
- The S-Rank Operator (Non-Lethal Control): Your goal is control. Take a non-lethal primary like the VKS Pepperball Launcher or a Beanbag Shotgun. Your sidearm should be a Taser. Your long tactical slot is for the mandatory Mirror Gun. Fill your gear slots with CS Gas and Door Wedges. This loadout is purely about disabling and securing, not eliminating.
- The All Rounder (Lethal Stealth): For general purpose play. Take a suppressed assault rifle like the M4A1. A Mirror Gun is still your best friend for recon. Bring a mix of flashbangs for entry, C2 for tougher doors, and a door wedge for security. The suppressor will keep you off the enemy’s radar and let you choose your engagements, taking down threats one by one without alerting the entire map.
- The “Loud and Proud” Breacher (Dynamic Entry): You are the point of the spear. Carry a B1301 Shotgun or a hard hitting SA-58 rifle. Your long tactical should be the Breaching Shotgun for fast, destructive entries. Load up on flashbangs and stinger grenades to disorient the enemy as you make your explosive entrance. Your job is to create chaos and overwhelm the enemy with speed and violence.
- The Point Man (Mobile Cover): Take a Ballistic Shield. This allows you to absorb enemy fire while your team maneuvers, but it restricts you to a sidearm and slows you down. This role requires strong communication with your team to coordinate movement and covering fire. You become a mobile wall, allowing your teammates to peek and fire from behind you safely.
How to Achieve S-Rank: The Definitive Guide
Achieving an S-Rank is the ultimate test of discipline in Ready or Not. It’s less about shooting and more about executing a perfect, non-lethal plan. The rules are strict and there is zero room for error. You must:
- Complete all primary and secondary mission objectives.
- Arrest every single suspect. Alive. This means no kills, period.
- Rescue every single civilian. Alive.
- Report every person (suspects and civilians) and collect every piece of evidence (dropped weapons).
- No officers can die, and you cannot commit any instances of “Unauthorized Use of Force.” This includes shooting a suspect who is in the process of surrendering, or firing on an unarmed contact.
To do this, your loadout and your team’s loadout are critical. You should run the S-Rank Operator build mentioned above, with a Mirror Gun, a non-lethal primary, and a ton of CS Gas.
Even more important is your AI squad’s equipment. You must equip all four of them with the VKS Pepperball Launcher. Do not give them the beanbag shotgun, as an unlucky headshot can be lethal and instantly fail your run. The VKS cannot cause lethal damage, making it the safest choice. Equip them with gas masks and heavy armor. And here is the most crucial trick: go into their loadout and remove all the ammunition from their secondary pistols. This prevents them from ever switching to a lethal weapon if they run out of pepperballs and is a foolproof way to prevent accidental kills.
The tactical flow for every room is the same: mirror the door, deploy CS Gas, wait for it to take effect, breach, and send your gas mask wearing team in to clean up the coughing, helpless suspects. This “Gas -> Wait -> Breach -> Clear” cycle should become your mantra for success. The “Wait” step is critical; listen for the sounds of coughing to confirm the gas has spread before you enter. Patience is the greatest virtue for an S-Rank. After you get the “Mission Complete” notification, don’t leave. Issue the “Search and Secure” command. Your AI team will automatically scan the level for any evidence you missed, ensuring you get a perfect score.
The path through Ready or Not is a steep one, but it’s incredibly rewarding. It’s a game that respects your intelligence and rewards patience and careful planning. The chaos of Los Sueños can feel overwhelming, but with the right doctrine, the right tools, and the right mindset, you can be the one to bring order back to the city. Move slow, think clearly, and act decisively. Good luck out there, officer.
Thanks for keeping up with Game.Dazepuzzle.com