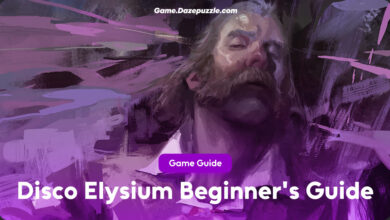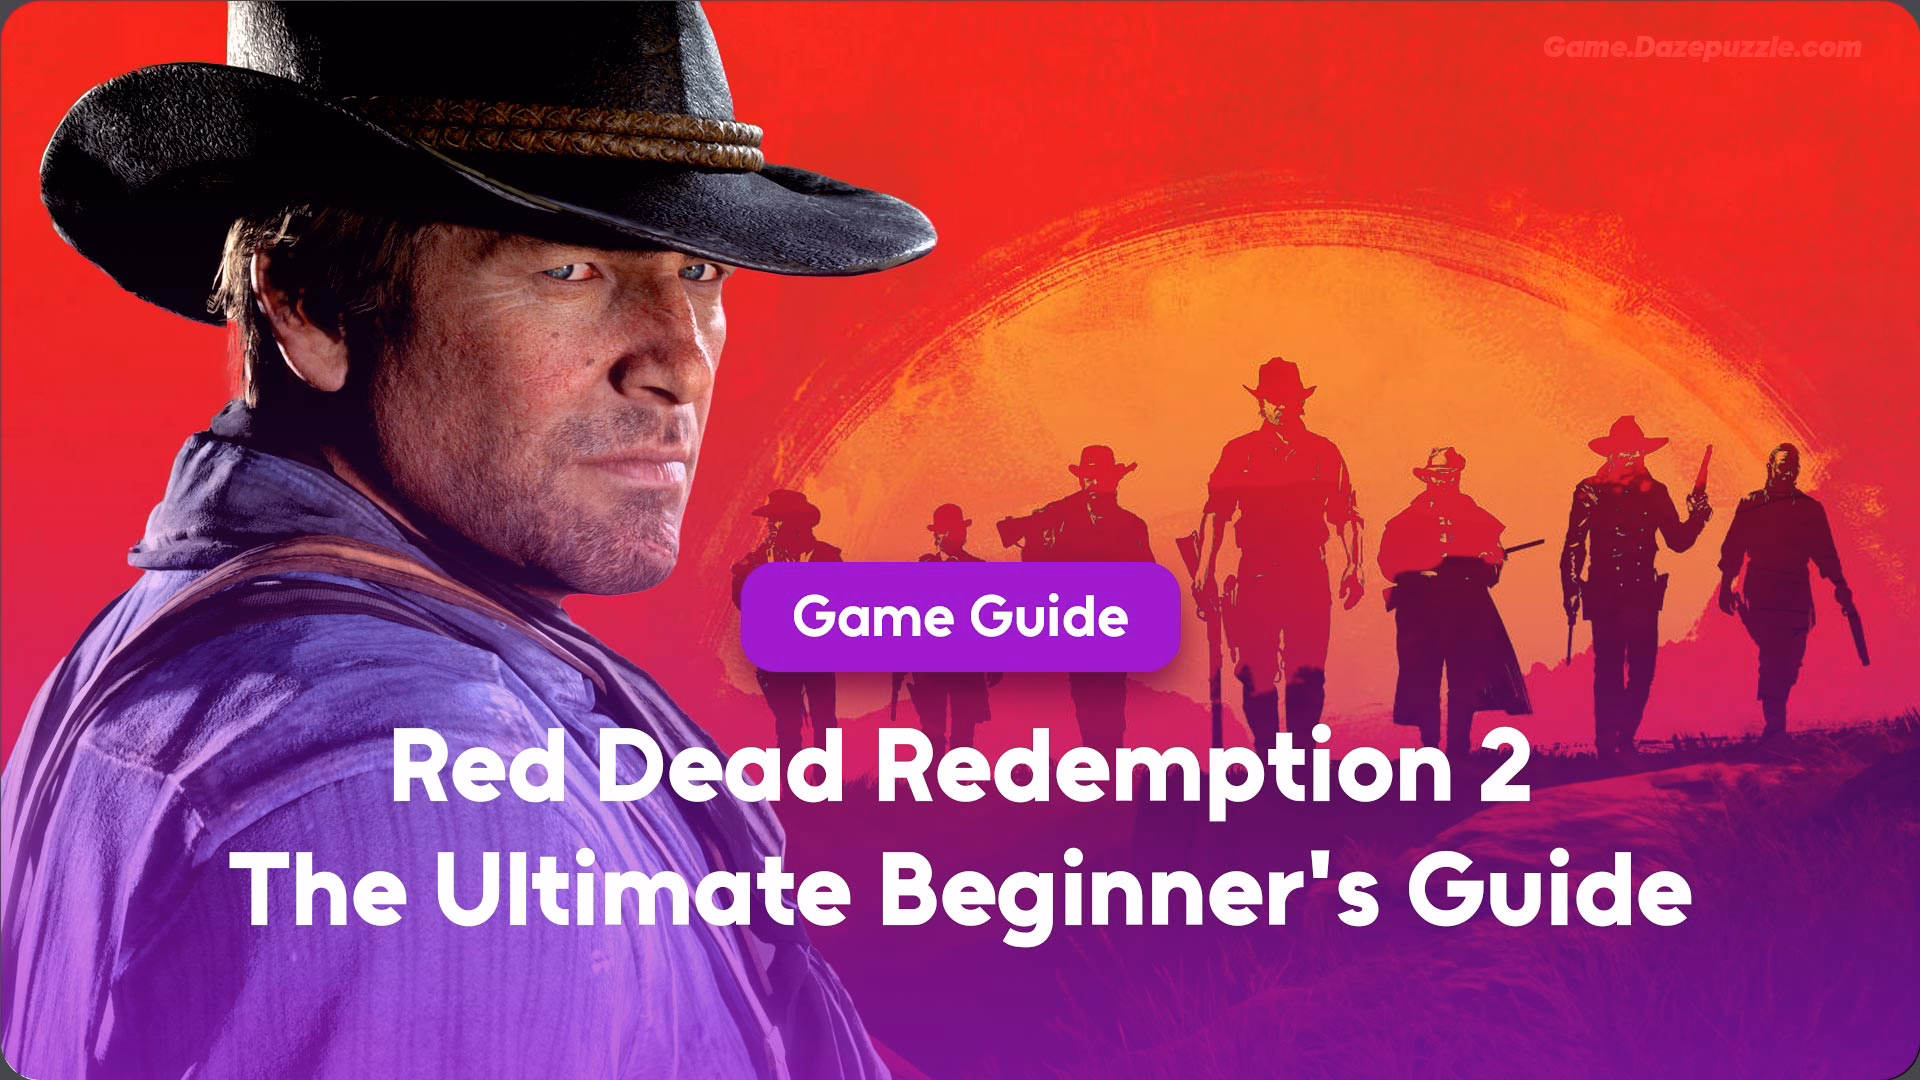
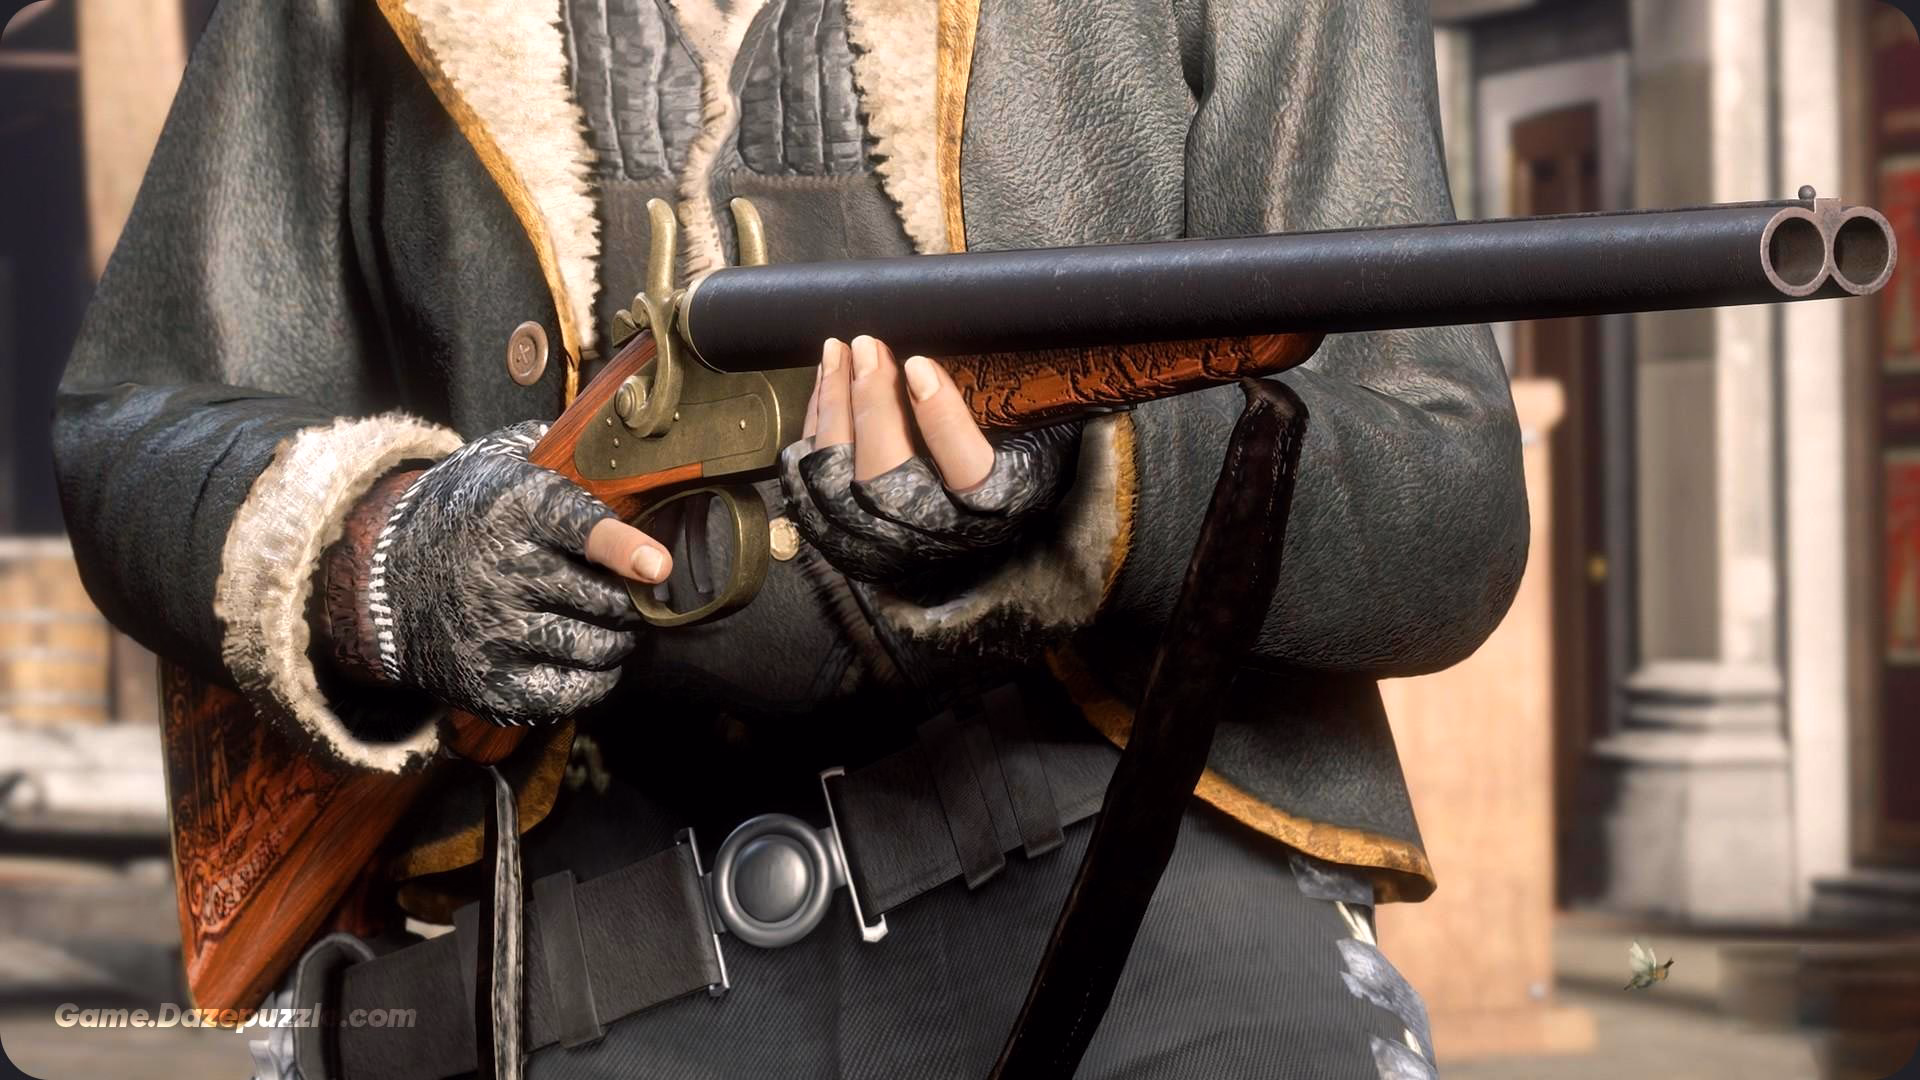
Welcome to the untamed world of Red Dead Redemption 2, where you’re now Arthur Morgan.
You’re about to embark on one of the greatest gaming journeys ever created. But let’s get one thing straight right now: this game is a beast. It’s massive beautiful and intentionally slow. It doesn’t hold your hand. It expects you to live in its world and that can be overwhelming when you’re just trying to figure out which end of the horse to feed.
What’s in my Red Dead Redemption 2 Beginner’s Guide
It’s incredibly easy to spend your first ten hours feeling perpetually broke lost and frustrated wondering why you can only carry three cans of beans and why it takes twenty real-world minutes to ride to a mission marker. Many new players bounce right off the game for these exact reasons missing out on the masterpiece that lies beneath.
But you won’t. Not with this guide.
Think of me as the seasoned old cowboy sitting next to you at the campfire telling you all the secrets the game never bothers to explain. This isn’t a boring wiki page or a clinical walkthrough. This is a practical no-spoiler checklist of the ten most important things you should do right away to transform your experience from a frustrating slog into an incredible adventure. We’re talking about setting up a solid foundation getting a fat stack of cash and avoiding all the common rookie mistakes. These are the tried-and-true strategies that veteran players swear by. Trust me on this. Do these things first and you’ll be a rootin’ tootin’ legend before you even finish Chapter 2.
Read More: Red Dead Redemption 2 Cheats and Codes (Full List & How to Use Them)
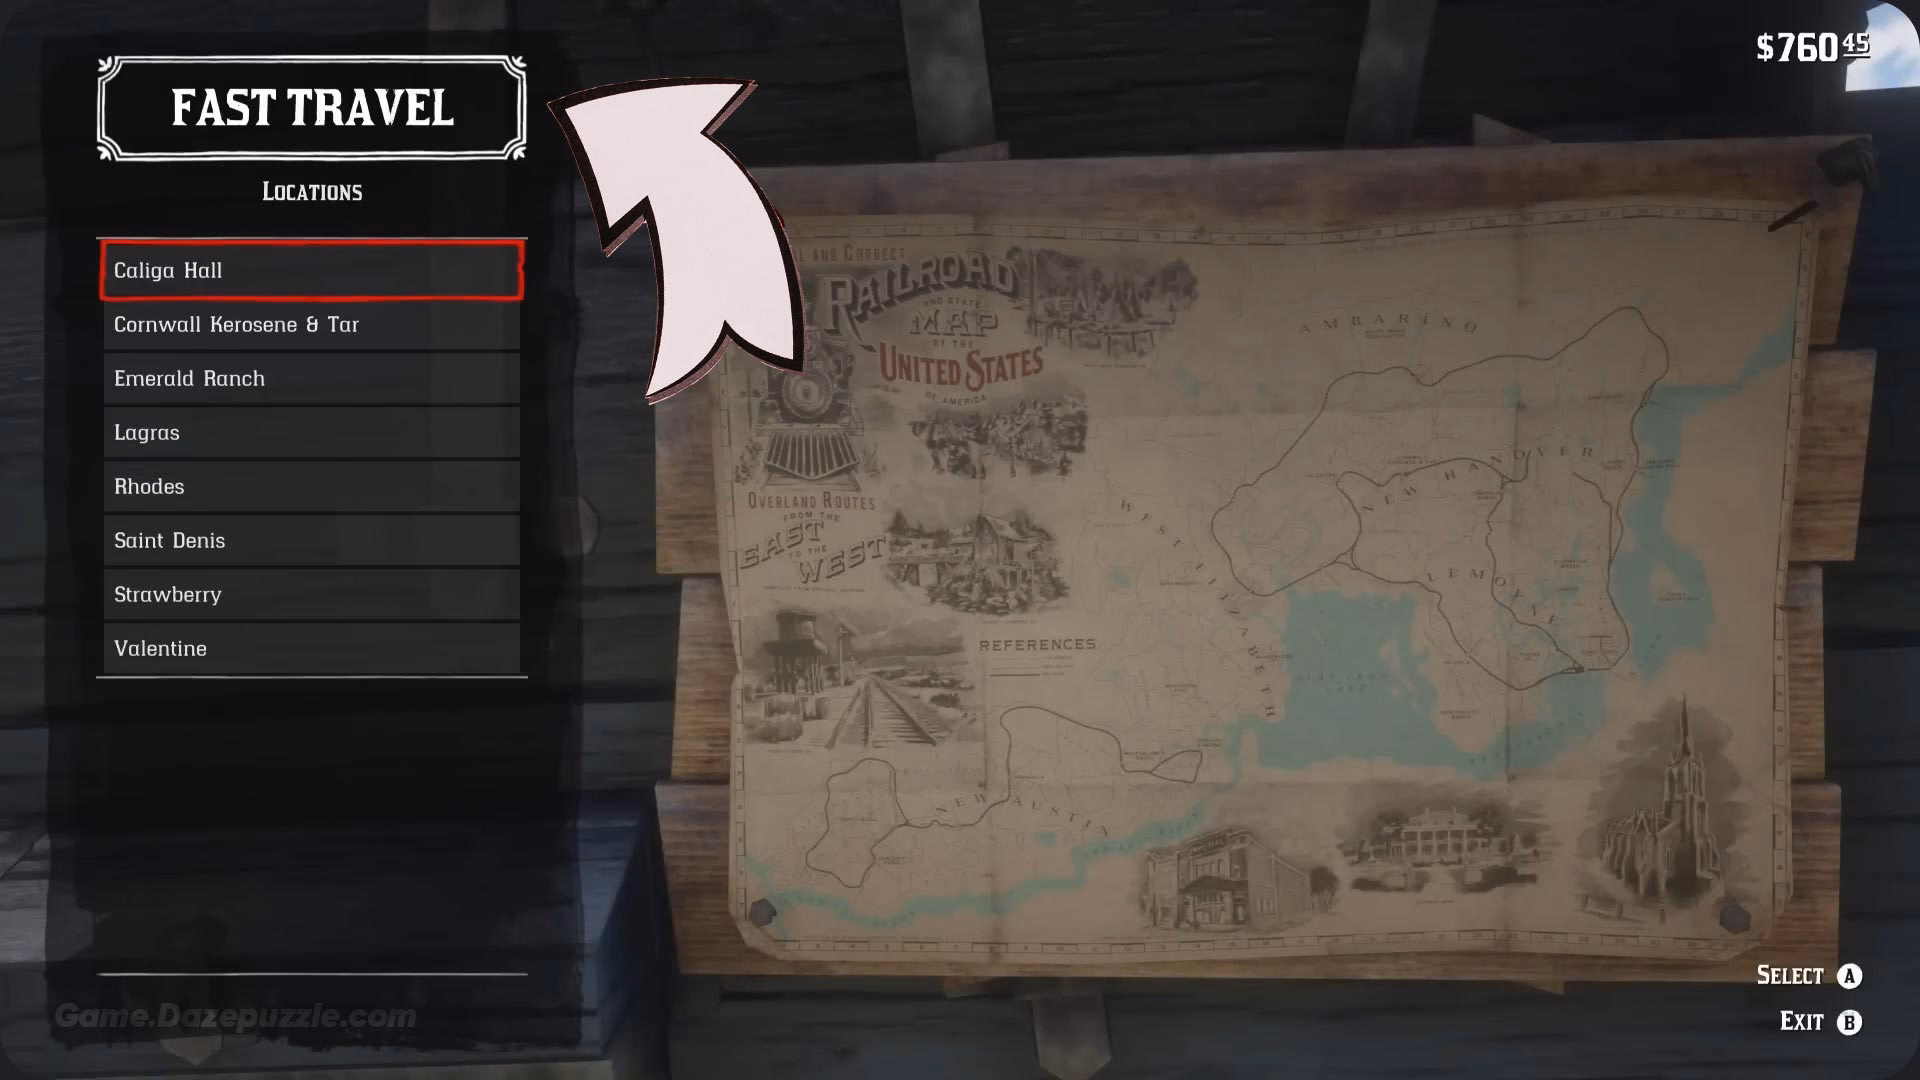
1. Stop Riding Everywhere. Unlock Fast Travel
Why this is your absolute first priority: Let me paint you a picture. You’ve just finished a long mission. You’re miles from camp.
It’s dark it’s raining and a pack of wolves just decided you look like dinner. You spend the next fifteen minutes on a long miserable ride back only to realize you forgot to do something in the town you just left. This is the beginner RDR2 experience in a nutshell.
Riding is immersive and beautiful yes but it can also be a colossal waste of your time and a major source of frustration. Unlocking fast travel is the single biggest investment you can make in your own sanity. It gives you the freedom to explore without the dread of the long ride home.
How to get it done: This is surprisingly simple but the game never points you to it.

- Head to the Camp Ledger: In the Van der Linde gang’s camp there’s a donation box next to a big ledger book. This is where you can donate money and items to the gang but more importantly it’s where you upgrade the camp.
- Upgrade Dutch’s Tent: Your first camp upgrade needs to be for Dutch’s lodging. It costs a couple hundred bucks so make sure you’re donating your valuables to the camp fund. This upgrade is called “First Things First.”
- Upgrade Arthur’s Tent: Once you’ve upgraded Dutch’s tent a new option will appear in the ledger to upgrade Arthur’s tent and wagon. It’s called “Next in Line” or something similar. Buy this upgrade. And that’s it! A map will now appear on the side of Arthur’s tent. Just walk up to it and you can instantly travel to any town or major location you’ve previously discovered. It’s a one-way trip from camp but it’s an absolute game-changer.
2. Get Rich Quick. Find the Limpany Gold Bar
Why this is so vital: Money makes the Wild West go ’round. You need it for better guns camp upgrades supplies and paying off those pesky bounties. Trying to save up by looting bodies for 75 cents apiece is a path to madness. There is a much better way. A single free gold bar worth a whopping $500 is just sitting there waiting for you to pick it up. Getting this early on feels like winning the lottery. It gives you the financial freedom to buy whatever you need without having to grind for hours.
Read More: Red Dead Redemption 2 Updated!
How to get it done:
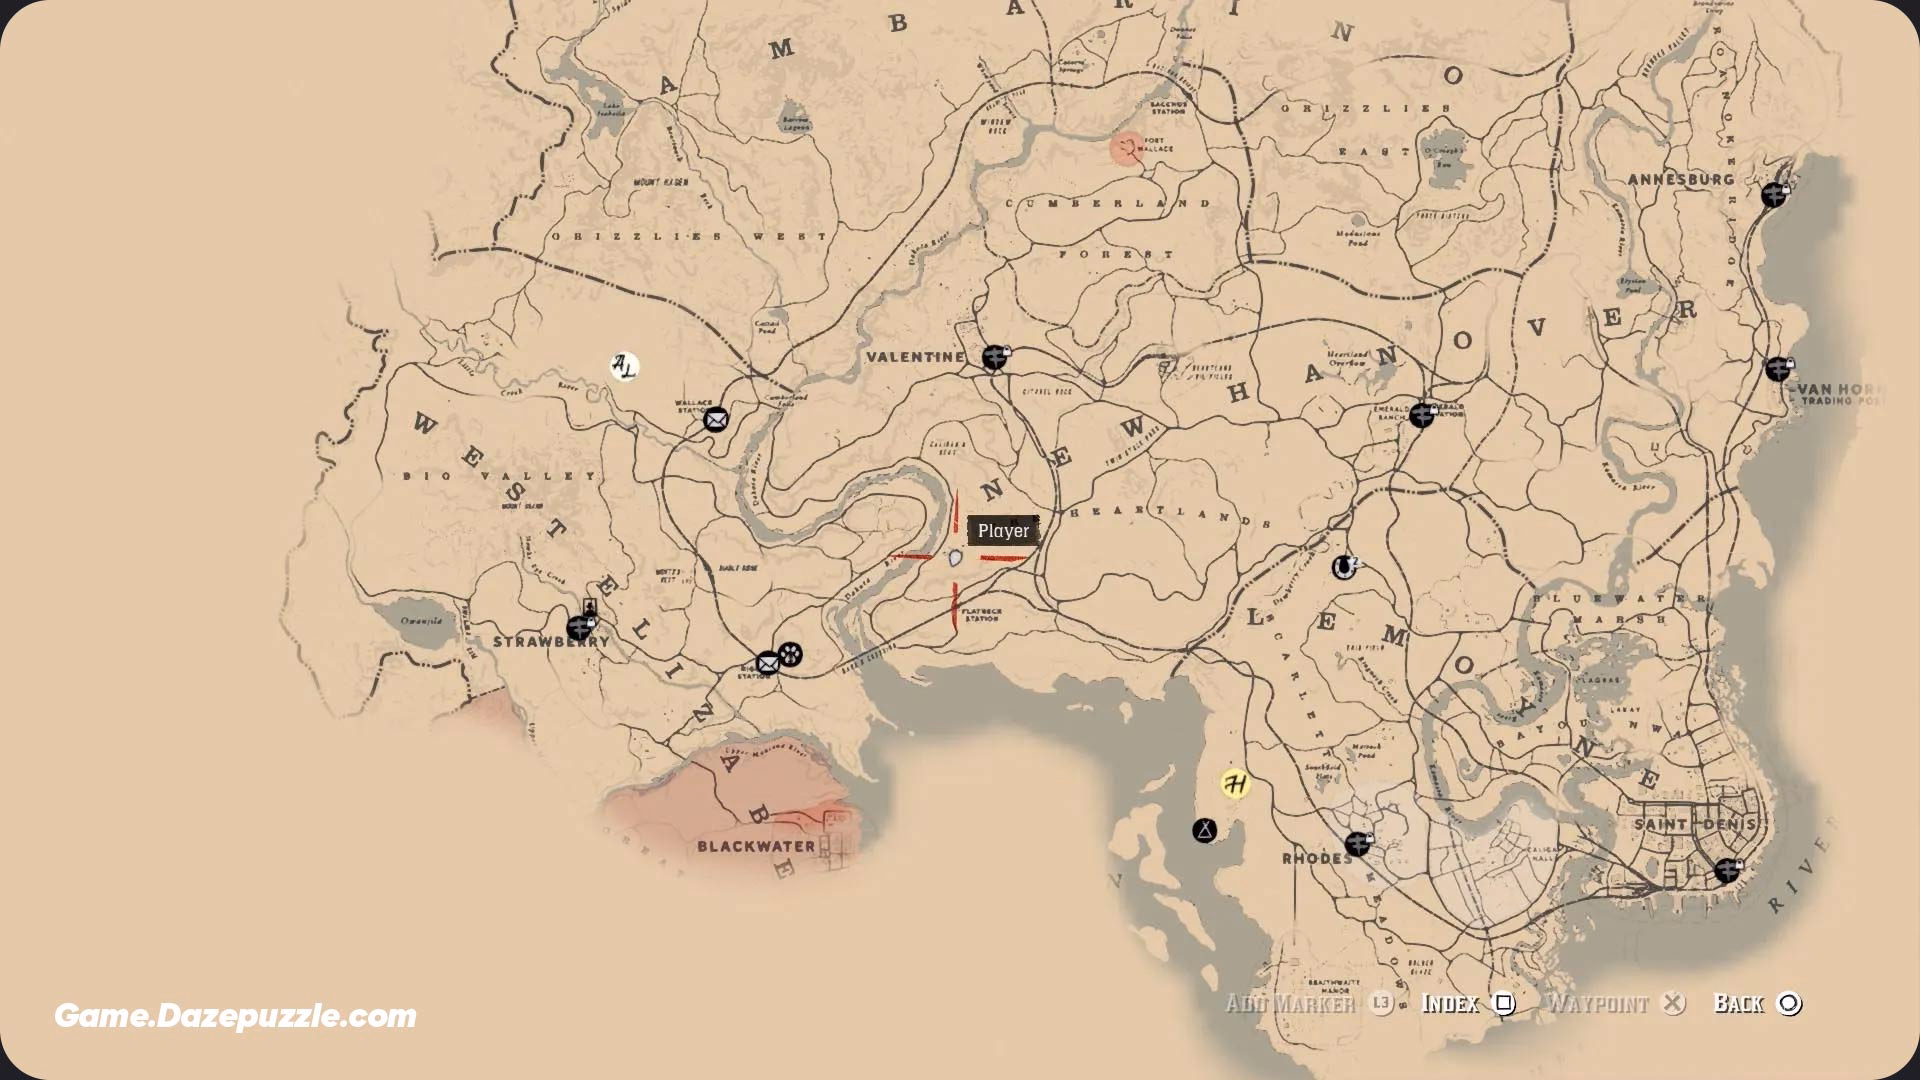
- Find Limpany: Look on your map just a little bit southwest of your starting camp at Horseshoe Overlook. You’ll find a completely burned-down abandoned town. It’s spooky and desolate. That’s Limpany.
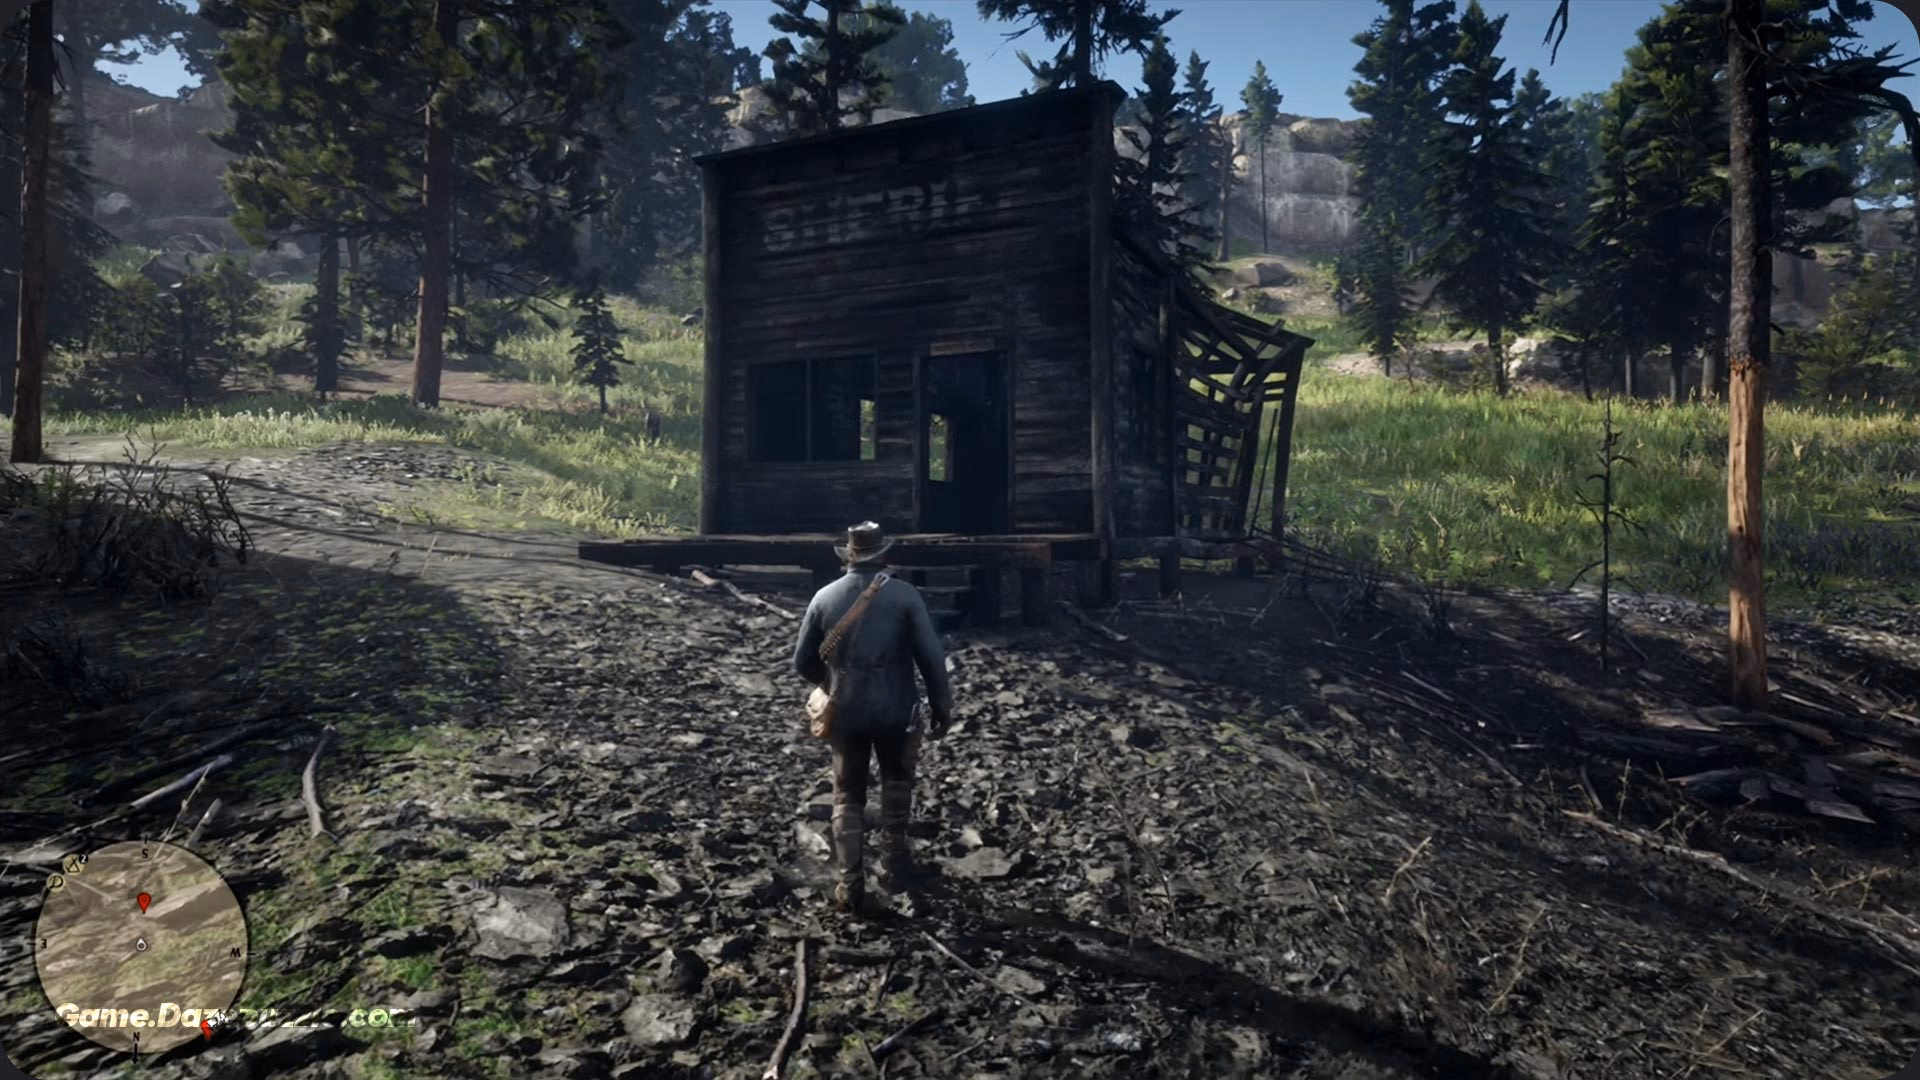
- Locate the Sheriff’s Office: As you walk through the ghost town look for the Sheriff’s building. It’s one of the few structures still somewhat standing.
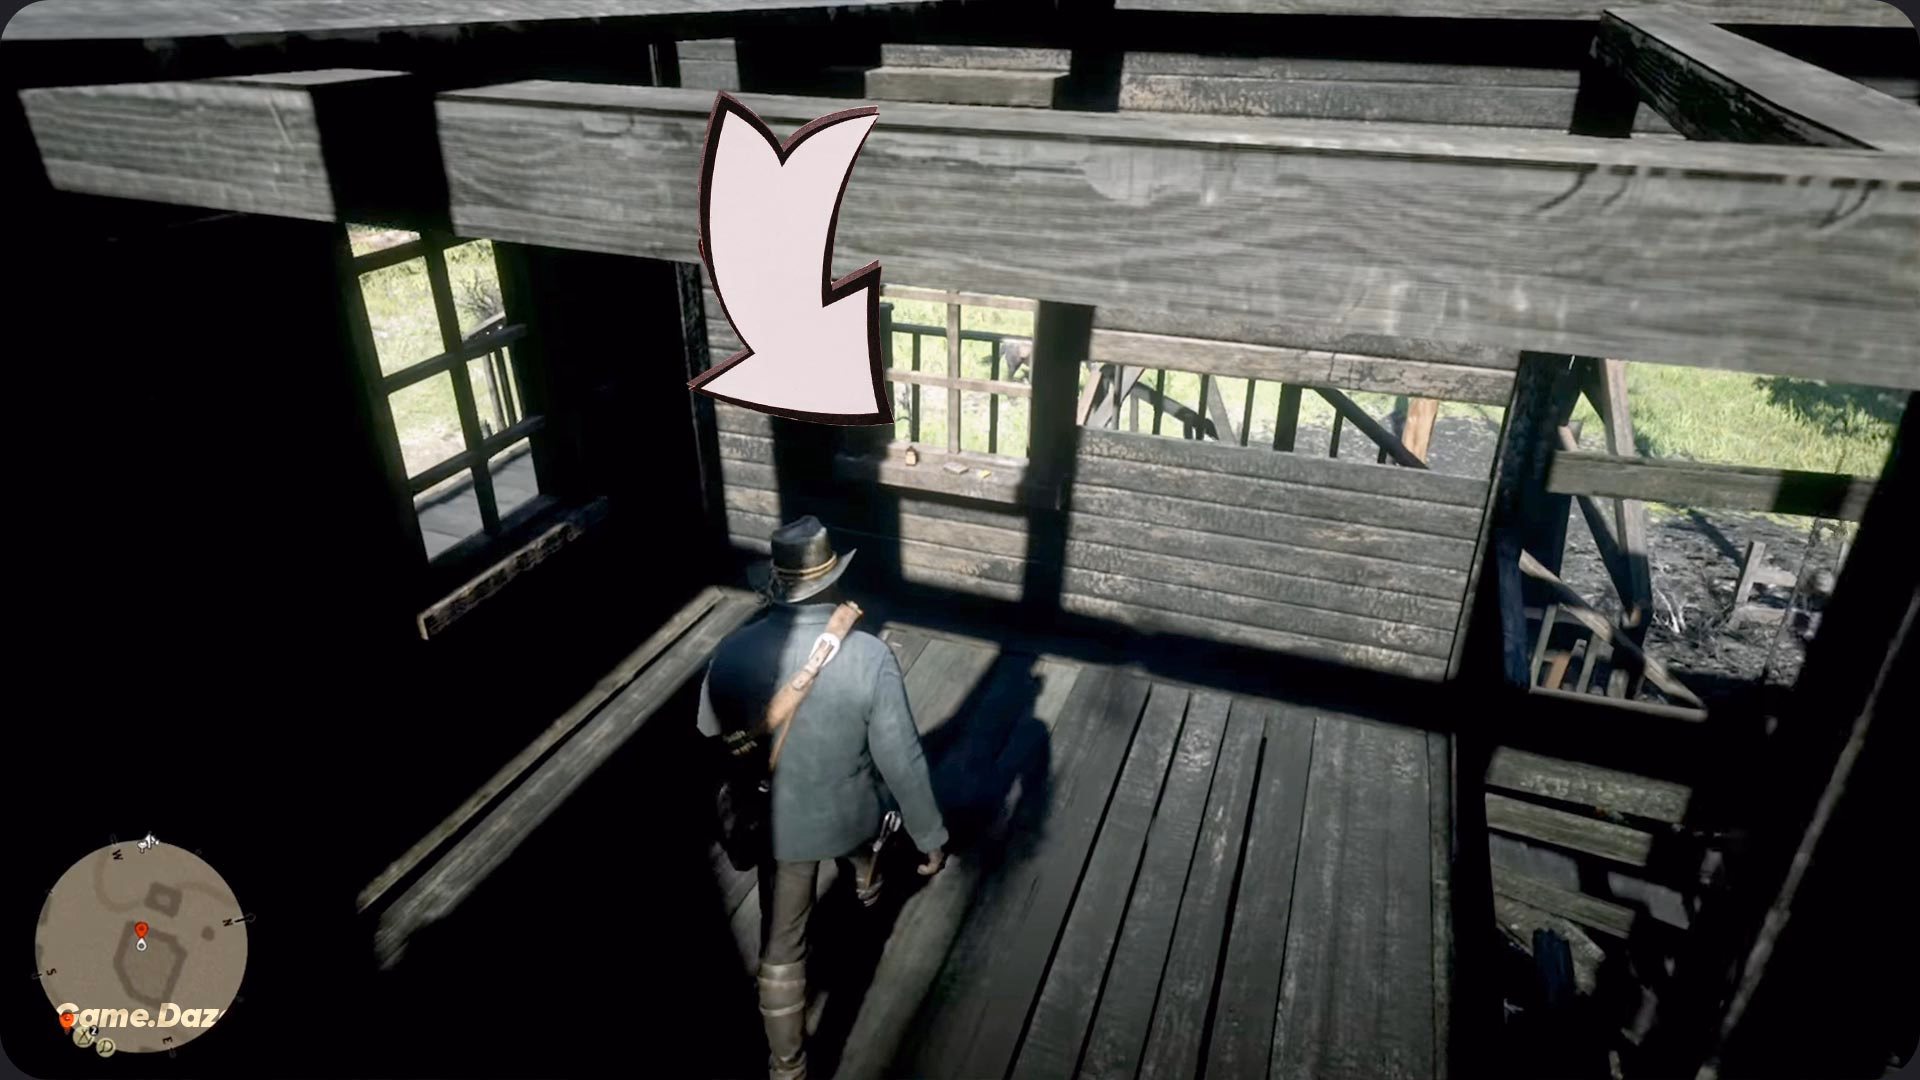
- Grab the Gold: Go inside the Sheriff’s office and walk behind the main desk. On the floor under the desk is a lockbox. Open it up and inside you’ll find a shiny gold bar and a pamphlet.
- Sell it to a Fence: Here’s the key part. You can’t just waltz into the General Store and sell a gold bar. They’ll look at you funny. You need to sell it to a “Fence” a special vendor who deals in stolen and valuable goods. The easiest one to unlock early in the game is at Emerald Ranch part of a story mission with Hosea. Once you’ve unlocked him you can sell that gold bar for a cool $500.
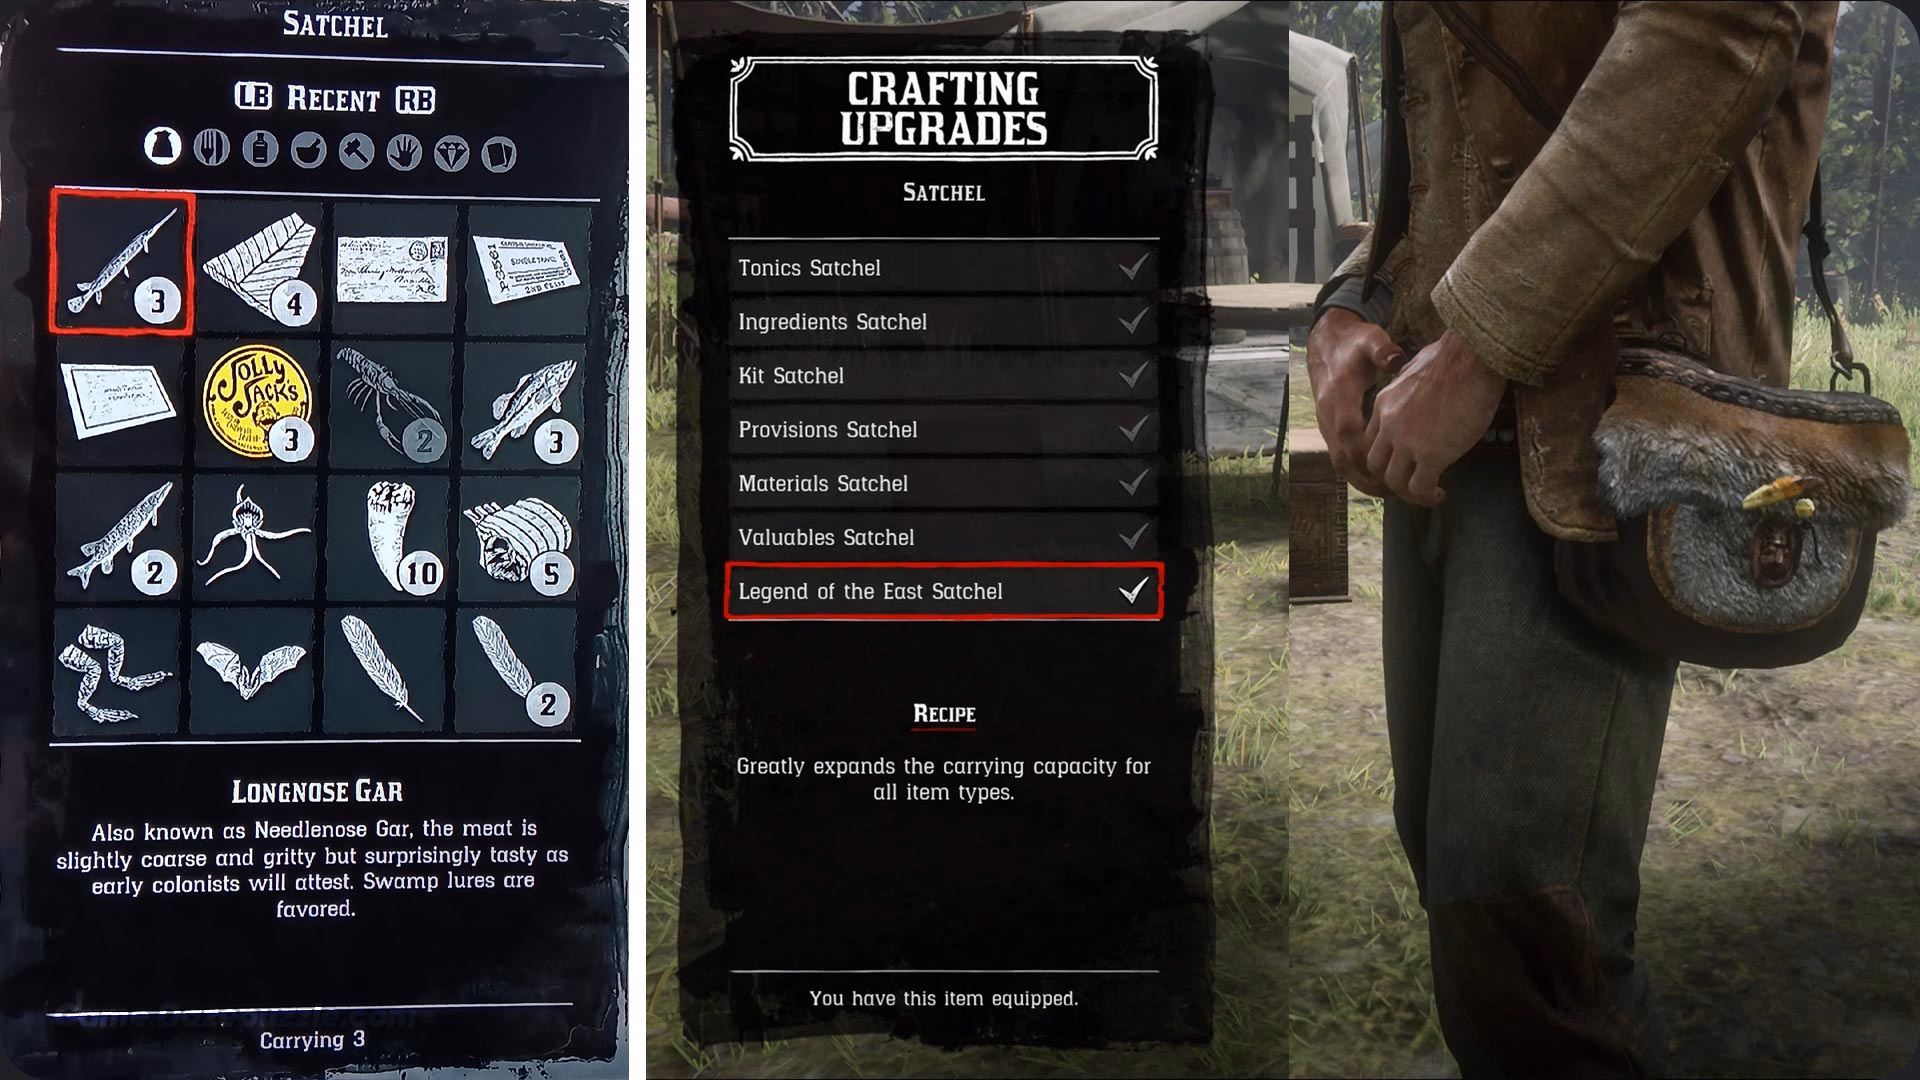
3. Get the Best Upgrade in the Game. The Legend of the East Satchel
Why this is a non-negotiable game-changer: “Your inventory is full.” You will see this message constantly in your first few hours and it is infuriating. Arthur’s starting satchel is ridiculously small. You’ll be forced to leave valuable tonics food and animal parts behind simply because you don’t have room. The Legend of the East Satchel solves this problem permanently. It increases your carrying capacity for almost every item type to 99. Imagine never having to worry about inventory management again. It allows you to play the game freely stocking up on everything you could ever need.
How to get it done: This isn’t a quick task it’s a project. But starting it early is crucial.
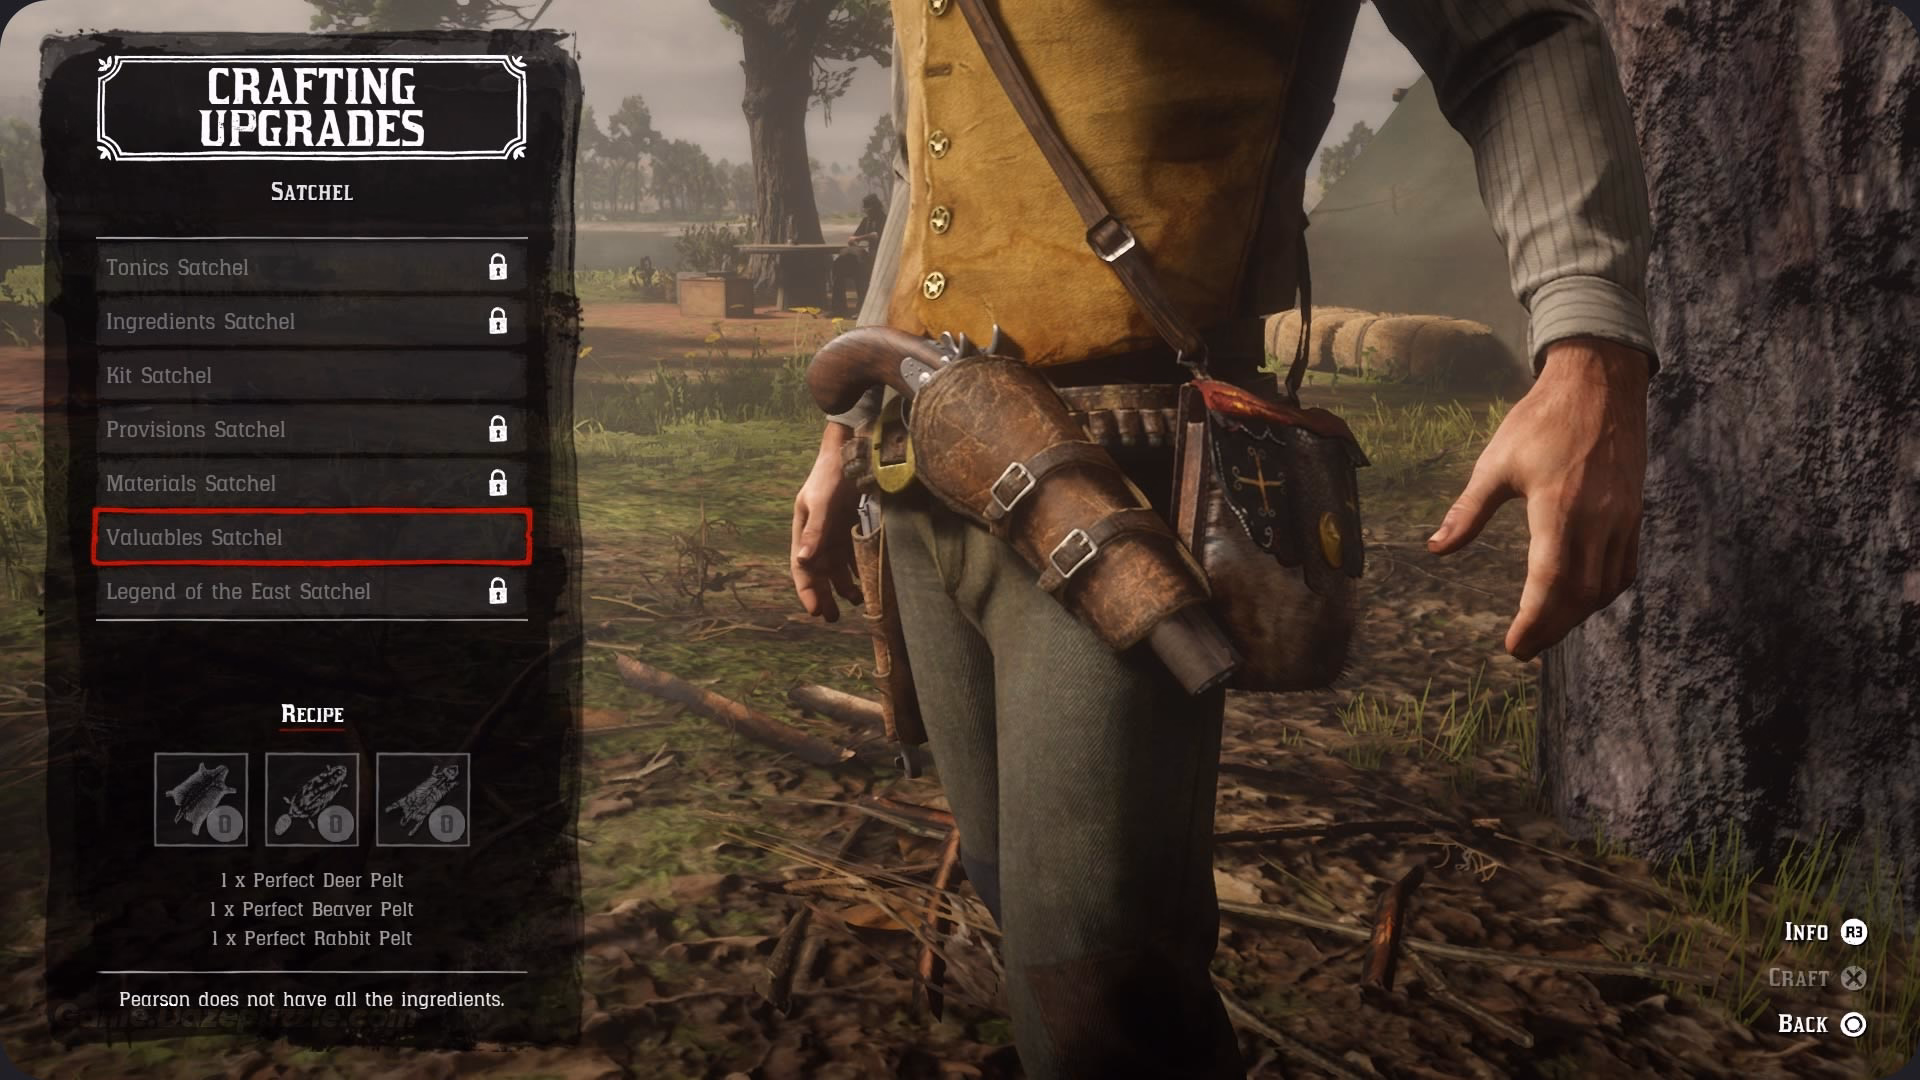
- Buy the Leather Working Tools: First things first head back to that camp ledger. You need to purchase the “Leather Working Tools” from the upgrade list. This gives Pearson the camp’s cook the ability to craft new items.
- Talk to Pearson: Go find Pearson in his cook’s wagon. You can access his crafting menu. You’ll see that to craft the final Legend of the East Satchel you first need to craft all the other satchels (Tonics Satchel Ingredients Satchel etc.).
- Start the Hunt: Each of these satchels requires a few different “Perfect” animal pelts. This is why you need to start this project early. From the moment you begin the game you should be on the lookout for three-star animals to hunt. Focus on getting the required pelts for each satchel one by one. It’s a grind but the payoff is the single best quality-of-life improvement in the entire game.
4. Become a Pro Hunter (Learn to Get Perfect Pelts)
Why this skill is essential: This skill is directly tied to the last point. You simply cannot get that amazing satchel without mastering the art of hunting. It’s also your main source of materials for crafting other gear and food. Getting a “Poor” pelt from a pristine three-star animal because you used the wrong weapon is one of the most frustrating feelings in RDR2. Learning to hunt correctly saves you time and immense frustration.
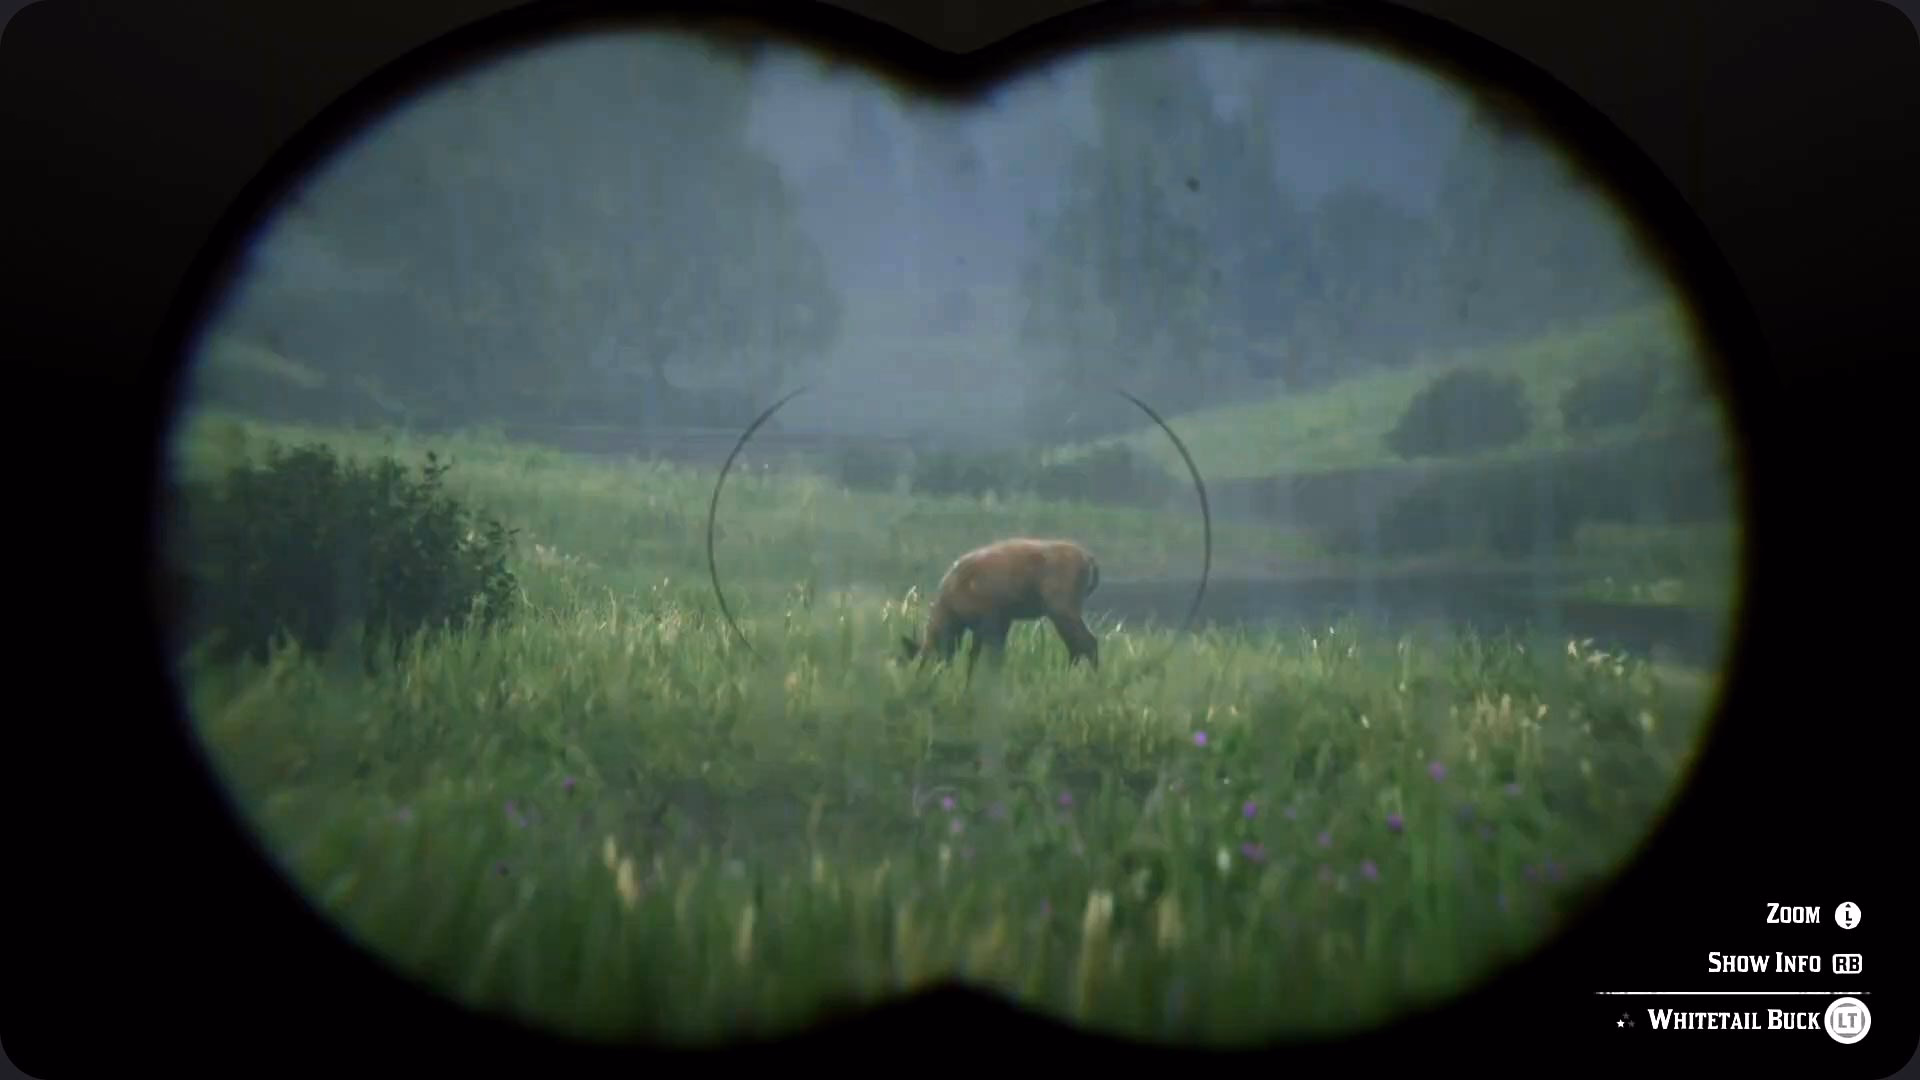
How to get it done: Hunting with precision is a science. Here’s the formula:
- Study Your Prey: Before you even think about shooting use your binoculars to spot an animal from a distance. Zoom in and you’ll see its name and a star rating in the bottom right corner. You are ONLY interested in three-star animals for crafting purposes.
- Use the Right Tool for the Job: This is where most people go wrong. Using a cannon to kill a fly doesn’t work and using a shotgun on a rabbit will obliterate its pelt. The game requires you to use the correct weapon class.
- Small animals (squirrels rats): Bow with Small Game Arrows.
- Medium animals (rabbits badgers raccoons): Varmint Rifle. This will be your best friend. Buy it as soon as you can.
- Large animals (deer pronghorn wolves): A good Rifle or a Bow with regular arrows.
- Massive animals (bears elk moose): A powerful Rifle like a Rolling Block or a Springfield Rifle.
- Aim for the Vitals: A perfect pelt requires a clean kill. This means a one-shot kill to a vital area. Your best bet is always a headshot. You can also aim for the heart. Use your Dead Eye ability to slow down time and “paint” a red X on the animal’s weak spot to guarantee a clean hit.
Follow these three steps every single time and you’ll be swimming in perfect pelts for Pearson.
5. Tame a Ghostly Super-Horse for Free
Why this horse is special: Your starting horse is… fine. It’s the Toyota Corolla of horses. It gets you from A to B. But the White Arabian is a free untamed supercar waiting for you in the mountains. It’s one of the fastest and best-handling horses in the entire game with elite stats across the board. Taming this beauty early on will make every single aspect of travel—chases races and simple exploration—dramatically better.
How to get it done: This is a little adventure in itself.
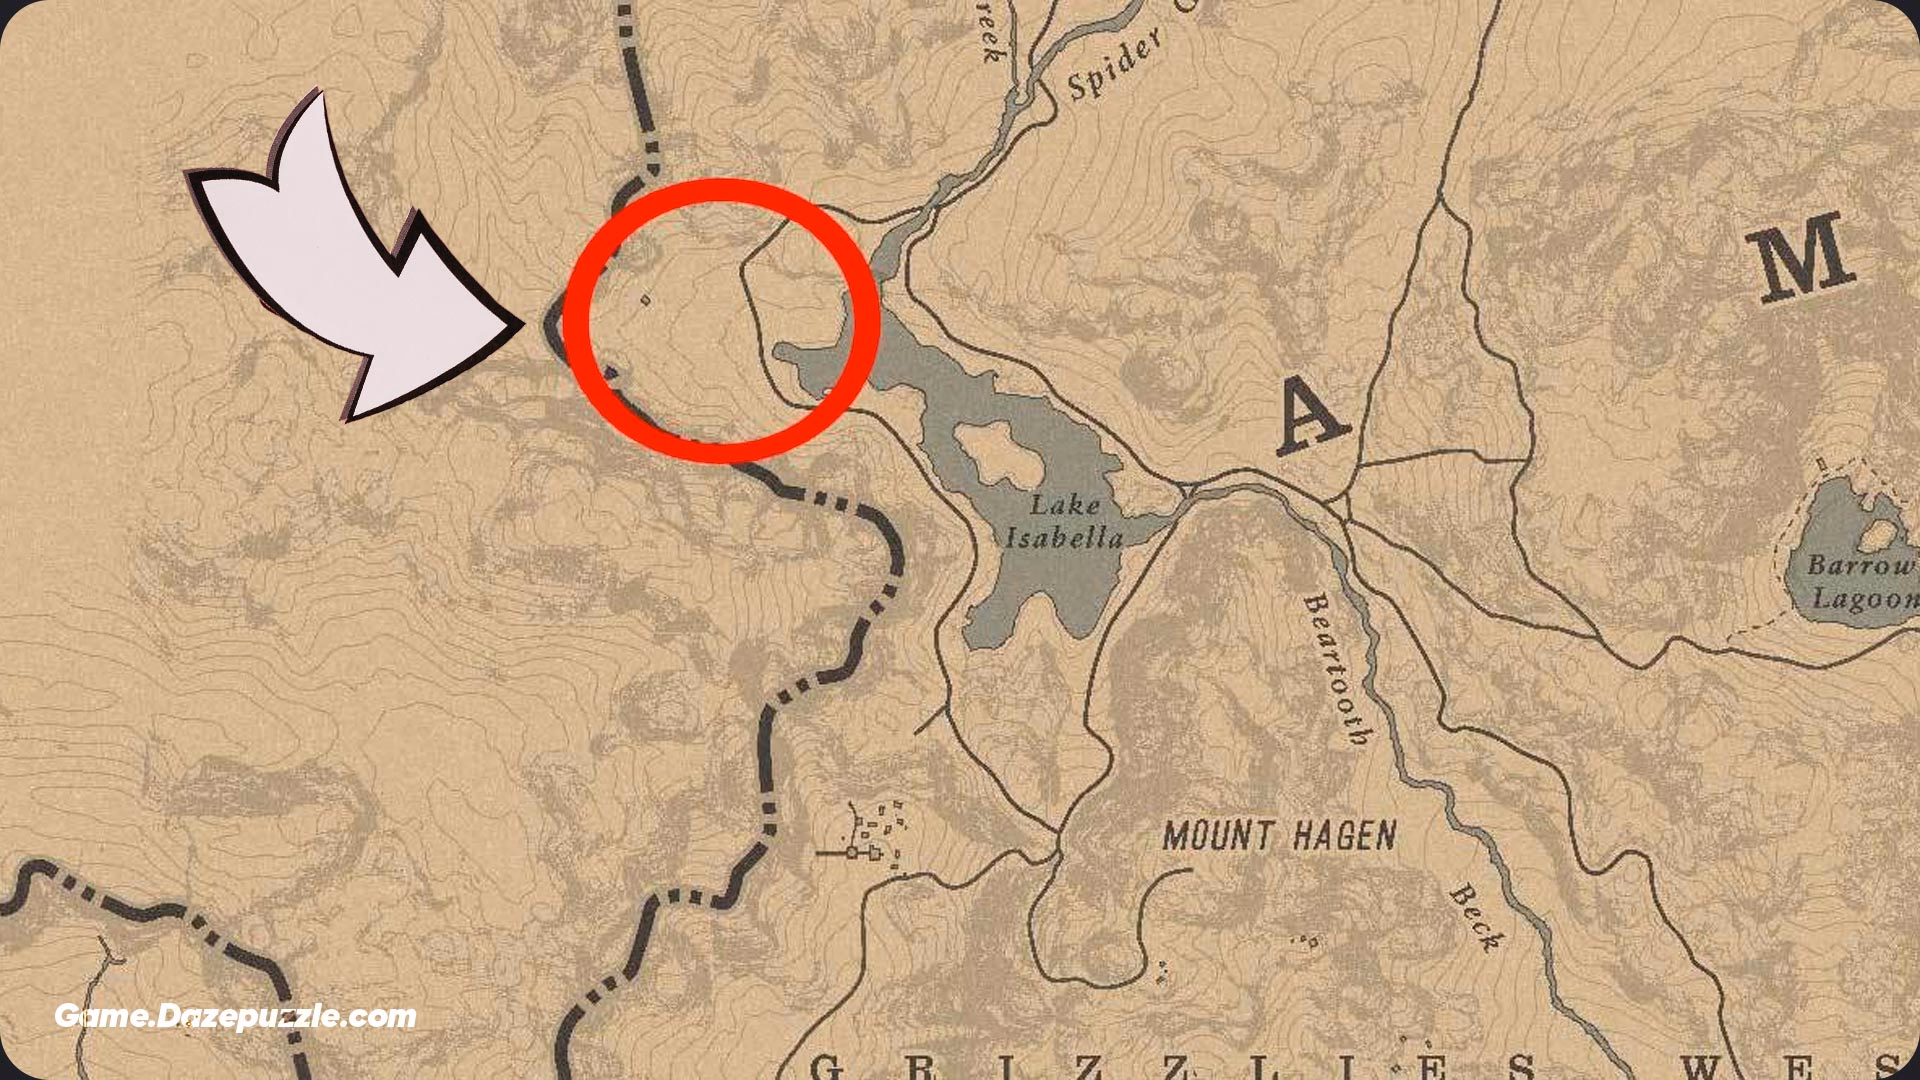
- Go North: Pack some warm clothes because you’re heading up into the snowy mountains. Look on your map for Lake Isabella located in the far northwest corner of Ambarino.
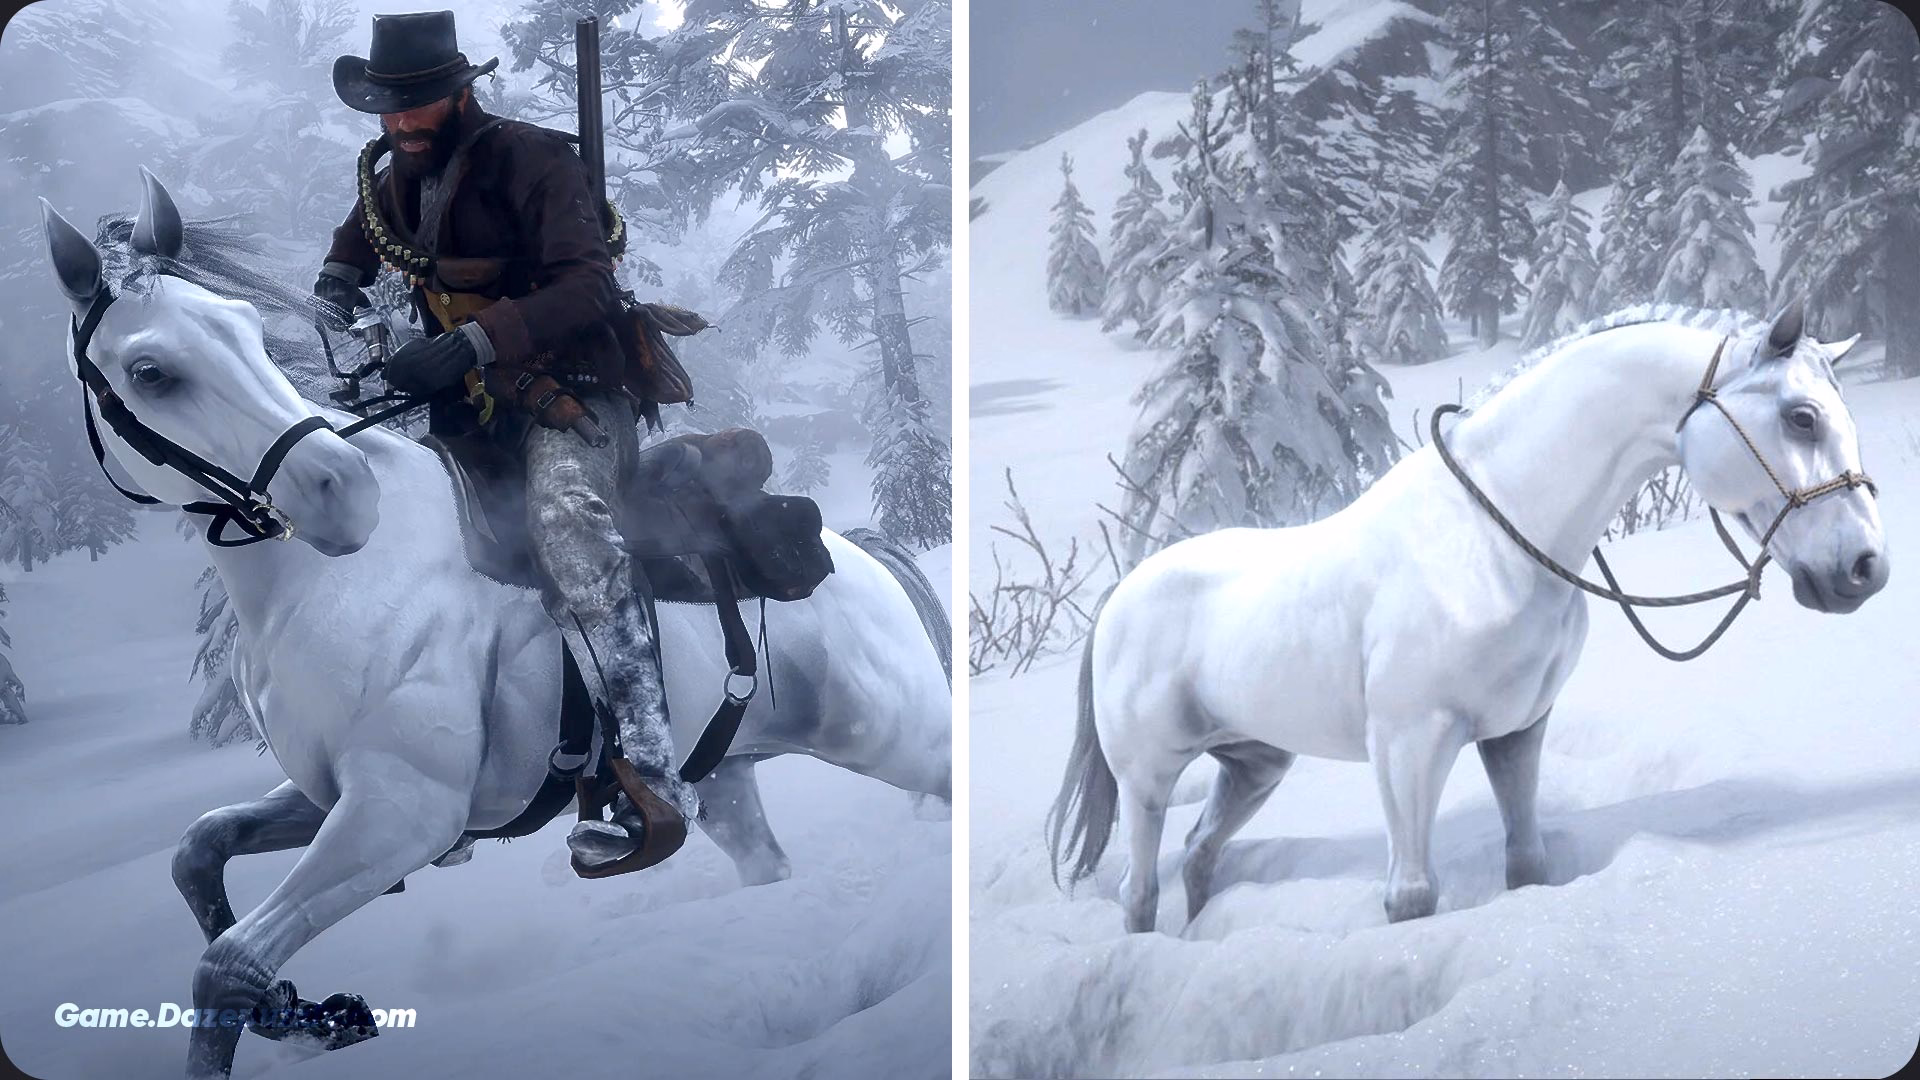
- Spot the Ghost: The White Arabian blends in with the snow but you’ll find it wandering on the western bank of the frozen lake. It’s a majestic sight.
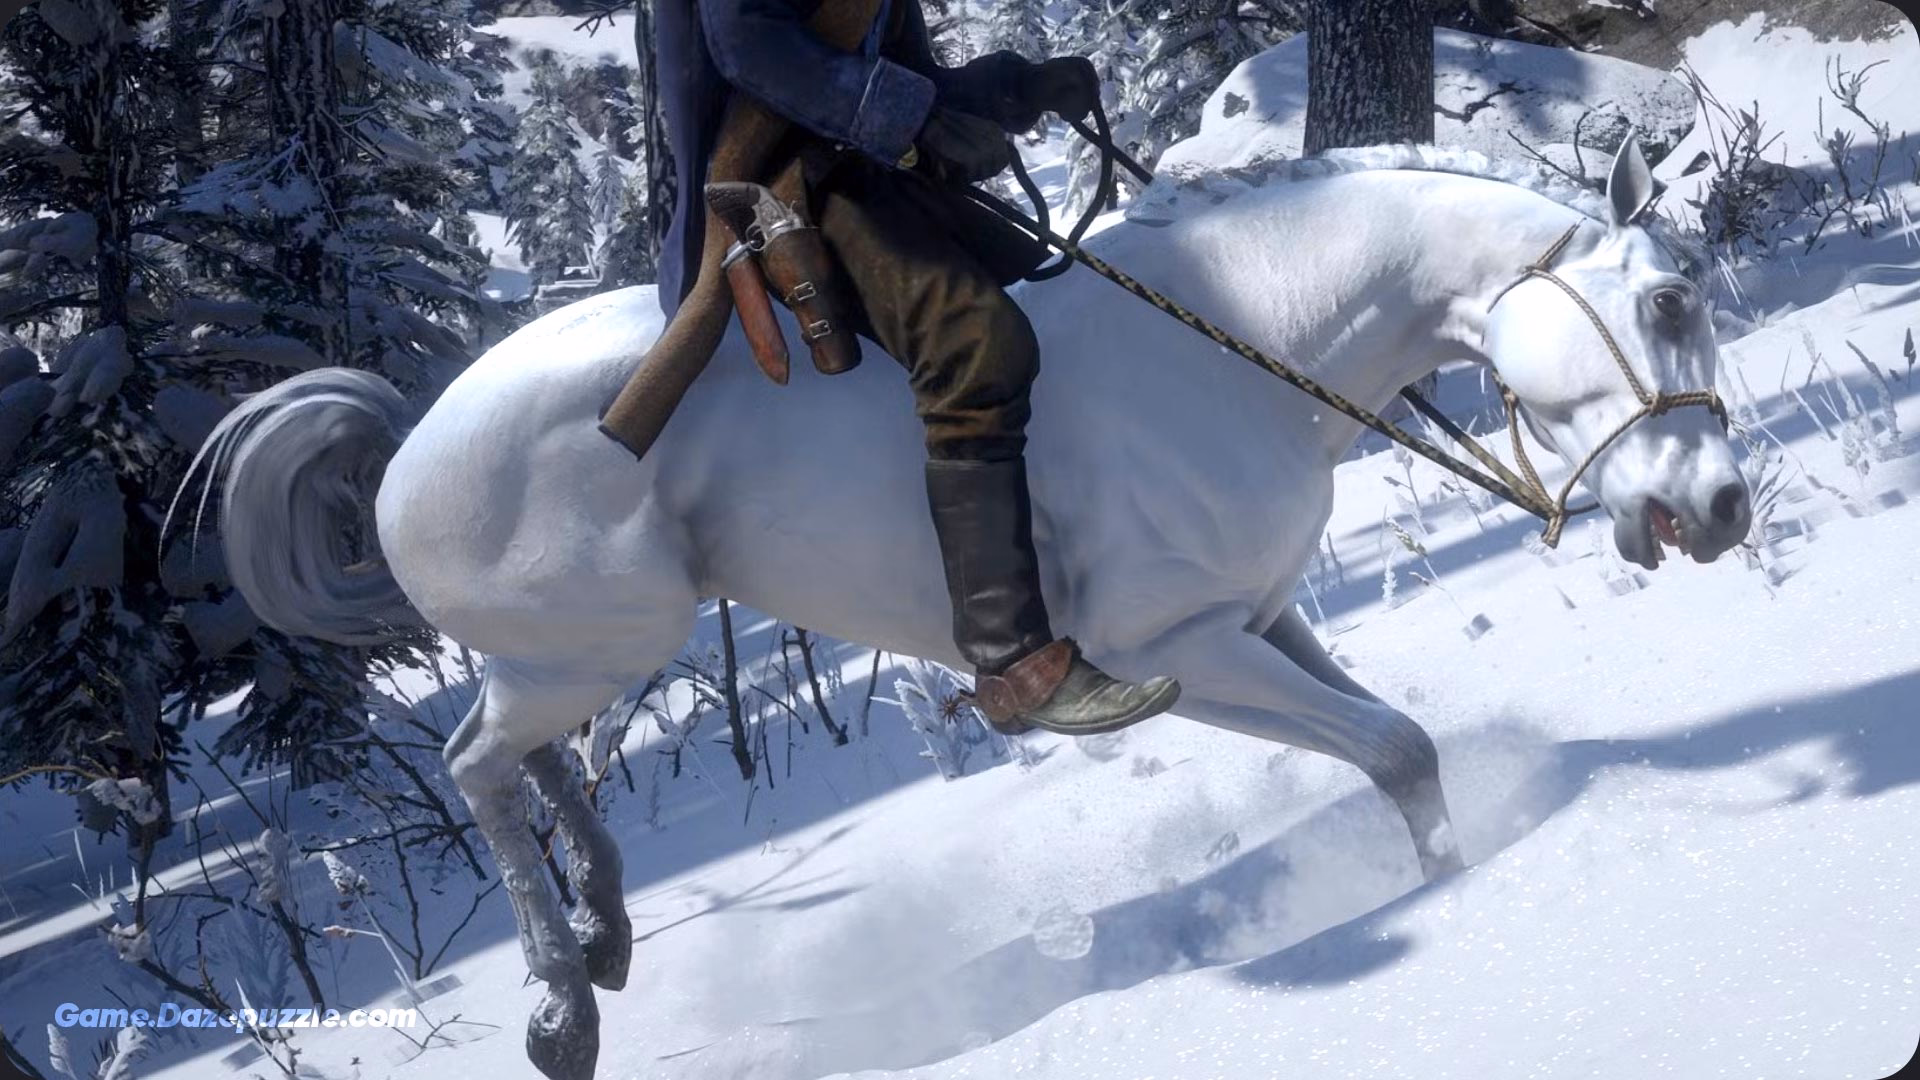
- The Taming Process: You can’t just run up to it.
- Get off your current horse and approach it on foot very slowly. Crouch to make yourself less of a threat.
- Hold down the “Target” button and repeatedly hit the “Calm” button as you inch closer. A bar in the bottom right will show you if it’s getting agitated. If it does stop moving until it calms down.
- Once you’re close enough you’ll get a prompt to mount it. Get ready.
- The horse will immediately start bucking wildly. To stay on you need to pull the left analog stick in the opposite direction the horse is bucking. If it lurches left pull right. If it leans forward pull back. Keep fighting it and eventually it will break. Congratulations you’ve just tamed a legendary beast. Slap your saddle on it and enjoy the ride.
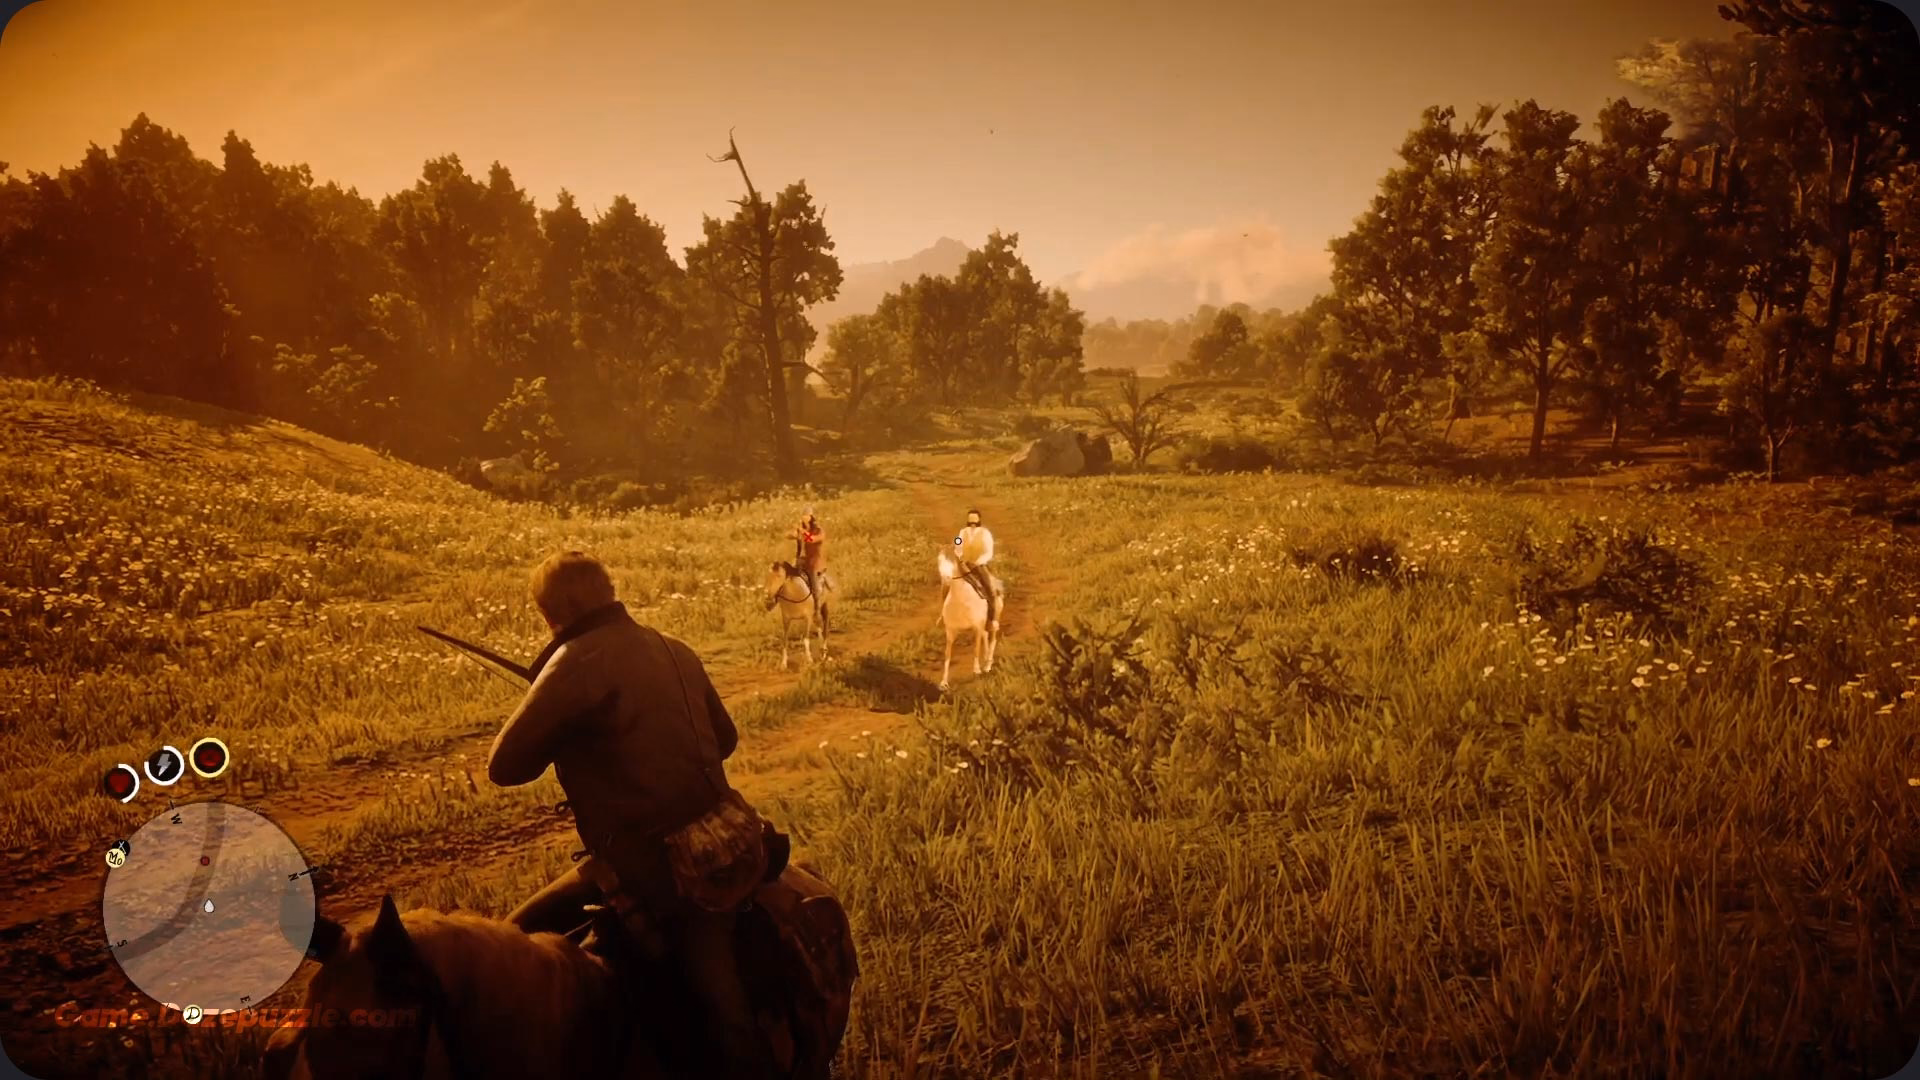
6. Find Cool Guns Instead of Buying Them
Why this is worth your time: Why spend your hard-earned cash on standard-issue cattleman revolvers when the world is littered with unique powerful and stylish weapons you can get for free? Finding these guns feels like a real discovery and they often have better stats and cool engravings you can’t get anywhere else.
How to get it done: Turn into a treasure hunter.
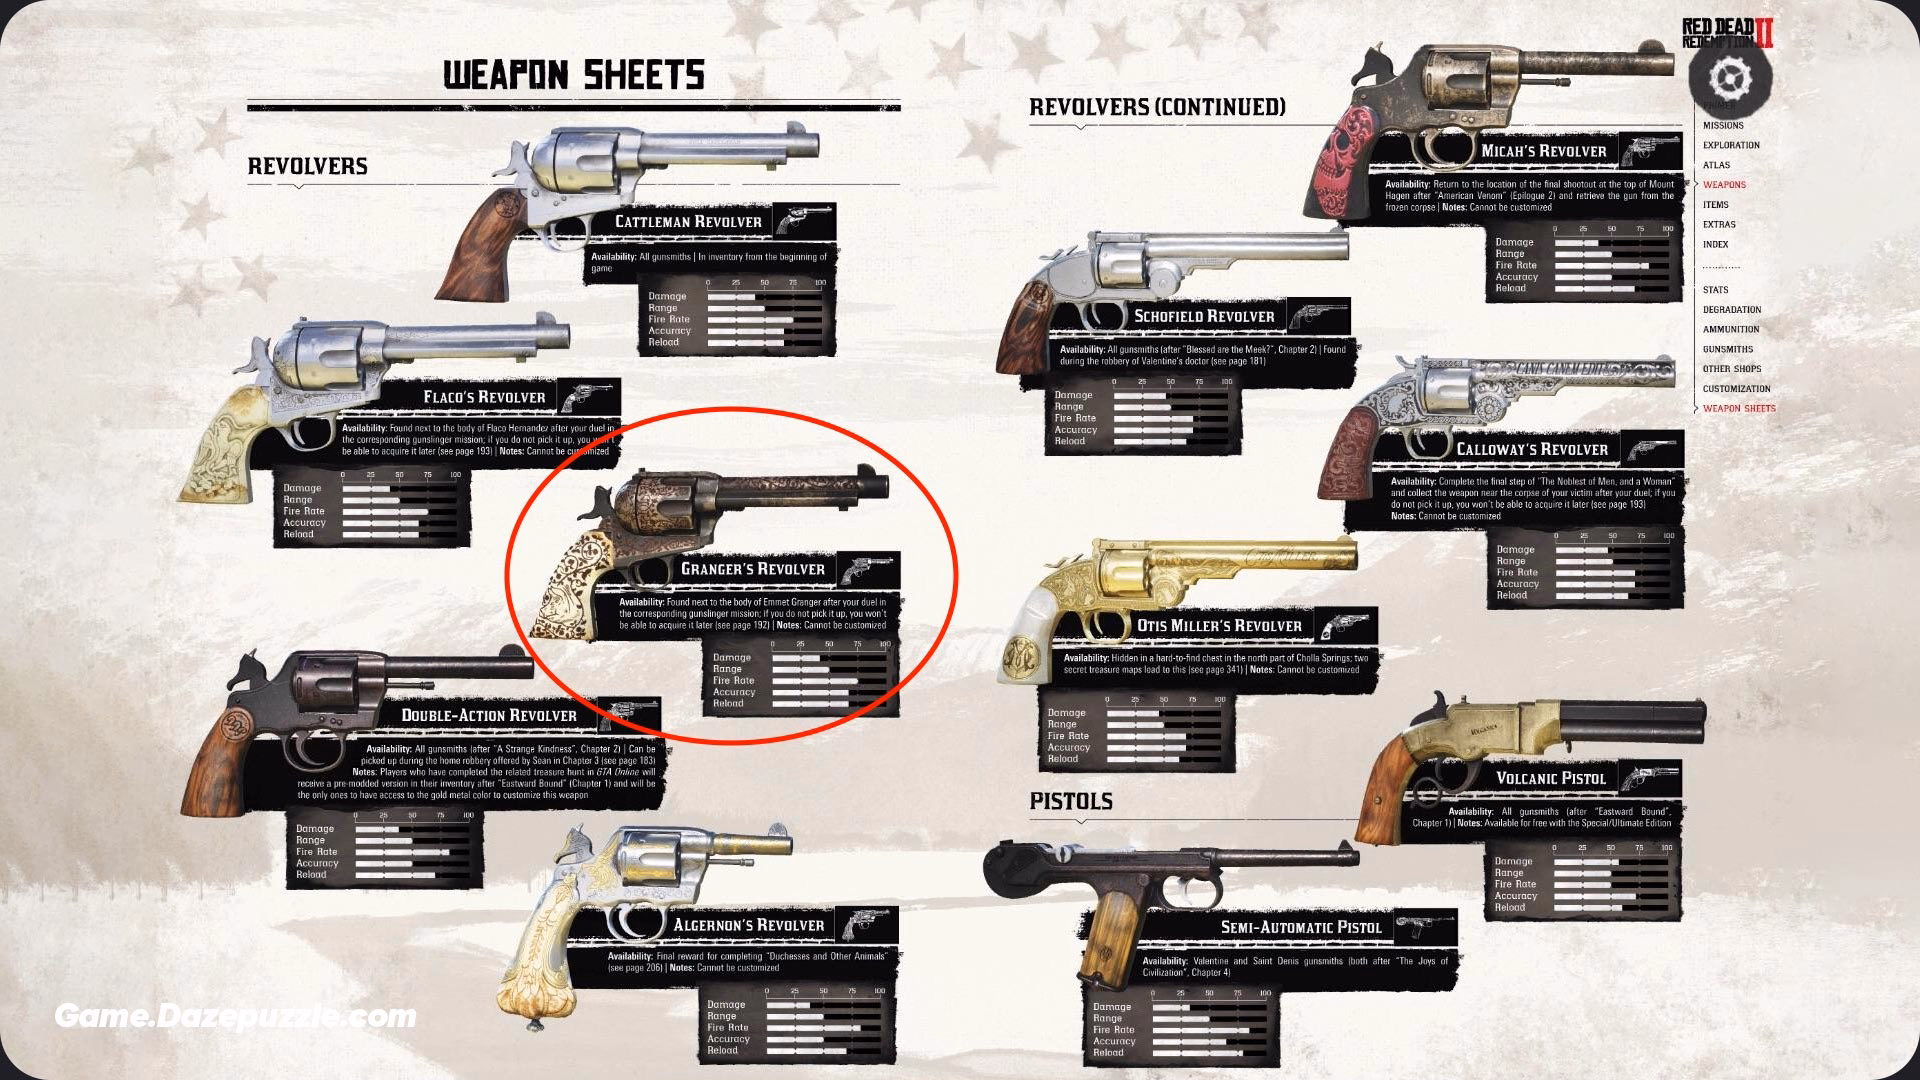
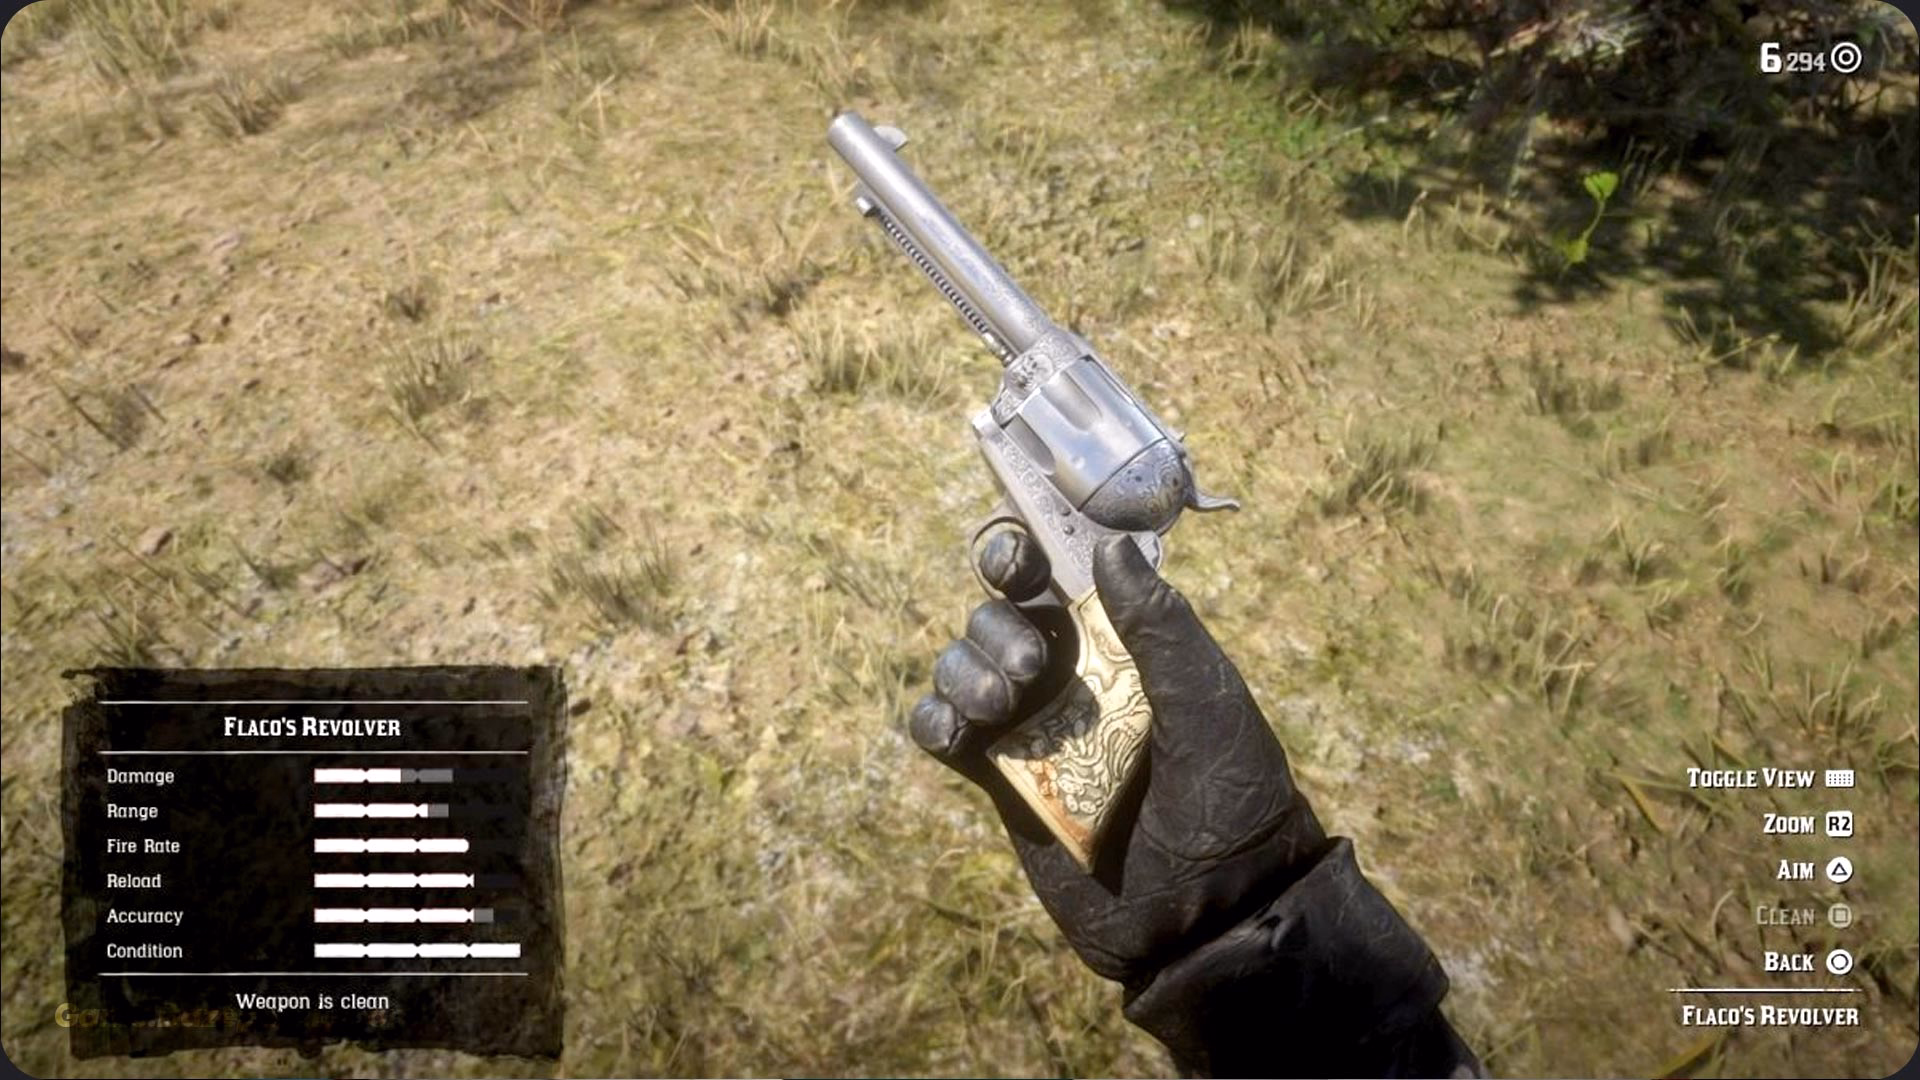
- The Gunslinger Mission: This is the best place to start. In one of the saloons in Valentine (the smaller one not the main one) you’ll find a writer talking to a bartender. This starts the mission “The Noblest of Men and a Woman.” He’ll give you photographs of several legendary gunslingers. Hunt them down challenge them to a duel and you can take their unique engraved weapons. Flaco’s Revolver and Granger’s Revolver are two excellent early-game guns you can get this way.
- The Rare Shotgun: There’s a hermit living in a cabin far to the north of Annesburg. He’s not friendly. If you deal with him you can take his “Rare Shotgun” which is incredibly powerful and has a unique dark wood finish.
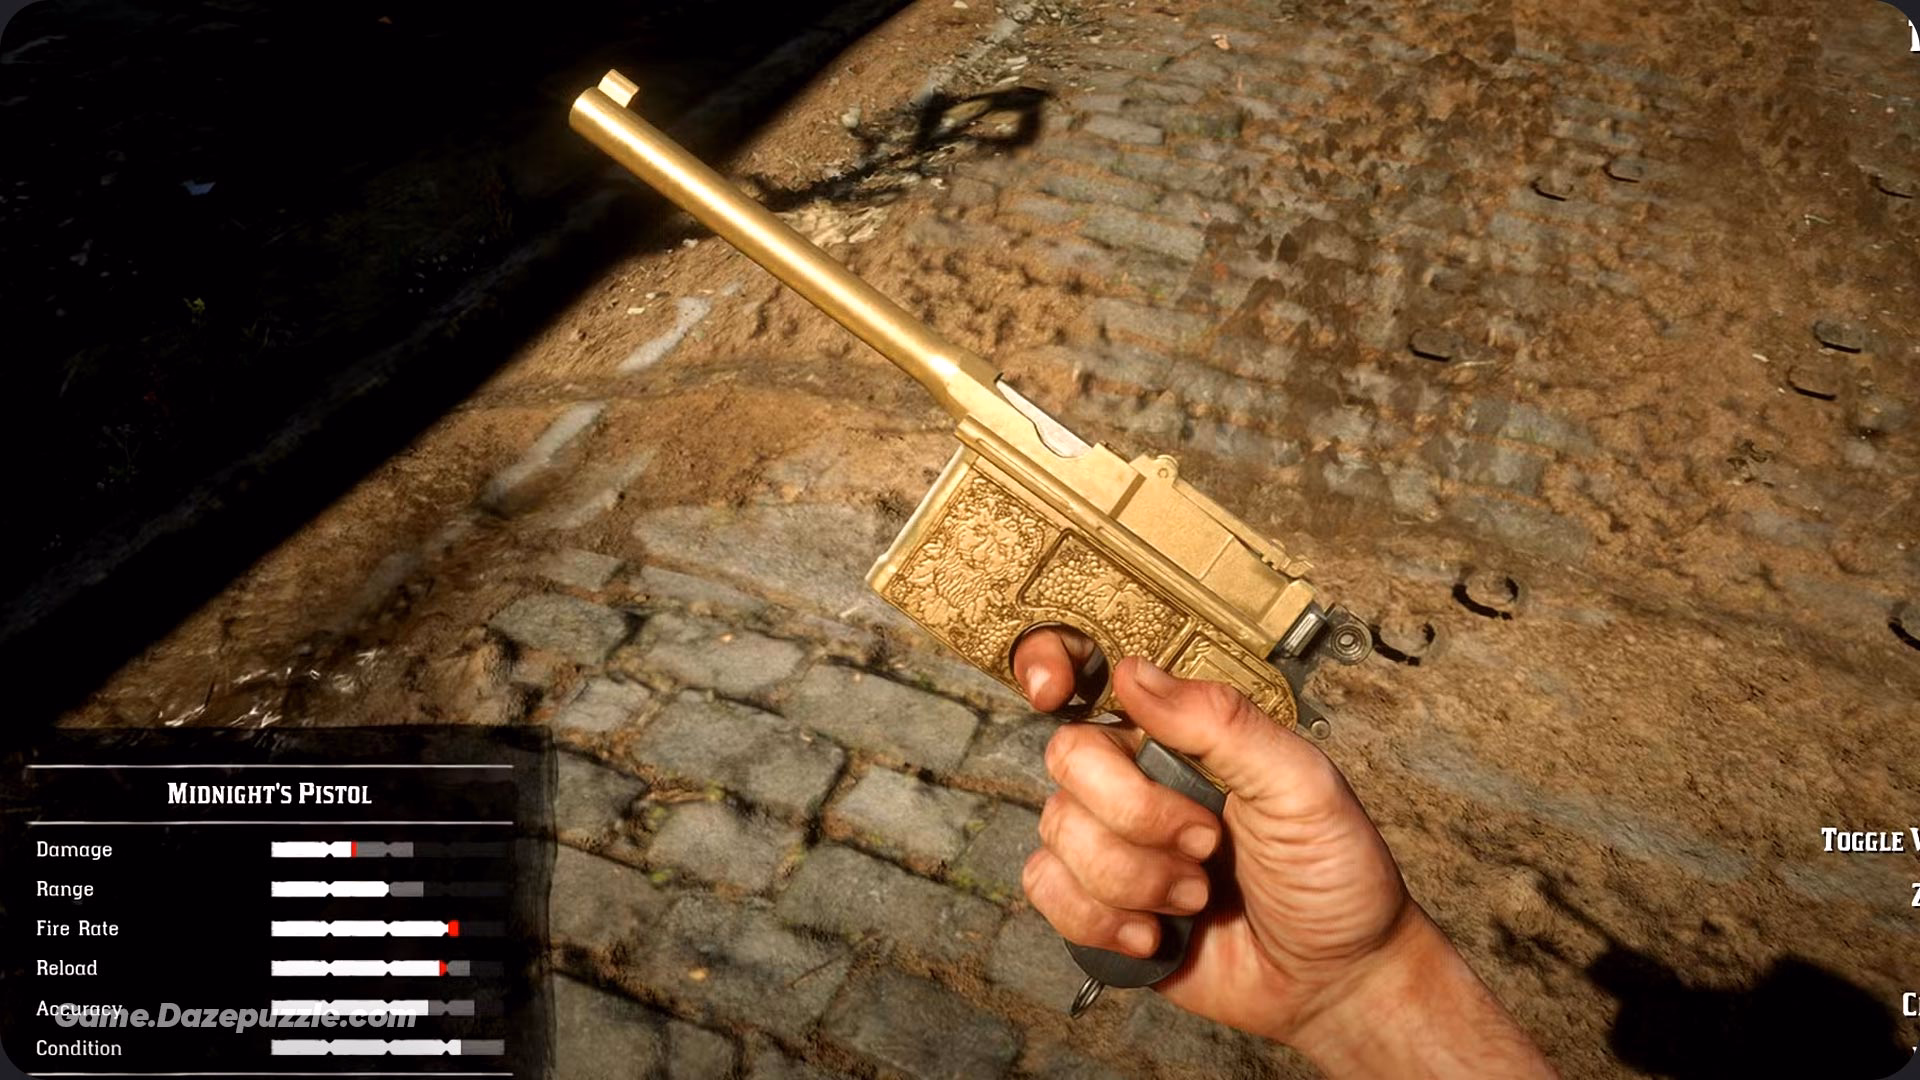
- Midnight’s Pistol: Another gunslinger pistol you can get from the same questline Billy Midnight’s Mauser Pistol is a rare rapid-fire pistol that’s a blast to use.
7. Start the Weird Stranger Mission: “Geology for Beginners”
Why this mission is important: This isn’t just another side quest. It’s a breadcrumb trail that encourages you to explore every nook and cranny of the massive world map. It forces you to look at your surroundings differently searching for oddities carved into rock faces. It’s a fantastic motivator for organic exploration and the reward at the end is both unique and deeply tied to the game’s stranger mysteries.
How to get it done:
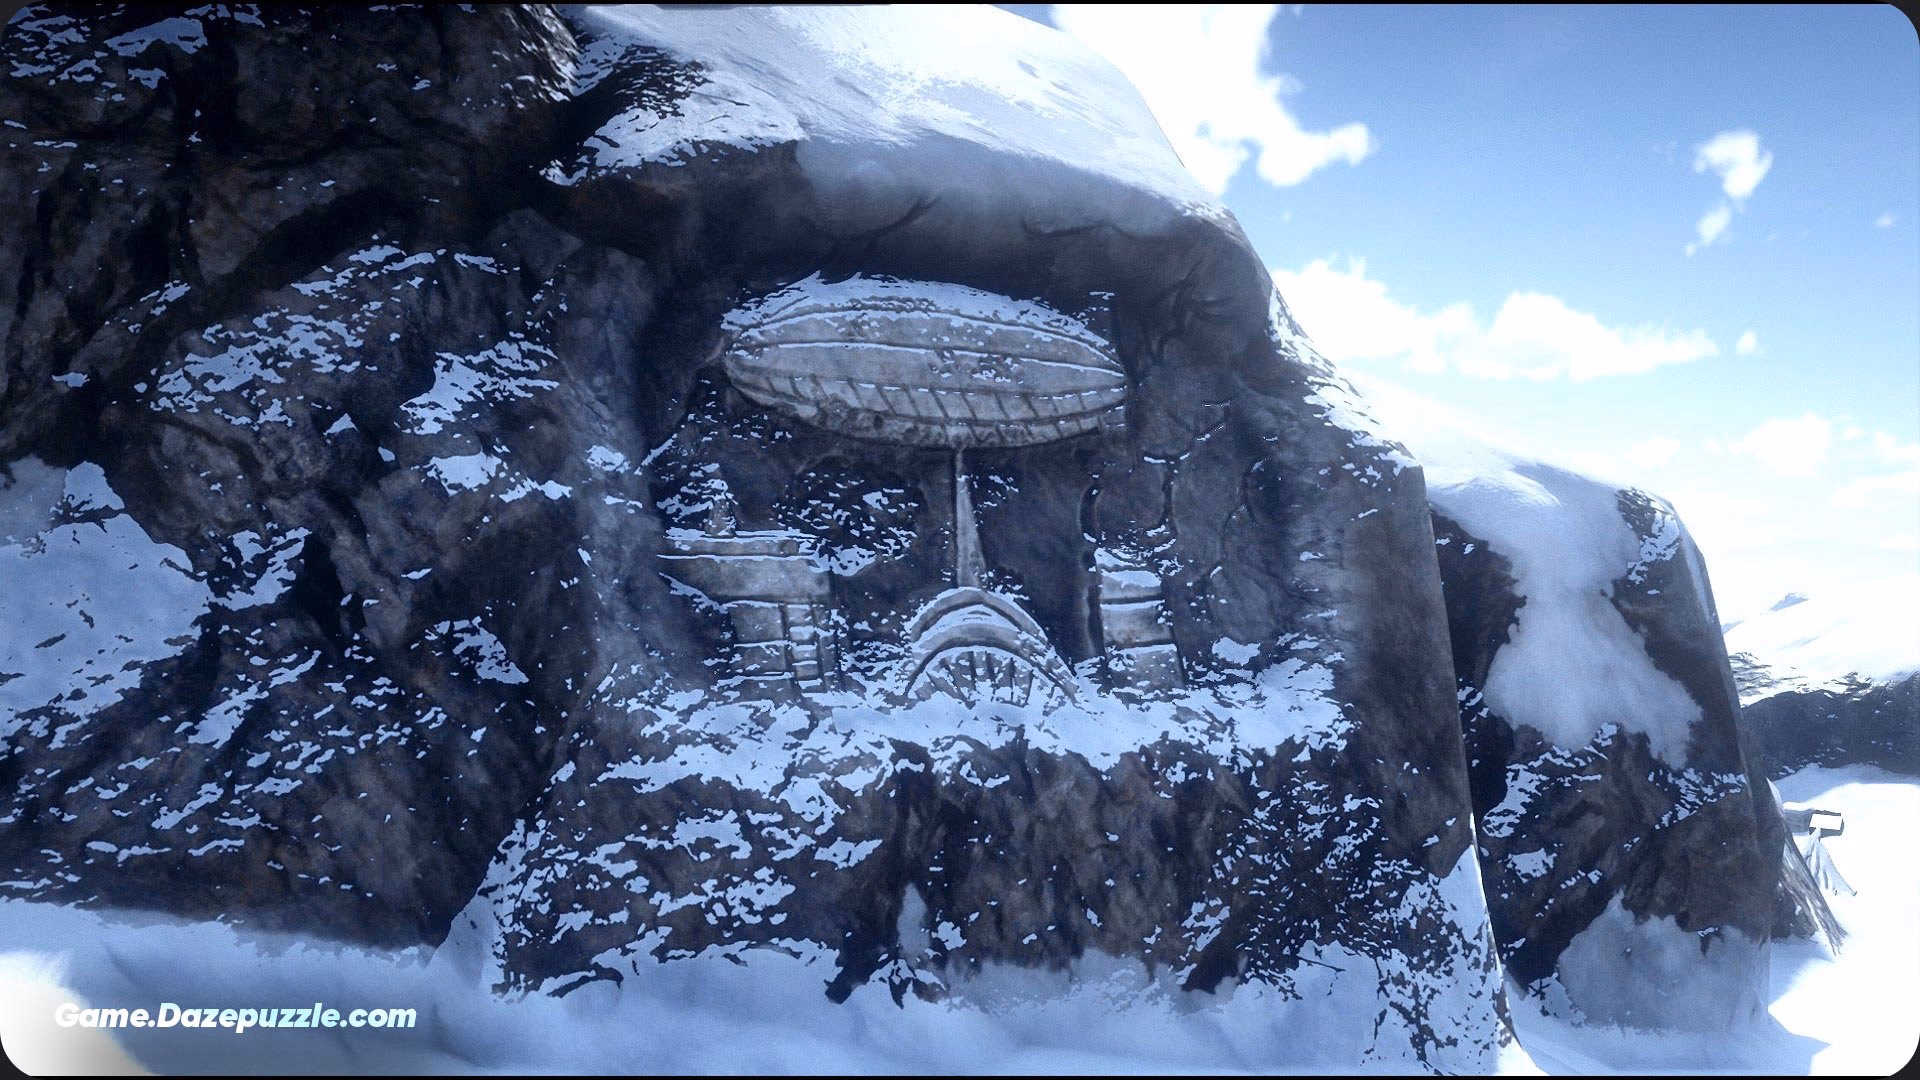
- Find the Strange Cabin: Head to a small cabin on a plateau northwest of Strawberry. You’ll find a very peculiar man named Francis Sinclair. He’s… odd. He speaks in a strange accent and seems out of place.
- Accept the Quest: He will ask you to find ten rock carvings scattered across the world. He’ll give you a map but it’s not super precise.
- Look Everywhere: This is the fun part. As you play the main story and explore you’ll start spotting these large intricate carvings on cliff walls and mountainsides. Keep your eyes peeled. Finding one feels like solving a little puzzle. Don’t worry about finding them all at once just keep the quest active and you’ll stumble upon them naturally.
8. Learn How to Deal with the Law
Why you need to care about this: Getting a bounty on your head in RDR2 is more than just an annoyance; it can seriously derail your game. When a bounty gets high enough the game will send relentless bounty hunters after you often with dogs and at the worst possible moments. They can ambush you during a mission or while you’re tracking a legendary animal. Learning to manage your relationship with the law is a core survival skill.
Read More: Red Dead Redemption 2 Switch 2 Port and Next-Gen Upgrade Rumors Ignite Fan Hopes
How to get it done: You have two options: be discreet or be rich.
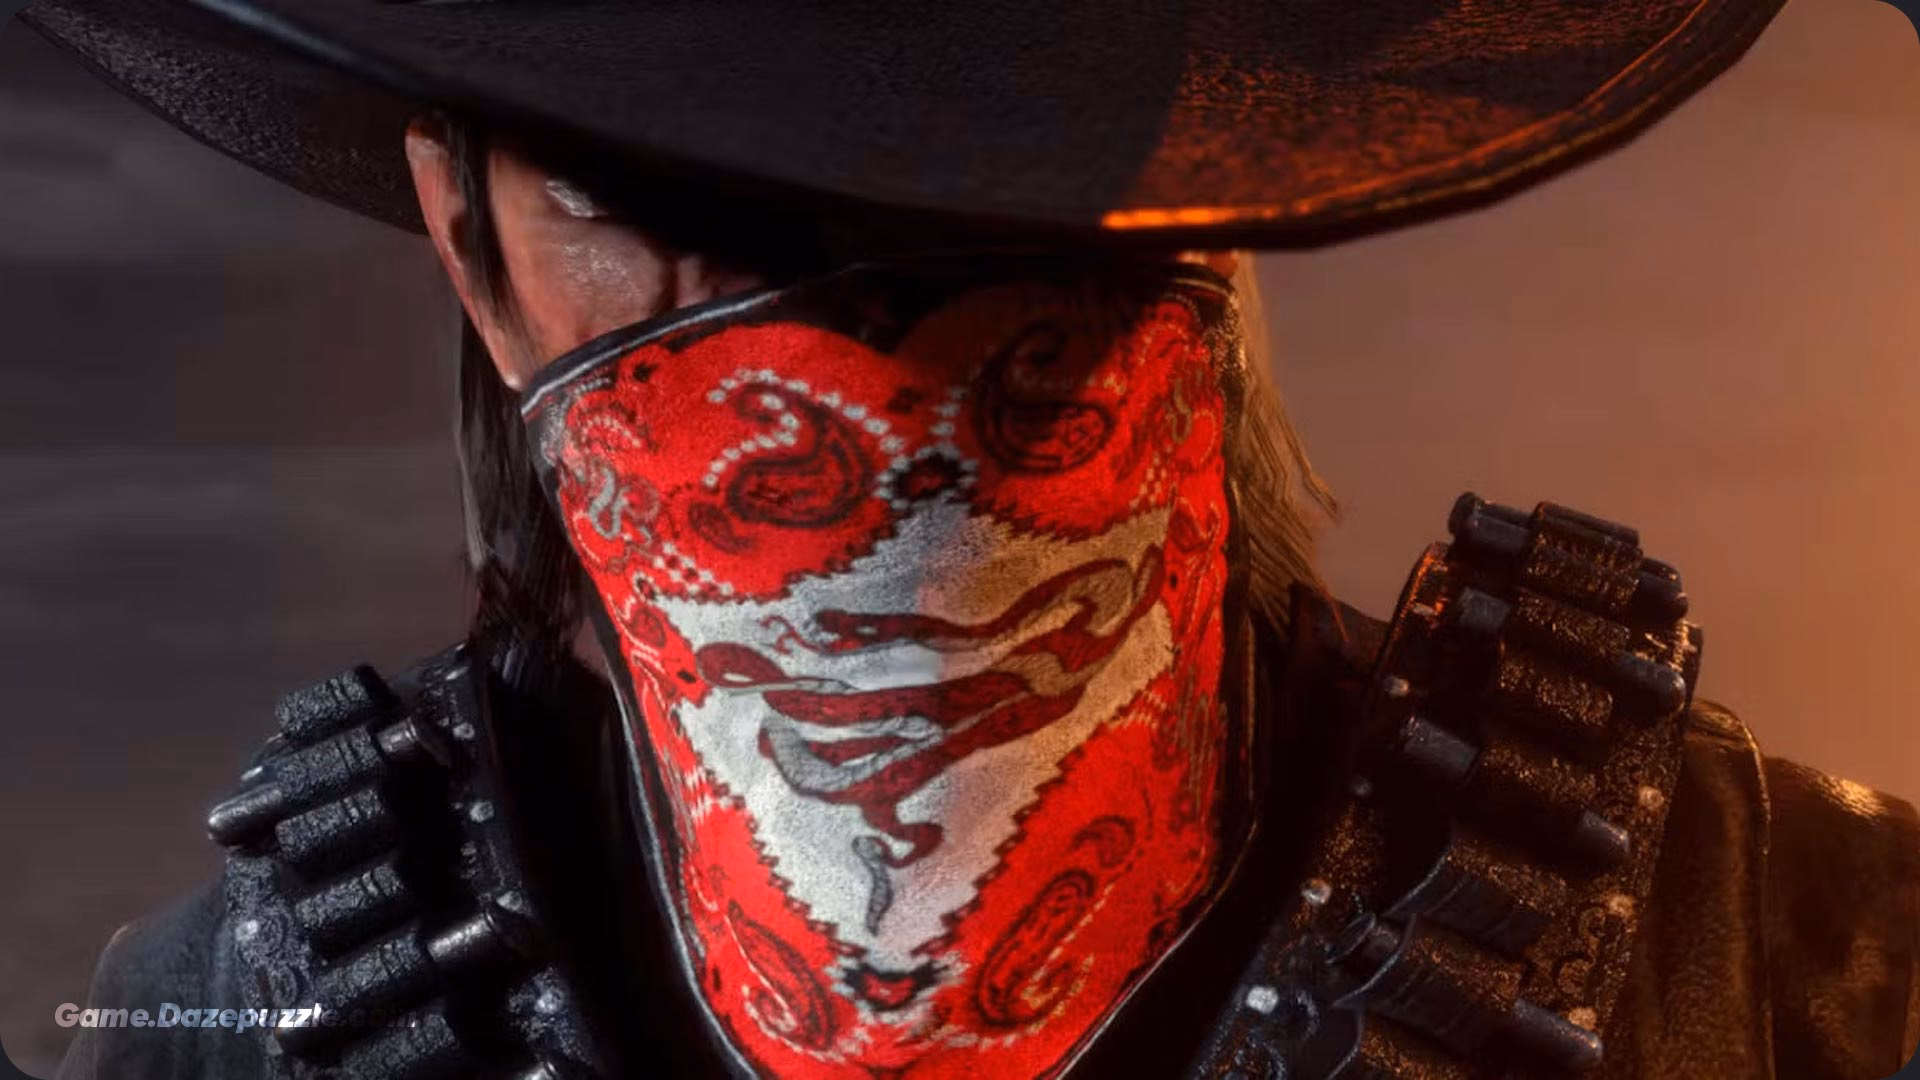
- The Mask is Your Friend: Before you commit a crime put on your bandana. You can access it from your item wheel. If no one recognizes you and you escape the search area before the law shows up you’ll often get away with no bounty.
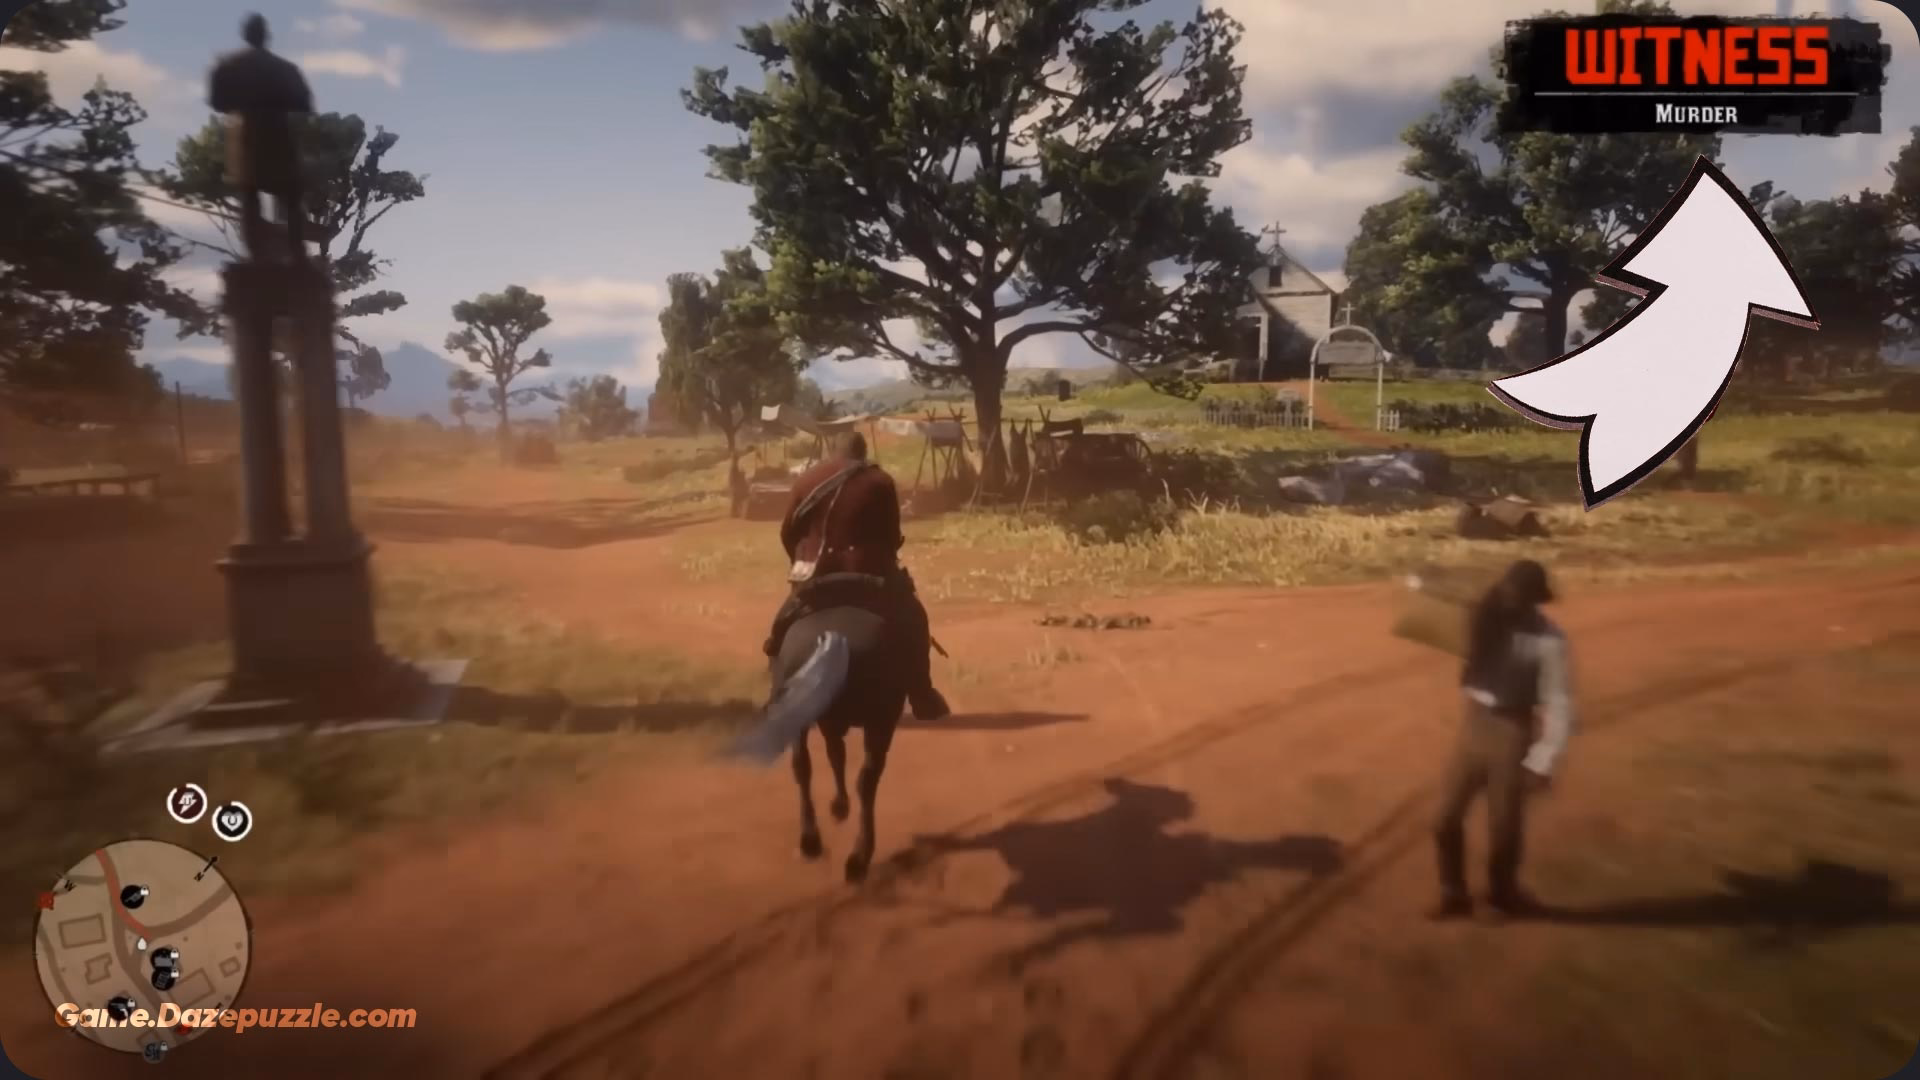
- The Witness System: If someone sees you commit a crime they will be marked as a “Witness” on your minimap. You have a short window to deal with them. You can either threaten them to keep quiet or… well you’re an outlaw. Just know that more crime can attract more witnesses.
- Pay Your Dues: If you do get a bounty don’t let it stack up. Just ride to the nearest post office (located at train stations) and pay it off. A $10 bounty is easy to pay. A $300 bounty will drain your wallet and make entire states hostile towards you.
9. Don’t Ignore Your Ability Cards
Why this system is so important: The game does a poor job of explaining this but Ability Cards are your character’s “build.” They are passive and active perks that can dramatically change your effectiveness in combat. Ignoring them is like playing with one hand tied behind your back. A good card loadout can make you a tanky dead-shot machine while a bad one will leave you chugging health tonics every five seconds.
How to get it done:
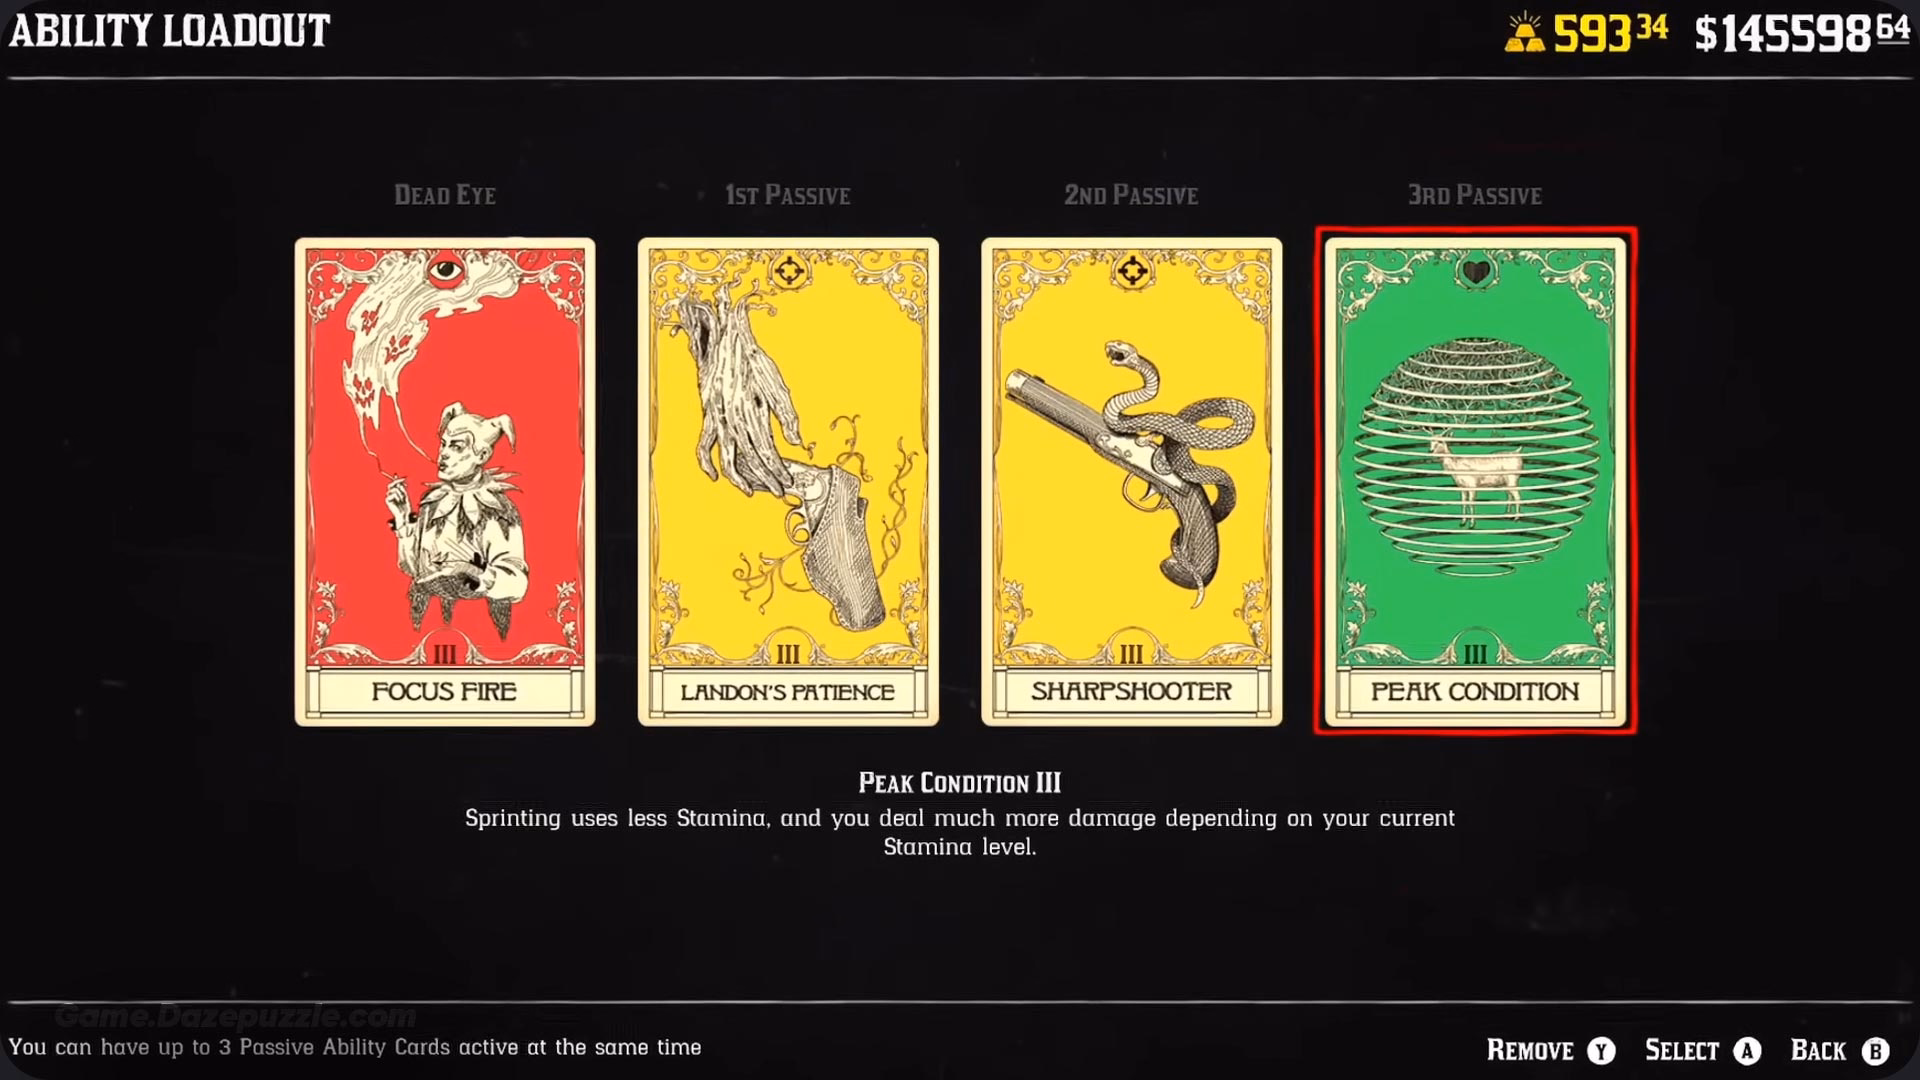
- Open the Menu: Go to your ability loadout screen. You have one slot for a Dead Eye card and three slots for Passive cards.
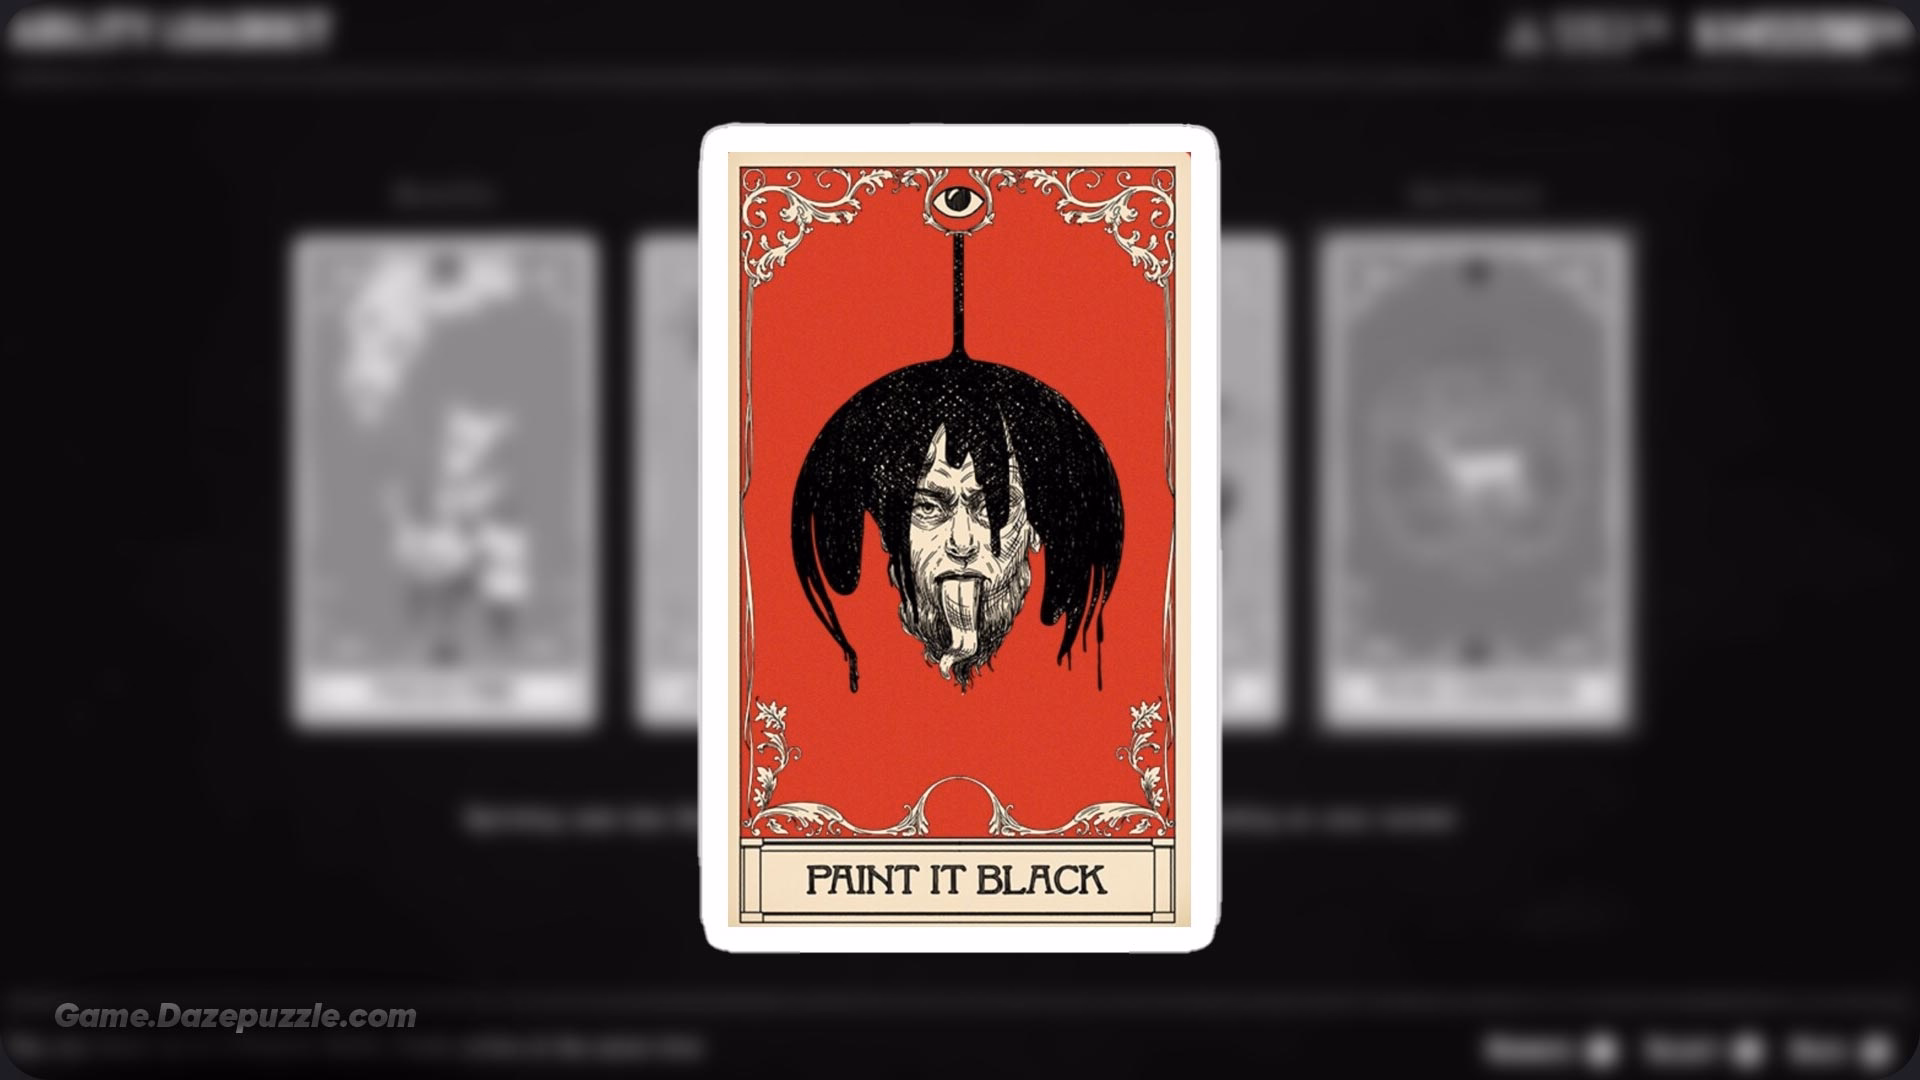
- Choose a Good Dead Eye Card: The default card is fine but “Paint it Black” is the undisputed king for beginners. It lets you “paint” targets on enemies in Dead Eye guaranteeing your shots will land. It’s perfect for taking out multiple enemies or hitting the vitals on a fast-moving animal.
- Create a Synergy with Passive Cards: Don’t just pick random cards. Think about how they work together. Here’s a great starting build:
- Eye for an Eye: Headshots restore a little bit of your Dead Eye meter. This pairs perfectly with Paint it Black encouraging you to aim for the head.
- Strange Medicine: You regain a small amount of health whenever you deal damage. This is a lifesaver in long fights.
- Cold Blooded: You regain a small amount of health for a few seconds after getting a kill. Stacking this with Strange Medicine makes you surprisingly tough to kill.
10. Stop Buying Medicine, Make Your Own
Why this is the smart play: Being a true frontiersman is about living off the land not the General Store catalogue. Buying health tonics and provisions costs money that is better spent on guns and upgrades. The world of RDR2 is a living pharmacy overflowing with plants you can craft into powerful items for free. It’s about becoming self-sufficient.
How to get it done: It’s as simple as picking flowers.
- Eagle Eye is Your Best Friend: As you’re riding around click your Eagle Eye ability. The world will turn grey but important things like animals and plants will glow.
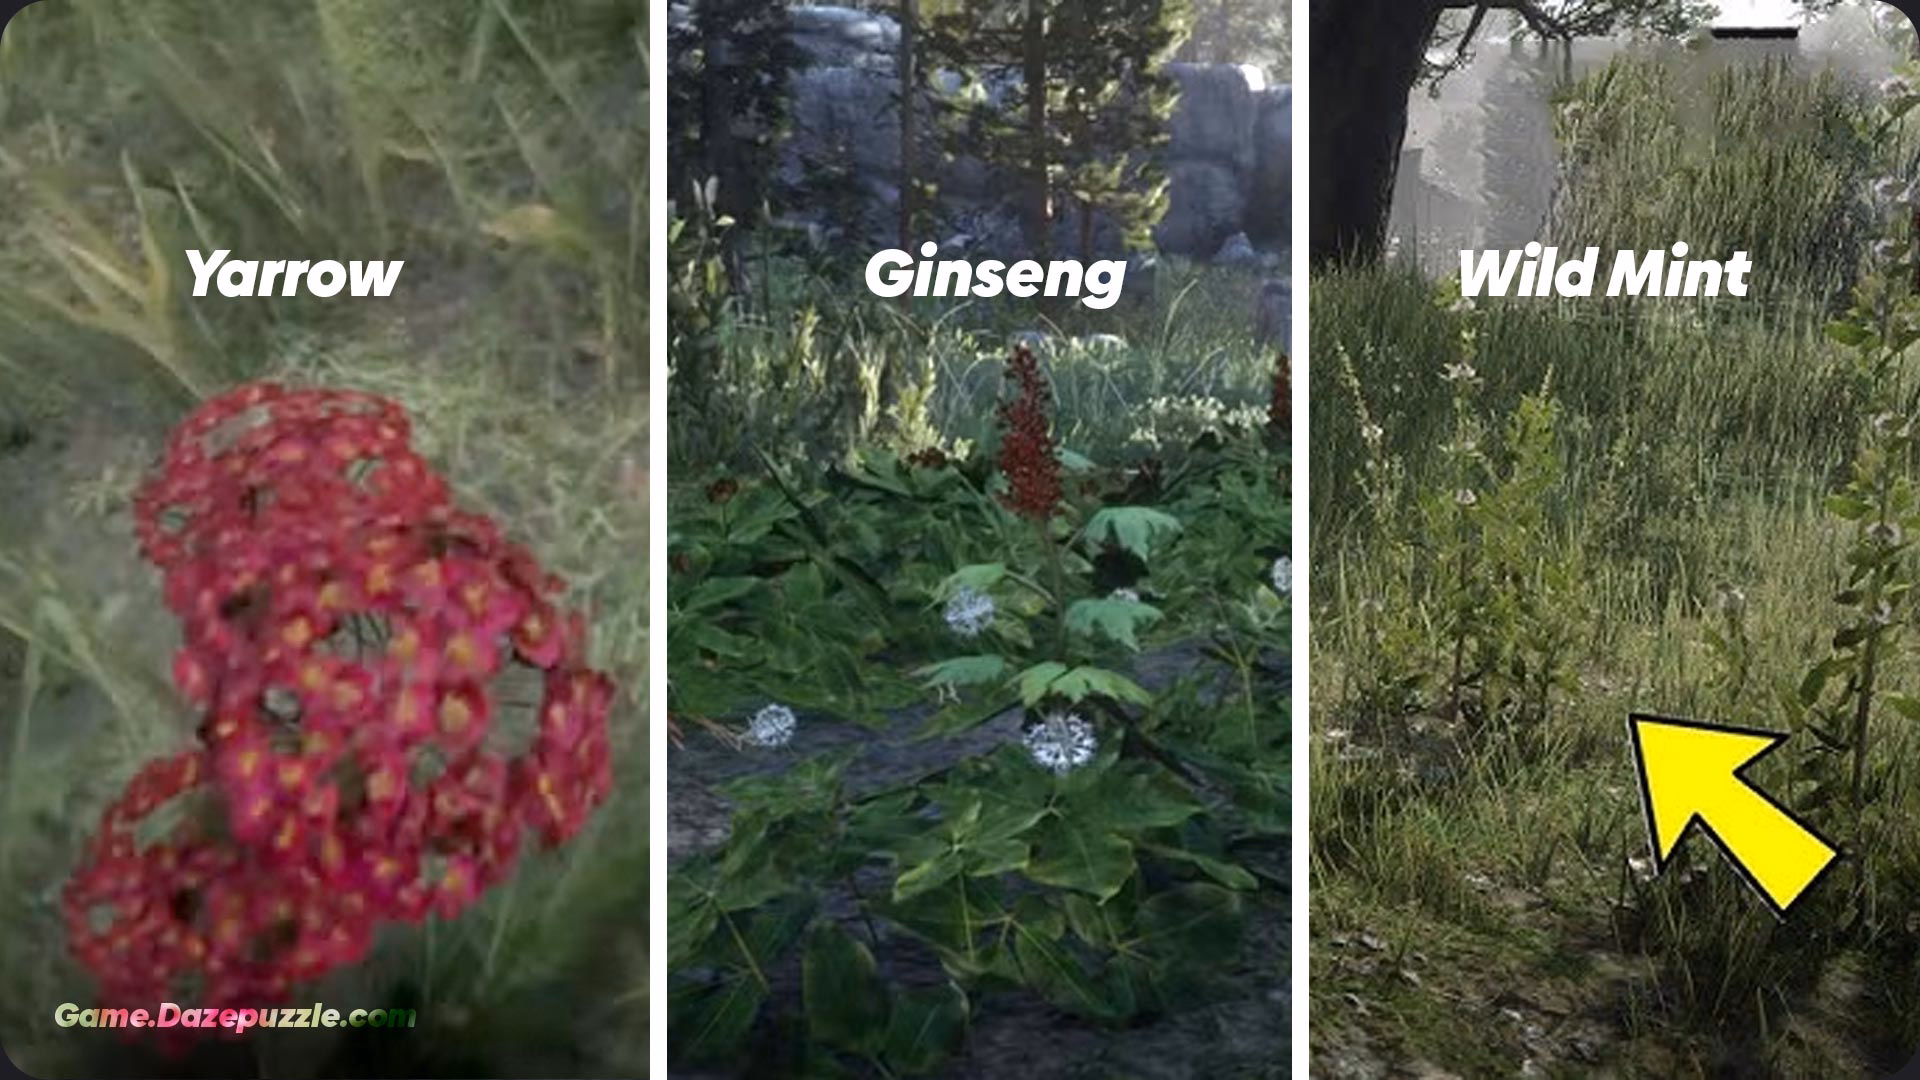
- Learn Your Plants: You don’t need a botany degree. Just remember these basics:
- Yarrow: The red fluffy-looking plant. It’s for your Health Core.
- Ginseng: The leafy plant with little red berries. Also for your Health Core.
- Wild Mint: A tall leafy plant usually near water. This is for your Dead Eye core.
- Oregano: A common herb. Good for your Stamina Core.
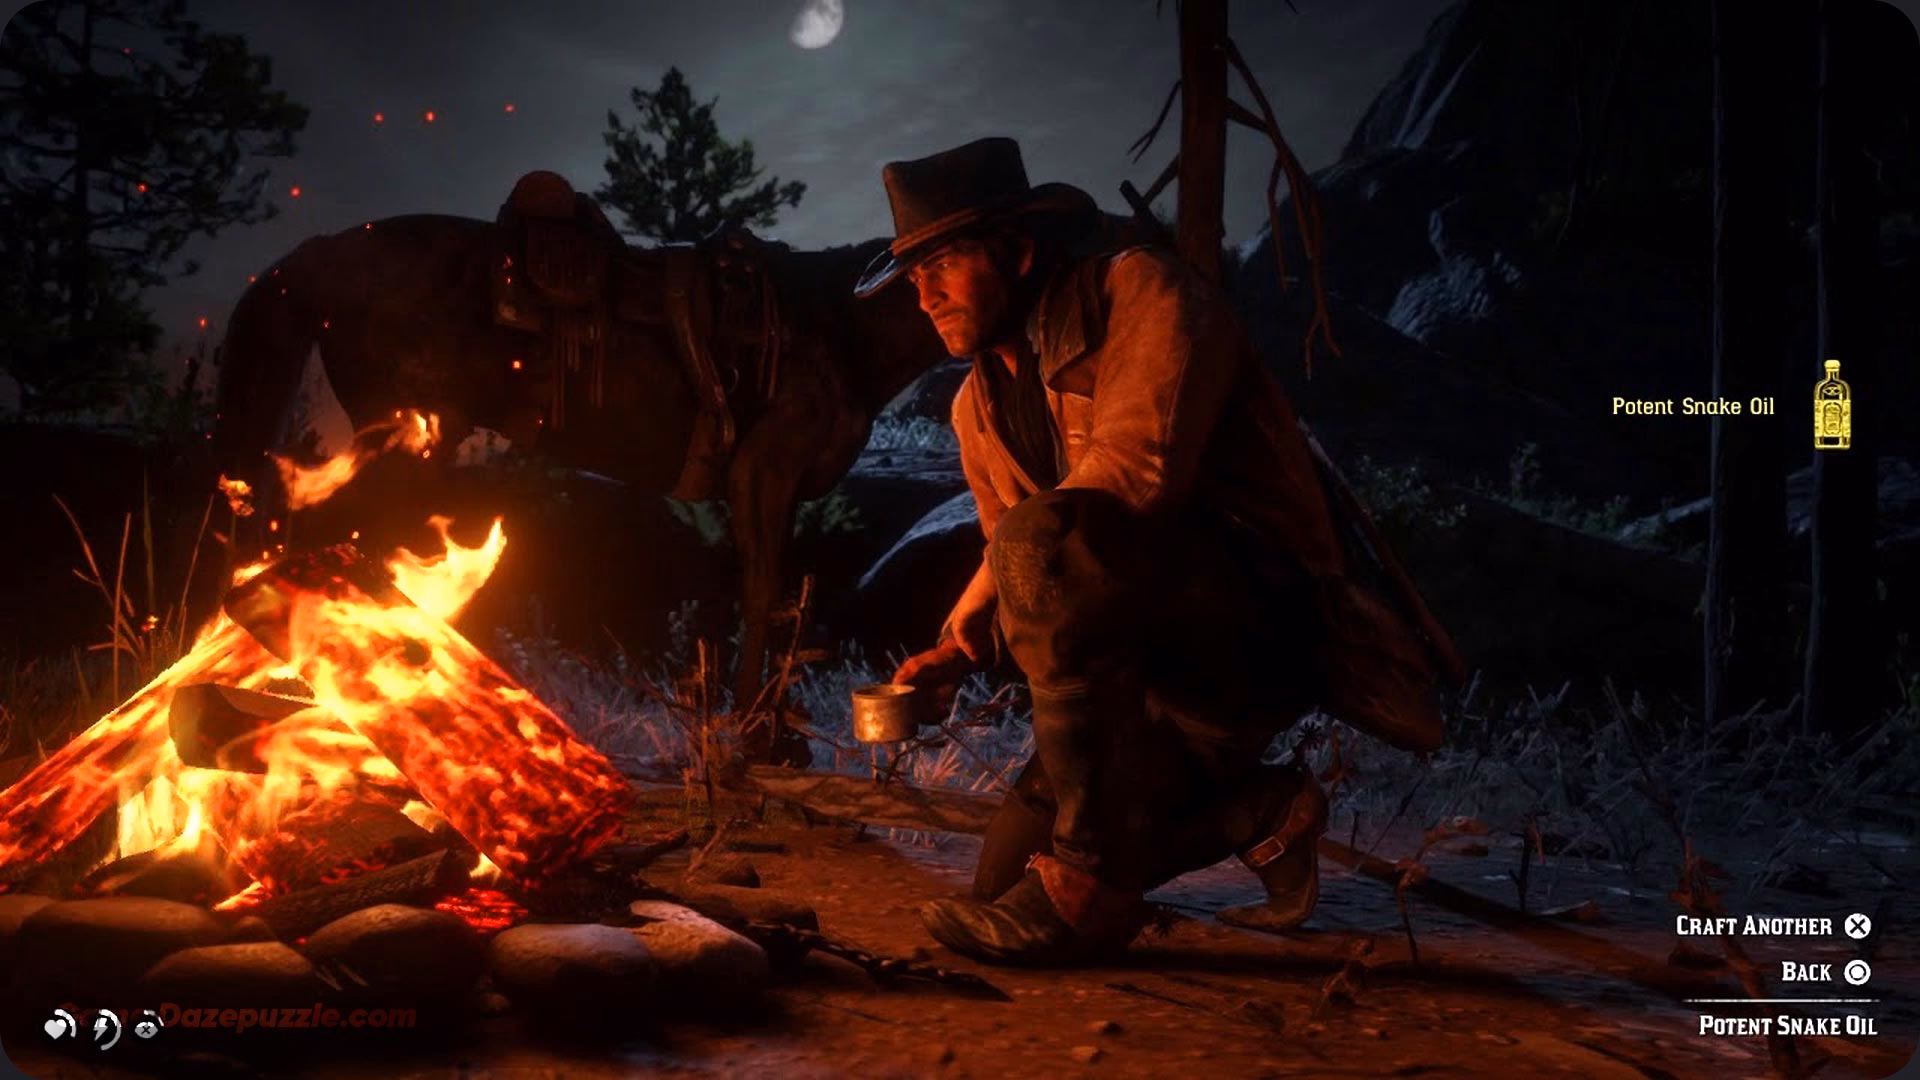
- Craft at a Campfire: Anytime you set up a camp in the wild or rest at your gang’s camp you can craft. Take those plants and turn them into Potent Bitters and Health Tonics. They’re often more effective than the store-bought versions and they cost you nothing but a little time.
And there you have it partner. That’s the blueprint. If you tackle these ten things early on you’ll bypass the slow frustrating start and jump right into the good stuff. You’ll have money a legendary horse an enormous satchel and the skills to survive whatever the Wild West throws at you. You’re no longer a greenhorn. Now get out there explore that incredible world and become the legend you were meant to be. Good luck.
Your Questions Answered, Partner!
Got a few more questions rattling around in that head of yours? Don’t you fret. Here are the straight-up answers to some things you might still be wondering about.
Wait, so fast travel is only one-way from the camp? What’s the catch?
Yep, that’s the main catch. You can instantly travel from your camp to a town you’ve discovered, but you can’t travel from that town back to your camp using the map. Think of it as a free, one-way stagecoach ticket to get your adventures started faster. For the ride home, you’ll still have to use a stagecoach (for a small fee), ride a train, or just enjoy the journey on your horse.
That Legend of the East Satchel sounds like a ton of work. Is it really that important?
I’m not gonna lie to you, it’s a project. But let me put it this way: every single player who has crafted it says it’s the best thing they did in the game. The frustration of seeing “Inventory Full” completely vanishes. It transforms the game from a constant management headache into a pure adventure. Trust me, it’s more than worth it. Start the hunt early and casually, and you’ll get it done.
Help! The White Arabian horse ran away while I was trying to tame it. Is it gone forever?
Deep breaths, partner. No, it’s not gone for good. That horse is a wild spirit. If it bolts, just leave the area for a couple of in-game days. Go do a mission, sleep a few times, then ride back up to Lake Isabella. It will respawn in the same area, waiting for another go. Be more patient next time! The same goes if it gets killed (though try not to let that happen!).
I found a perfect, 3-star animal but I used the wrong gun and got a “Poor” pelt. Have I failed forever?
Nope! The world is teeming with wildlife. You didn’t ruin your one and only chance. While that specific animal is gone, another 3-star animal of the same species will eventually spawn somewhere in its natural habitat. The key is to learn from the mistake. Next time you see a 3-star critter, make sure you have the right weapon equipped before you even think about pulling the trigger.
I found the $500 gold bar in Limpany! Are there more easy treasures like this out there?
You bet there are! That first gold bar is the easiest one to get you started, but the world is full of treasure maps, hidden lockboxes, and other gold bars. The “Geology for Beginners” quest mentioned in the guide is a great start. Keep your eyes peeled for strange maps sold by strangers or found in enemy camps. Exploration is always rewarded in this game.
Should I do all 10 of these things before playing any of the main story missions?
Great question. The best way to do it is to mix them in. Start the main story missions in Chapter 2, as some of them (like the one with Hosea) are needed to unlock things like the Fence. Between those story missions, take your time to go on these adventures. Go hunt for a few pelts, then do a mission. Try to tame the Arabian, then do another mission. It’s not a checklist to finish before you play; it’s a blueprint to make your entire playthrough better.