In the harsh, unforgiving sands of the desert, battles are won not just with swords and arrows, but with wheat, wood, and gold. A towering castle is useless if the treasury is empty and the granary is bare. Welcome, my lord, to the definitive Stronghold Crusader Economy Guide. For years, I’ve navigated these treacherous economic waters, and now I’m laying out the map for you. Whether you’re building your first woodcutter’s hut or financing a 10,000 unit army in the new Definitive Edition, mastering the flow of resources is the absolute key to victory. This guide will transform your fledgling camp into an unbreakable financial empire.
What’s in our Stronghold Crusader Economy Guide?
The Three Pillars: Understanding Your Castle’s Core Mechanics
Before you can build a sprawling war machine, you must master the three fundamental pillars that support every successful castle. These are not separate elements, but an interconnected system where each part influences the others. Your ability to manage the delicate dance between your resources, your people’s happiness, and your chosen style of rule will determine your fate.
Resources and Gold: The Lifeblood of Your Empire
At its heart, your castle is a complex machine that converts raw materials into security and power. The initial flow of wood is the very blood in the veins of your young economy. It is the primary component for nearly every early structure, from the humble hovels that house your growing population to the workshops that kickstart your entire production system.
A successful start always hinges on aggressively establishing a large number of woodcutter’s huts, often ten to twenty, to ensure a powerful and uninterrupted flow of this crucial resource. A clever opening move is to immediately purchase a small amount of wood from the market, an investment that pays for itself by allowing you to lay down your initial infrastructure without a moment’s delay.
Once your wooden foundations are set, your attention must turn to stone. This dense, valuable material is the building block of your mighty fortifications, the very walls and towers that will protect your burgeoning economy from jealous rivals. The process of quarrying stone is significantly slower than chopping wood and is entirely dependent on the steady work of Ox Tethers to transport the heavy blocks to your stockpile.
For a quarry to operate at peak efficiency, especially if it’s located far from your castle’s core, it will require the support of multiple ox teams. Due to its high market value, selling any surplus stone you acquire can provide a rapid and substantial injection of cash into your treasury, often funding your first military endeavors.
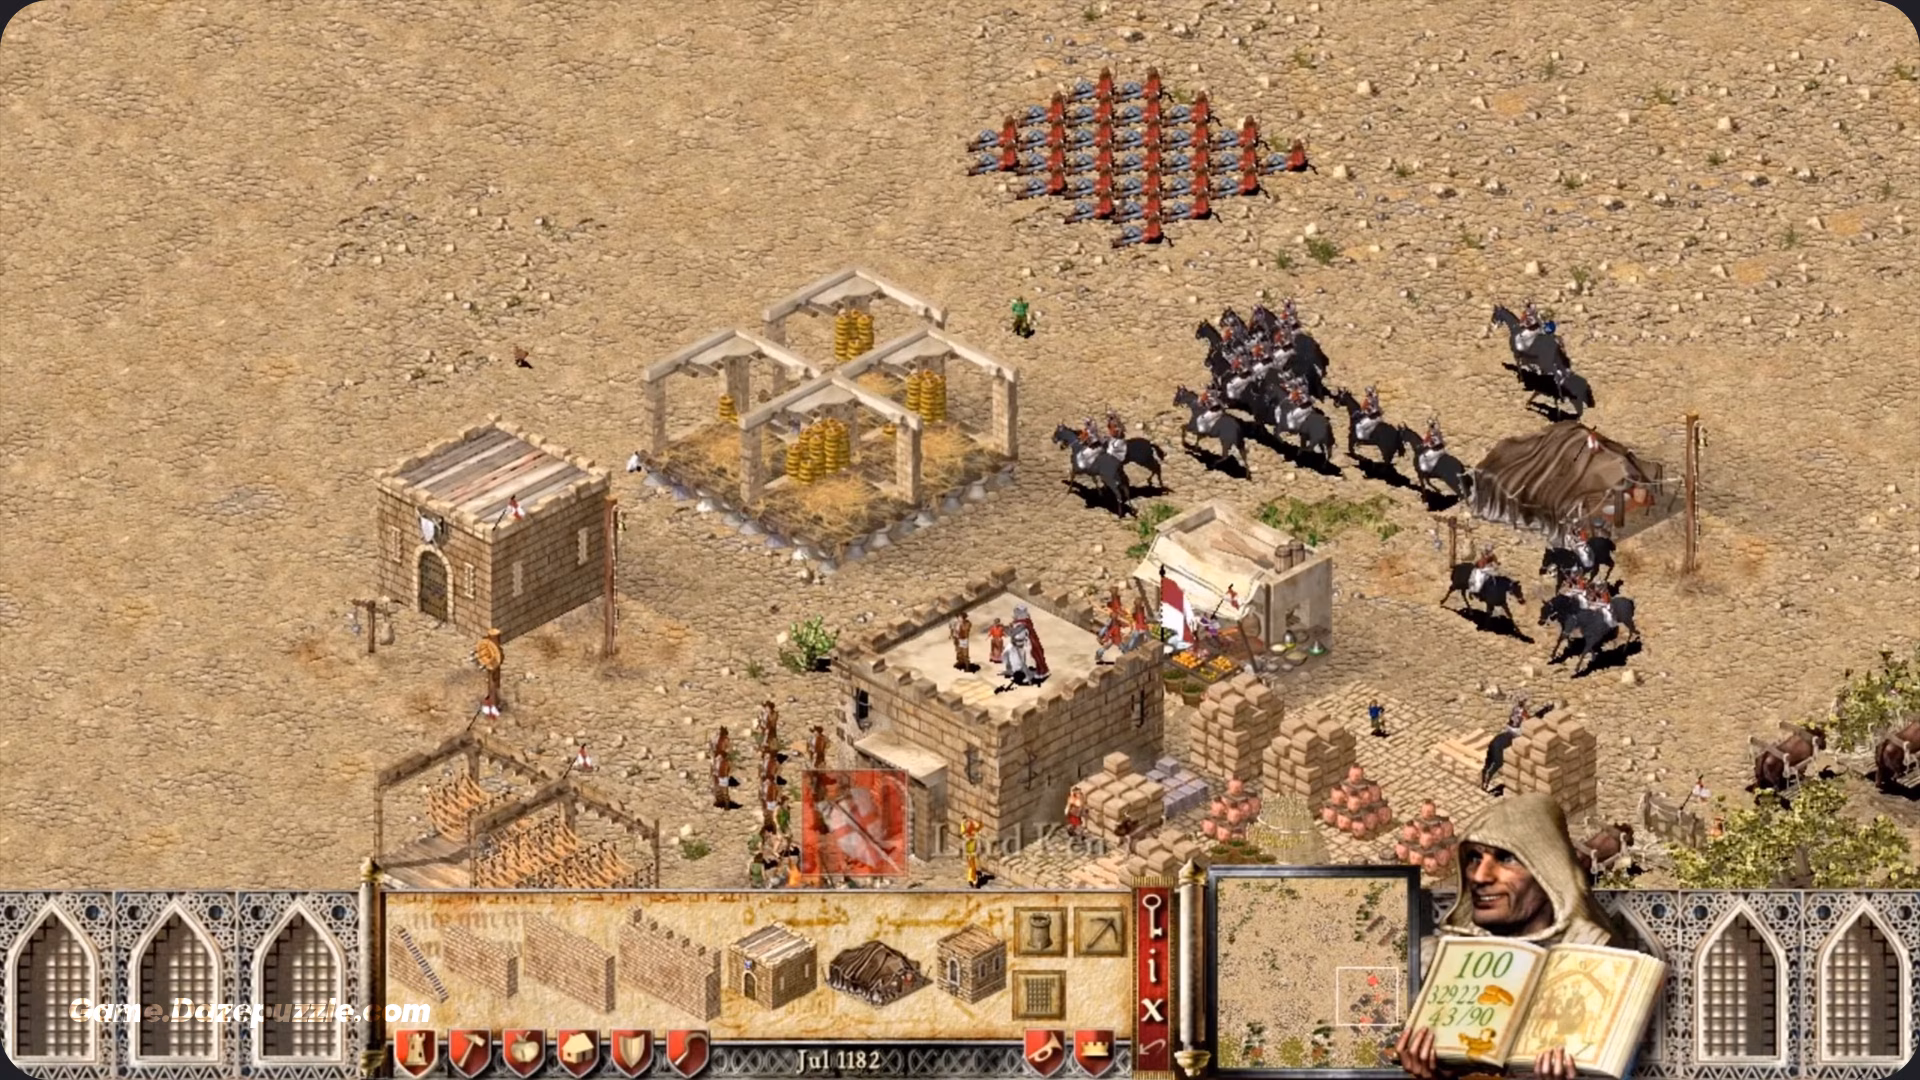
The true engine of your military might, however, is iron. This precious metal is the key to unlocking your most elite and decisive units, the heavily armored Swordsmen and Knights. It is forged into the swords, maces, and metal armor that allow your troops to dominate the battlefield. Iron mines are typically found in limited, strategically vital locations on the map, and their protection must become a paramount military objective. An unprotected iron supply is an open invitation for enemy raids. Economically, both raw iron and its finished products are among the most profitable goods you can sell, making a well defended iron industry a source of immense wealth.
Finally, there is pitch, a specialized resource with a singular, terrifying purpose: defense. Its primary use is in the creation of fiery moats, a horrifying obstacle for any attacking army. On maps where pitch is abundant, you can establish a simple yet effective hands off income stream by setting it to automatically sell at the market, letting the black gold trickle steadily into your coffers.
All these resources are ultimately in service of acquiring gold, the currency that makes everything happen. Gold is what you use to recruit soldiers, construct advanced buildings, and purchase essential goods from the market. Without a positive flow of gold, your war machine will grind to a halt. Your primary method of earning it is through taxation, a direct reflection of your relationship with your people. The rate you set is a delicate balancing act; higher taxes fill your treasury but erode your people’s happiness. The art of a true ruler is finding that sweet spot.
A negative tax rate, while seemingly harsh, can provide a colossal income that, when properly managed, can be offset by keeping your populace content in other ways. Your second major source of income is market trading. The market is your gateway to the world, allowing you to sell your surplus production for instant cash. Selling manufactured goods like bread or weapons is an excellent way to fund your ambitions. The “Auto-trade” feature, especially in the Definitive Edition, is a strategic gift, allowing you to set a baseline for your resources and automatically sell any excess, ensuring a constant, passive flow of gold while you focus on the art of war.
Popularity: The Pulse of Your Population
Your popularity rating is far more than a simple number; it is the very pulse of your castle, a direct measure of your people’s contentment. This rating dictates the flow of new peasants into your settlement, providing the workforce for your farms and the recruits for your army. Should your popularity remain above 50, a steady stream of hopeful subjects will gather at your campfire, ready to serve. But if it dips below this critical threshold, a mass exodus will begin. This can trigger a catastrophic downward spiral of abandoned workshops, empty fields, and a silent treasury, leading to the swift collapse of your entire domain.
The happiness of your people is influenced by several interconnected factors. The most fundamental of these is food. Providing generous rations is a powerful method for boosting morale, and offering a variety of different food types in your granary provides an even greater bonus. Conversely, an empty granary is one of the fastest ways to see your popularity plummet.
This is directly tied to taxes, as high taxes will sour the mood of even the best fed populace. You must learn to balance the weight of your tax burden with the comforts you provide. One of the most effective comforts is ale. By establishing a production chain of hops farms, breweries, and inns, you can distribute ale to your people, providing a massive popularity bonus of up to +8.
This single industry can effectively neutralize the negative impact of very high taxes, allowing you to maintain a happy populace while filling your treasury. Beyond these basic needs, you can provide spiritual comfort through religion. A simple church offers a permanent +1 bonus, while a grand cathedral provides a +2 bonus. These are passive, fire and forget structures that quietly bolster your people’s spirits. Lastly, you must be mindful of crowding. If your population outgrows the capacity of your housing, the resulting cramped conditions will breed discontent. Always ensure you have enough homes for your loyal subjects.
The Fear Factor: A Double Edged Sword
The Fear Factor is perhaps the most nuanced and powerful mechanic in your arsenal, forcing you to make a profound strategic choice about your style of leadership. It is a double edged sword that pits military strength directly against economic efficiency.
If you choose the path of the benevolent ruler and build “Good Things” like lush gardens, festive maypoles, and beautiful statues, you create a pleasant and cheerful environment. This has a direct and potent effect on your military. For each +1 point of positive fear factor, your troops’ attack damage is increased by 5%, reaching a formidable +25% bonus at the maximum +5 level. In a clash of armies, this bonus can mean the difference between a heroic victory and a devastating defeat.
However, this power comes at a steep economic price. Your workers, enchanted by the lovely surroundings, will spend a portion of their day relaxing instead of working. At the +5 level, this reaches a 50/50 work to rest ratio, effectively cutting your entire economic output in half.
Alternatively, you can rule as a tyrant, erecting “Bad Things” like imposing gallows, grim torture devices, and cages that serve as a constant reminder of your authority. This path of fear has the opposite effect. Your troops, demoralized and fighting without conviction, will suffer a 5% penalty to their attack damage for each -1 point, down to a -25% penalty at the -5 level.
The reward for this military weakness is an astonishing surge in economic productivity. Your workers, driven by fear, will not only work 100% of the time but will also become preternaturally efficient, producing more finished goods from the same amount of raw materials. A baker, for instance, might magically create 12 loaves of bread from a single sack of flour instead of the standard 8. This productivity bonus can reach a staggering +50% at the -5 level.
An advanced and devastating strategy employed by veteran lords is the “Fear Factor Swap.” This involves starting the game with a -5 fear factor to turbo charge your economy, allowing you to rapidly amass a huge army funded by the sale of surplus goods. This requires careful management of popularity through food and ale to counteract the negative modifiers. Then, just moments before launching your grand assault, you demolish all the “bad” buildings and hastily construct “good” ones. Your massive, fear forged army suddenly gains the +25% attack bonus, transforming them into an unstoppable force ready to sweep across the map.
If you want to learn everything in the game, read our Stronghold Crusader Complete Guide
Engineering Your Economic Engine: Production Chains & Golden Ratios
A powerful economy is not just a collection of buildings; it is a symphony of synchronized production chains. Understanding how to engineer these chains for maximum efficiency is what separates amateur lords from true economic masters.
The Breadbasket: Mastering Food Production
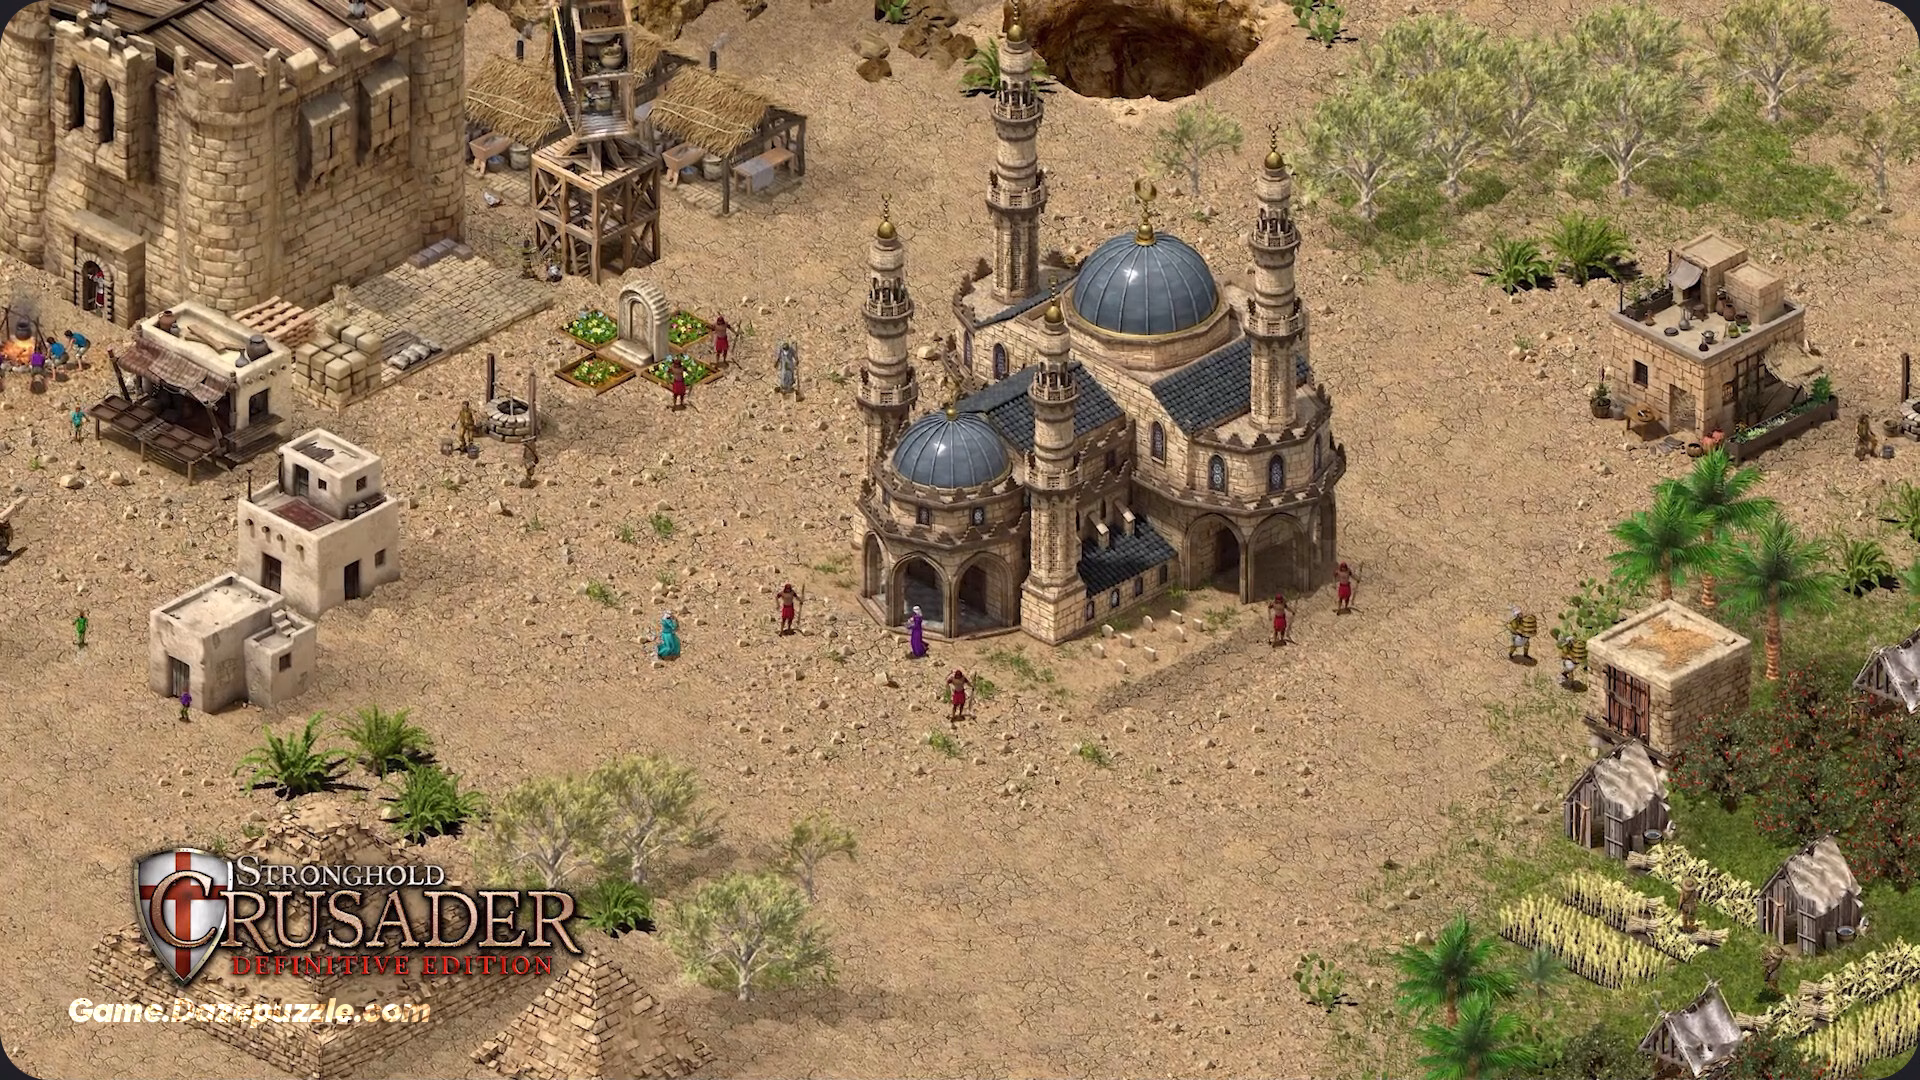
While several food sources are available, one stands above all others in terms of long term efficiency: bread. Though it requires a significant upfront investment in wood and stone to establish, the bread production chain offers the highest yield and is the cornerstone of any large, sustainable castle economy. The process begins with Wheat Farms, which must be placed on precious fertile oasis land. The harvested wheat is then transported to a Mill, where a miller grinds it into flour. Finally, Bakers take the flour from the stockpile to their bakeries and produce loaves of bread, which are stored in the Granary.
While many players seek a magic formula, the true “golden ratio” is dynamic. A good starting point for a balanced operation is three Wheat Farms, one Mill, and eight Bakeries. This configuration, when placed with careful attention to proximity, can reliably feed a population of around 80 people. However, a truly skilled ruler does not rely on static formulas but instead reads the flow of their economy. You must become an observer.
Is your stockpile overflowing with wheat while your bakers stand idle, waiting for flour? This is a clear signal that your mill is the bottleneck, and you must build another. Is your stockpile full of flour, but your granary is filling too slowly? This tells you that you need more bakeries to keep up with the supply. This constant, dynamic management is the key to a perfectly oiled food production machine.
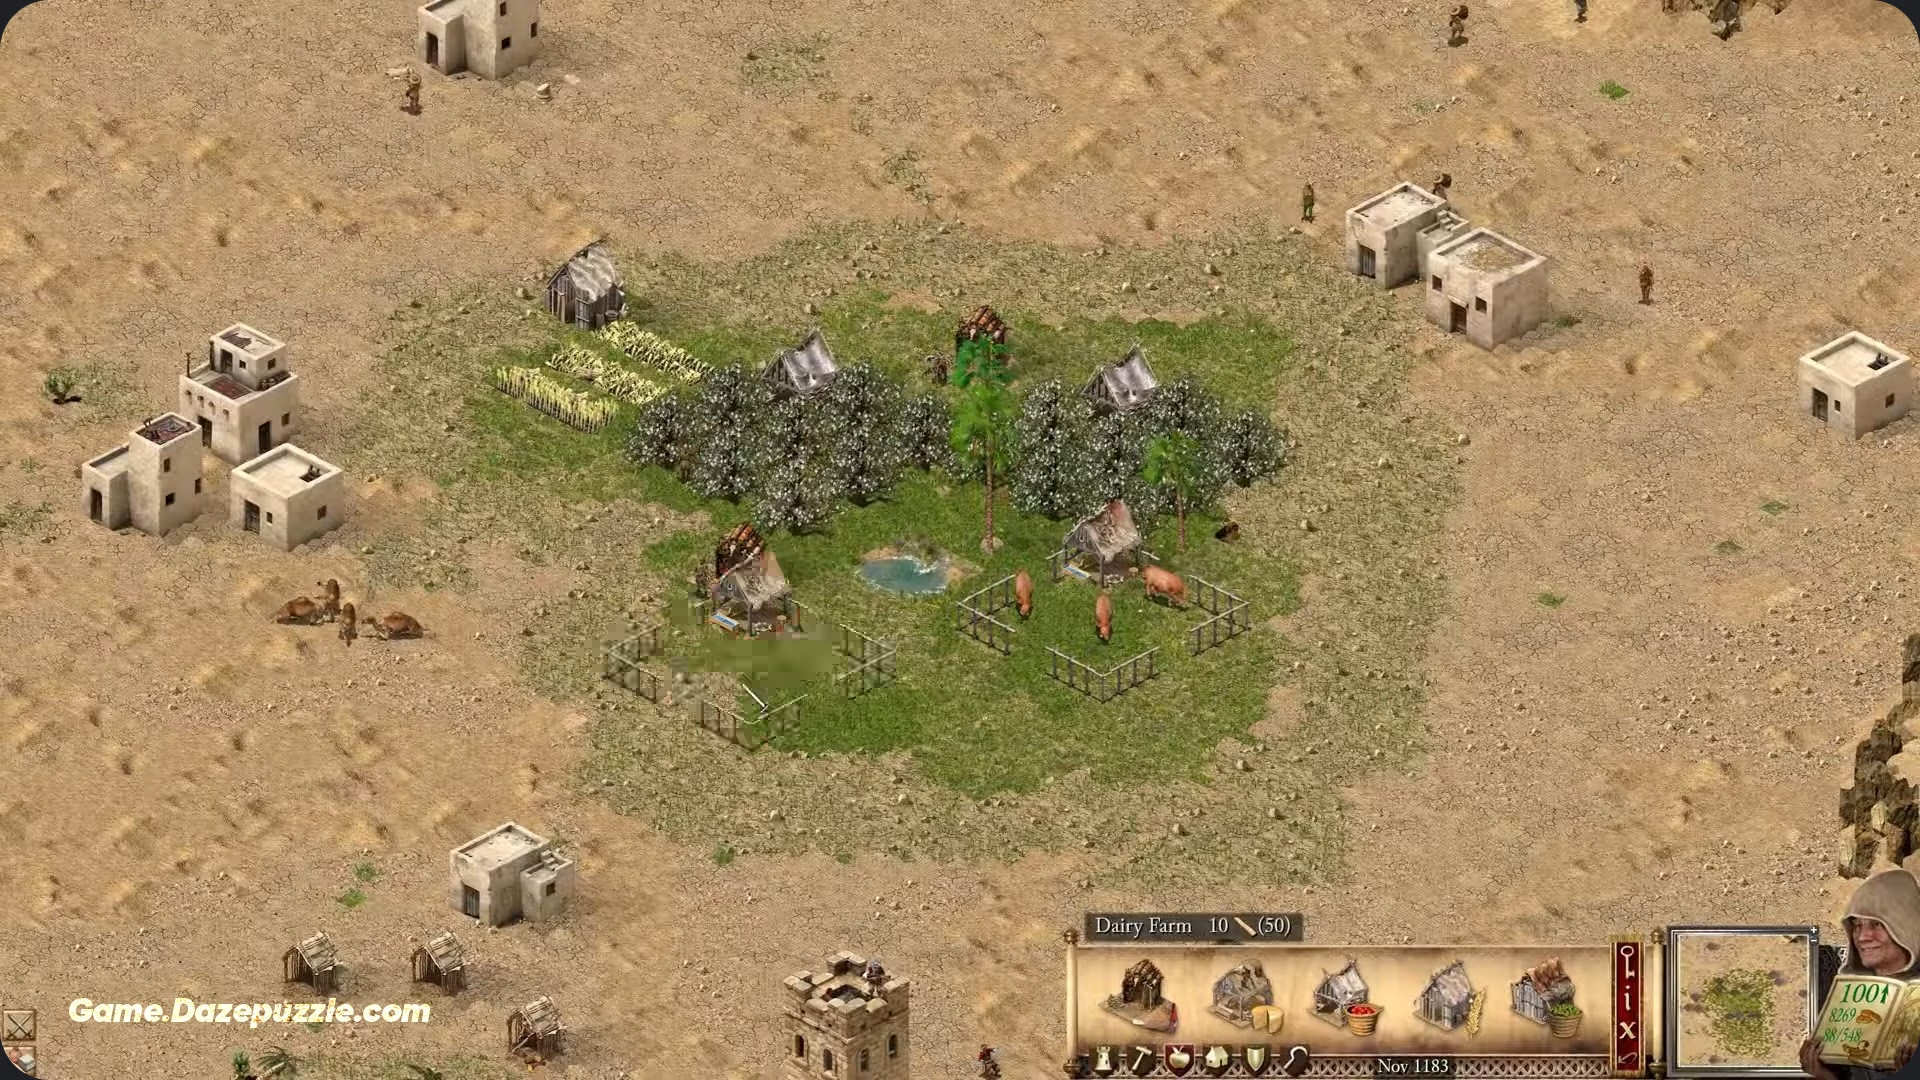
Of course, other food sources have their place. Apple Orchards are the cheapest and fastest way to get food on the table, making them the ideal choice for staving off starvation in the critical opening minutes of the game. Dairy Farms not only produce cheese but also provide the essential hides for crafting leather armor, offering a valuable two for one economic synergy that should not be overlooked.
The Morale Elixir: Mastering Ale Production for High Taxes
If bread is the foundation of survival, ale is the key to prosperity. It is, without question, your most powerful tool for generating the high levels of popularity needed to levy cripplingly high taxes on your populace. The sight of a functioning inn, distributing frothy mugs of ale, can make your peasants happily part with their coin. The production chain is straightforward: Hops Farms produce the raw hops, which are then taken to a Brewery to be turned into barrels of ale. These barrels are then delivered to an Inn for distribution.
To maximize the effect, you need to understand the ratios. A single, efficiently placed Hops Farm can typically supply two or even three Breweries with enough raw material. Each of those Breweries, in turn, can keep about two Inns fully stocked with ale. Finally, each Inn provides its happiness boosting services to roughly 30 peasants. By scaling this industry, you can achieve the maximum +8 popularity bonus from ale, effectively canceling out the penalty from a harsh -16 tax rate and creating an enormous, steady flow of gold into your treasury.
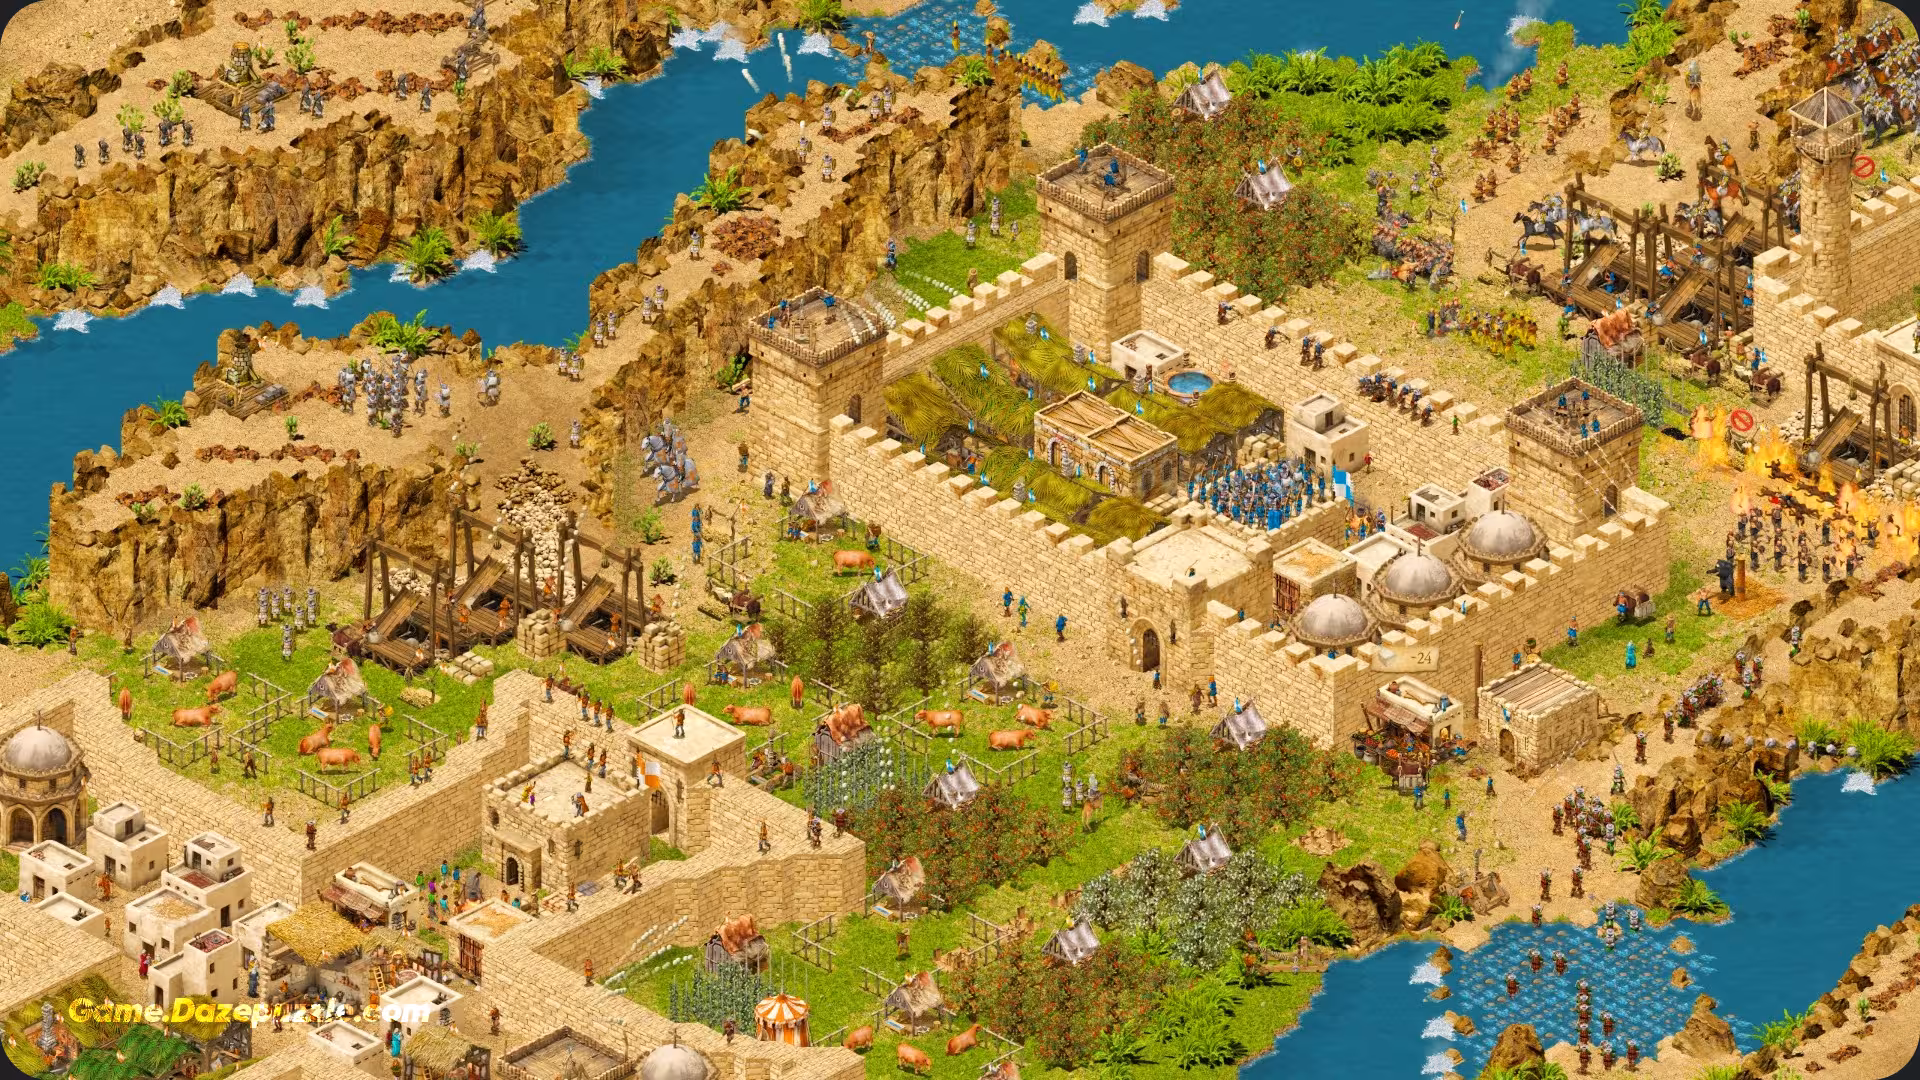
The War Machine: Forging Weapons and Armor Efficiently
The ultimate purpose of your robust economy is to fuel a powerful war machine. The continuous production of weapons and armor is the prerequisite for defending your lands and conquering your enemies. The efficiency of this military industrial complex hinges on one simple principle: placement. All of your weapon and armor workshops, the Fletcher’s, Poleturner’s, Blacksmith’s, and Armourer’s, should be constructed in a tight, dense cluster. This cluster must be built directly adjacent to both the Stockpile, where they draw their raw materials of wood and iron, and the Armoury, where they deposit their finished goods. Minimizing the walking distance for your craftsmen is paramount.
Within this system, you must also be aware of production speeds. A Blacksmith, for example, forges swords and maces at roughly twice the speed of an Armourer crafting a suit of metal armor. This means that to create a balanced supply for your elite knights, who require both a weapon and armor, you will generally need to build more Armourer’s Workshops than Blacksmith’s Workshops. Failing to do so will result in a surplus of swords in your Armoury while your expensively trained troops wait idly for their armor to be completed.
An Economy for All Seasons: Strategy from Early to Late Game
Your economic strategy cannot be static; it must adapt and evolve through the different phases of the game, from the desperate struggle for survival at the beginning to the epic challenge of sustaining a massive empire at the end.
The First Ten Minutes: Your Early Game Build Order
The opening moments of a match are a frantic race against time. Speed, efficiency, and a clear plan are everything. A powerful opening involves immediately pausing the game to calmly assess the terrain and plan your layout. Your first actions should be to place your Granary and Market, followed by a cluster of at least three to four Woodcutter’s Huts in the nearest forest. To prevent an immediate popularity drop from lack of food, quickly build one or two Apple Orchards.
This buys you precious time. Your next move should be a small but critical investment: purchase 50 to 100 units of wood from the market. This infusion ensures your building momentum never stalls. With this new wood, your absolute priority is to expand your logging industry to ten or more huts while simultaneously establishing your first Stone Quarries and Iron Mines, making sure to assign at least two Ox Tethers to each quarry to keep the stone flowing.
The Mid Game Transition: Scaling Your Economy for War
Once you have survived the initial crisis and your basic production lines are stable, you enter the mid-game. This phase is about strategic expansion and scaling your economy to support a real military. You must now continuously expand your core production chains for bread and ale, allowing you to feed a larger population and, more importantly, to set your taxes to very high negative levels. The immense income generated will be the engine of your military growth. This is also the stage where the auto trade feature becomes an indispensable tool.
By setting surplus goods like bread, stone, or even weapons to automatically sell, you create a reliable, passive income stream. This frees your mind from the minutiae of economic management and allows you to focus on grander strategies. However, the greatest danger in the mid-game is complacency. A booming economy with no defenders is nothing more than a ripe fruit waiting to be plucked by your enemies. You must strike a balance, investing in a credible defensive force to protect your valuable economic assets.
The Late Game Challenge: Preventing the Death Spiral
The late game presents a new and terrifying challenge: sustainability. Your focus shifts from building an economy to preventing the collapse of your massive empire under its own weight. A large army is an insatiable beast, consuming vast quantities of food and requiring a constant flow of gold and weapons to replenish its ranks after every battle. If your production lines falter at this stage, perhaps your forests have been depleted or your iron mines have been captured; you risk triggering a catastrophic “death spiral.” It begins with a food shortage, which causes your popularity to plummet.
Peasants abandon your castle, your tax income vanishes, your weapon production ceases, and your once mighty army, now unsupported, withers and dies on the vine. To avert this disaster, you must have diversified your income streams through auto trading and maintained a large strategic reserve of gold and wood. This reserve is your emergency fund, allowing you to quickly rebuild after a devastating attack and keep your economic heart beating.
The Definitive Edition Revolution: New Economic Paradigms
The Definitive Edition of Stronghold Crusader does more than just polish the graphics; it introduces new units and mechanics that fundamentally reshape economic strategy.
Gold Over Steel: How Bedouin Units Change Everything
The most significant change is the addition of eight new Bedouin units. These warriors are recruited from a single new building and, crucially, are purchased using only gold. This seemingly simple mechanic creates an entirely new and viable strategic path: the “gold centric” economy. A lord can now choose to focus their entire economic effort on activities that generate raw gold, levying high taxes, aggressively selling resources like stone and wood, and completely bypass the traditional, time consuming production chain of forging weapons. This allows a player to field a powerful and flexible army with incredible speed.
This gold centric approach, however, is as fragile as it is fast. If your primary source of income is disrupted, your ability to create new units vanishes instantly. The traditional production based economy is slower and more methodical but far more resilient. The ultimate expression of mastery is to adopt a Hybrid Model. In the early game, you can focus on selling resources to quickly acquire gold for a few fast moving Bedouin units, which can be used to harass your opponent’s fledgling economy. Meanwhile, safe behind your own walls, you methodically build up your traditional, production based economy to forge the heavily armored European troops who will form the unbreakable core of your late game army.
Adapting to the Terrain: Map-Specific Economic Strategies
Your economic plan must always be dictated by the land itself. On most Crusader maps, the small patches of fertile oasis are the most valuable strategic resource. The battle to control this land is often the defining conflict of the match. Since the bread production chain offers the most food output per precious tile of fertile ground, it is the superior choice for these desert environments. On the other hand, some maps are desolate wastelands, a dry economy with almost no natural resources.
In these bleak scenarios, your only path to survival is through taxation. You must become a master of morale, using inns and churches to push your popularity to its absolute peak. This will allow you to levy punishingly high taxes, generating the gold you need to buy everything from the market: the wood to build, the food to eat, and the weapons for your mercenary army.
Your Coronation as an Economic Master
Mastering the intricate economy of Stronghold Crusader is a deep and rewarding challenge. It is a game of systems, a delicate dance of numbers and needs. By understanding its core principles, you can transform any barren patch of sand into a thriving, unconquerable powerhouse. Always remember the fundamental tenets of a successful ruler. Practice the Principle of Diversity, for an economy with multiple income streams can weather any storm.
Embrace the Principle of Efficiency, for every step a worker doesn’t have to take is a coin saved and a resource gained. And above all, respect the Principle of Balance, for an economy without an army is a target, and an army without an economy is a ghost. You now have the knowledge. Go forth, build your empire, fill your coffers, and let the symphony of your perfect economy be the anthem of your victory.
Stronghold Crusader: Definitive Edition Steam Page
Thanks for keeping up with Game.Dazepuzzle.com