You’re standing in the armory. The cool, metallic scent of gun oil hangs in the air. Racks of rifles, shotguns, and submachine guns line the walls. Vests loaded with ceramic plates sit beside helmets equipped with night vision. This isn’t just a room; it’s a room full of decisions. And in the chaotic streets of Los Sueños, every single decision you make here, before the mission even begins, can be the difference between a successful operation and a catastrophic failure.
Choosing a Ready or Not loadout is more than just picking the gun that looks the coolest. It’s about defining your strategy. Are you a ghost, focused on non lethal perfection? A versatile operator ready for anything? Or a breacher, ready to bring overwhelming force? This guide will serve as your armorer, breaking down not just what to bring, but the crucial why behind every choice, ensuring you have the perfect kit for any job.
What Is in Our Ready or Not Loadout Guide?
The Three Core Loadout Philosophies
Before we talk about specific guns, we need to talk about strategy. Your gear should always serve your plan. In Ready or Not, there are three dominant philosophies for building a loadout.
1. The S-Rank Specialist (Non Lethal Purity): This approach is entirely focused on achieving a perfect score. It’s a puzzle solving mindset that prioritizes control and compliance above all else. Every piece of gear is chosen to incapacitate and arrest, not to neutralize. This path requires immense patience and precision, where you are more of a commander than a shooter. For a deep dive into the strict rules and tactics this requires, our Definitive S-Rank Guide is your primary manual.
2. The All Rounder Operator (Lethal Versatility): This is the go to, balanced approach for most players and most missions. It blends lethal firepower with essential utility, creating a flexible kit that can handle almost any situation the crumbling city throws at you. This philosophy is about being prepared for the unknown. You are a “jack of all trades,” ready to switch tactics on a dime, whether you need a quiet entry or an all out firefight.
3. The CQB Aggressor (Dynamic Entry): Sometimes, speed and violence of action are the only solutions. This philosophy is built for close quarters battle, focusing on lightweight gear and overwhelming firepower to dominate tight spaces and end firefights before they can even begin. It’s a high risk, high reward approach that relies on surprise and aggression to seize control of a room before hostiles have a chance to react.
Armory Breakdown: Weapons & Ammo
Your primary weapon is the heart of your loadout. While many guns are viable, the meta has settled on a few top tier choices based on their performance.
The Generalist’s Choice: 5.56mm & .300 BLK Rifles
For most situations, you can’t go wrong with an assault rifle chambered in 5.56mm or .300 Blackout. Rifles like the MK18, G36C, and MCX offer the perfect balance of stopping power, manageable recoil, and magazine capacity. The G36C is a community favorite for its incredibly low recoil, making follow up shots easy. The MCX, firing the .300 Blackout round, offers slightly more punch without a significant recoil penalty. These are the reliable workhorses of the LSPD.
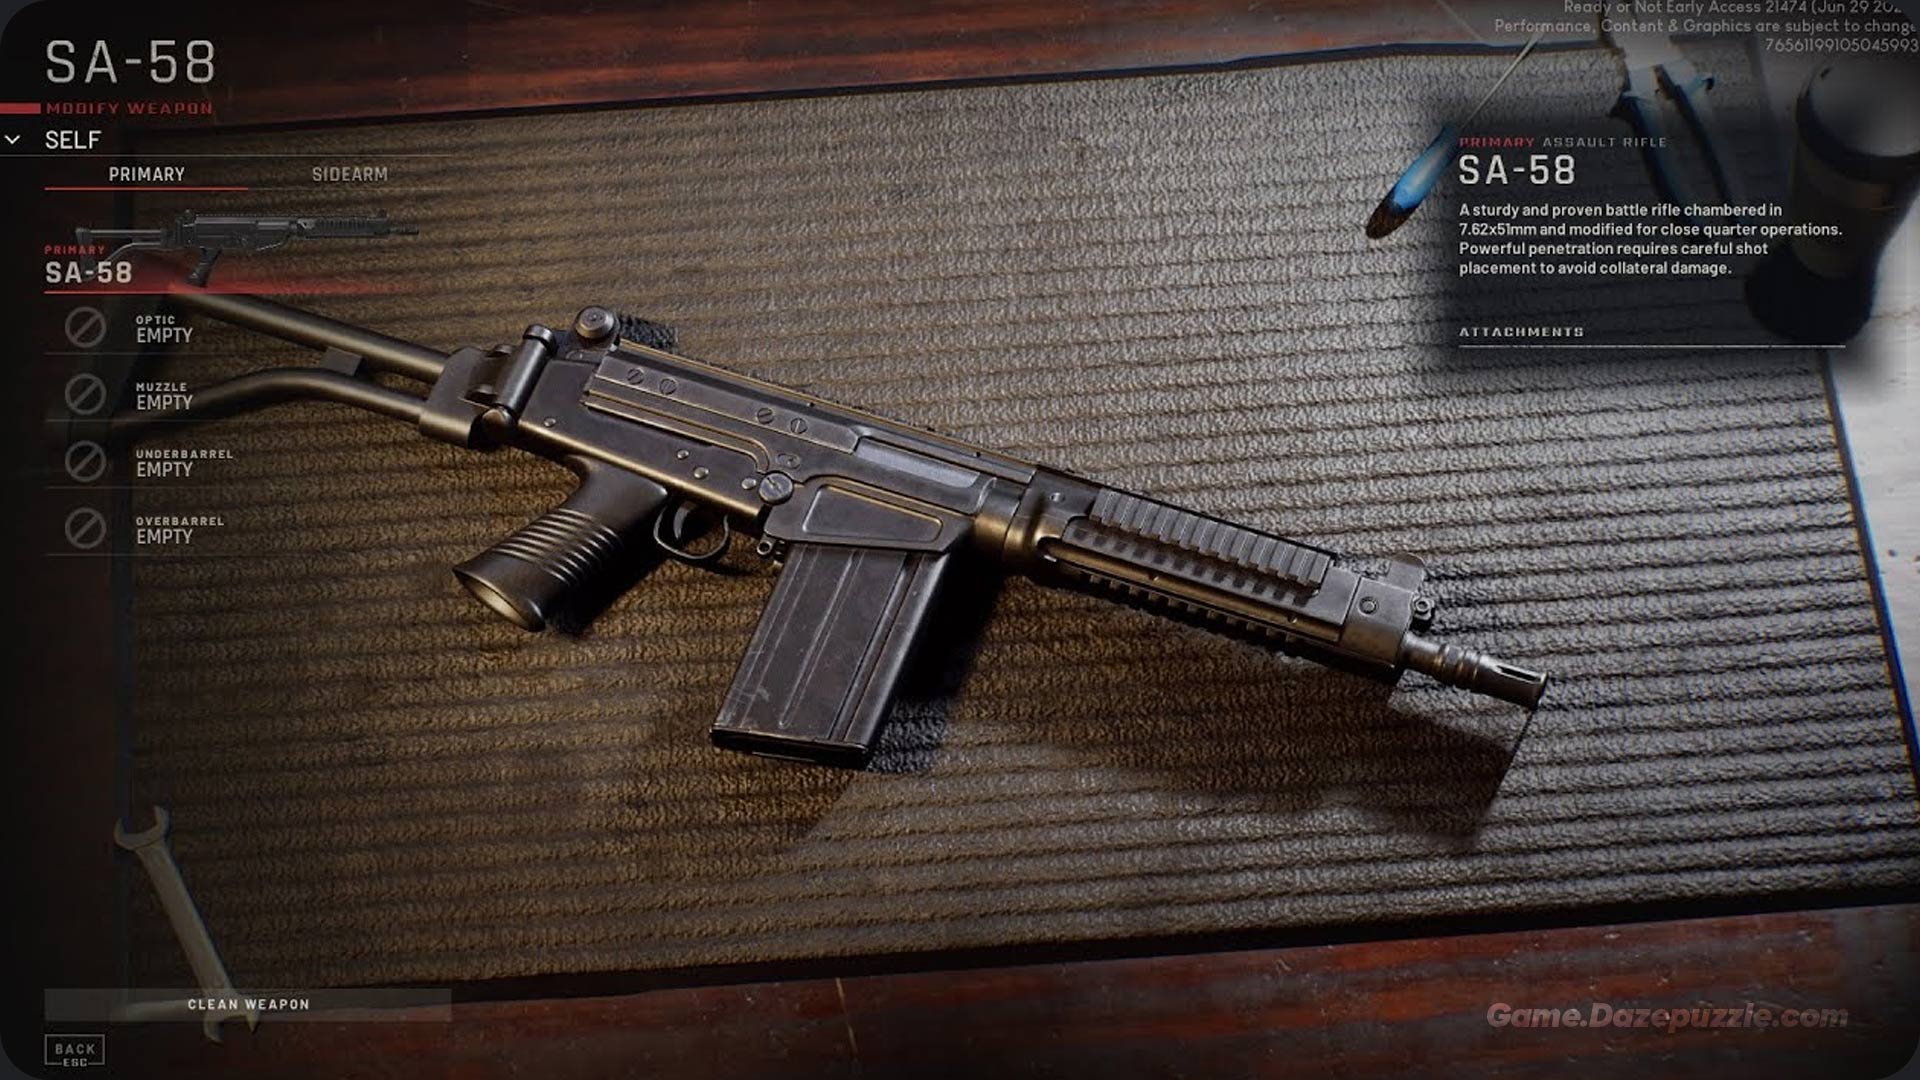
The Heavy Hitters: 7.62mm Battle Rifles
When you absolutely need to end a threat with one or two shots, you bring a battle rifle. The SA-58 is the king of this category, boasting incredible stopping power that can put down even heavily armored suspects with a single well placed shot to the torso. However, this power comes with a price: severe recoil and a smaller magazine. Choosing a 7.62mm rifle is a statement of confidence in your marksmanship.
Close Quarters Superiority: SMGs & Shotguns
In the tight confines of a meth house or a narrow hallway, SMGs and shotguns reign supreme. The MP7 and P90 are the top tier SMGs because their specialized ammunition can defeat body armor, a feat most other pistol caliber SMGs struggle with. For shotguns, the semi automatic B1301 is a monster, capable of clearing a room with terrifying speed.
The Ammo Debate: AP vs. JHP
This is simple: for lethal loadouts, always use Armor Piercing (AP) rounds. Jacketed Hollow Point (JHP) rounds are devastating against unarmored targets but will fail against the body armor worn by most serious threats in the game. Bringing JHP to a gunfight with armored suspects is a recipe for disaster.
Secondary Systems: The Importance of the Sidearm
While often overlooked, the sidearm is a critical component of an operator’s loadout. The Five-seveN (57 USG) is the undisputed king of this category due to its high capacity 20 round magazine, exceptionally low recoil, and superior armor piercing capability. While other weapons like the USP45 are potent against unarmored targets, the Five-seveN is the only option that is reliable in every situation.
The Science of Survival: Armor & Gear
Your ability to survive a firefight is determined by your protective gear. The community has this down to a science.
Armor Plates: The Ceramic Standard
There are three types of armor plates, but only one correct choice: Ceramic. Unlike Steel or Kevlar, which only reduce damage, Ceramic plates will completely negate all damage from a bullet until the plate shatters. This all or nothing protection is far superior and will save your life.
| Plate Type | Damage Mitigation Mechanism | Protection Rating | Key Disadvantage | Verdict |
|---|---|---|---|---|
| Ceramic | Negates 100% of damage until plate integrity fails. | Highest | Finite durability; offers no protection once broken. | Optimal Choice: The meta standard for all engagements. |
| Steel | Provides a flat percentage of damage reduction per shot. | High | Heaviest; reported to be buggy and can cause spalling damage to user. | Not Recommended: High weight and buggy performance make it inferior. |
| Kevlar | Provides a flat percentage of damage reduction per shot. | Low | Ineffective against rifle rounds and AP pistol rounds. | Situational: Only viable for very early missions against unarmored threats. |
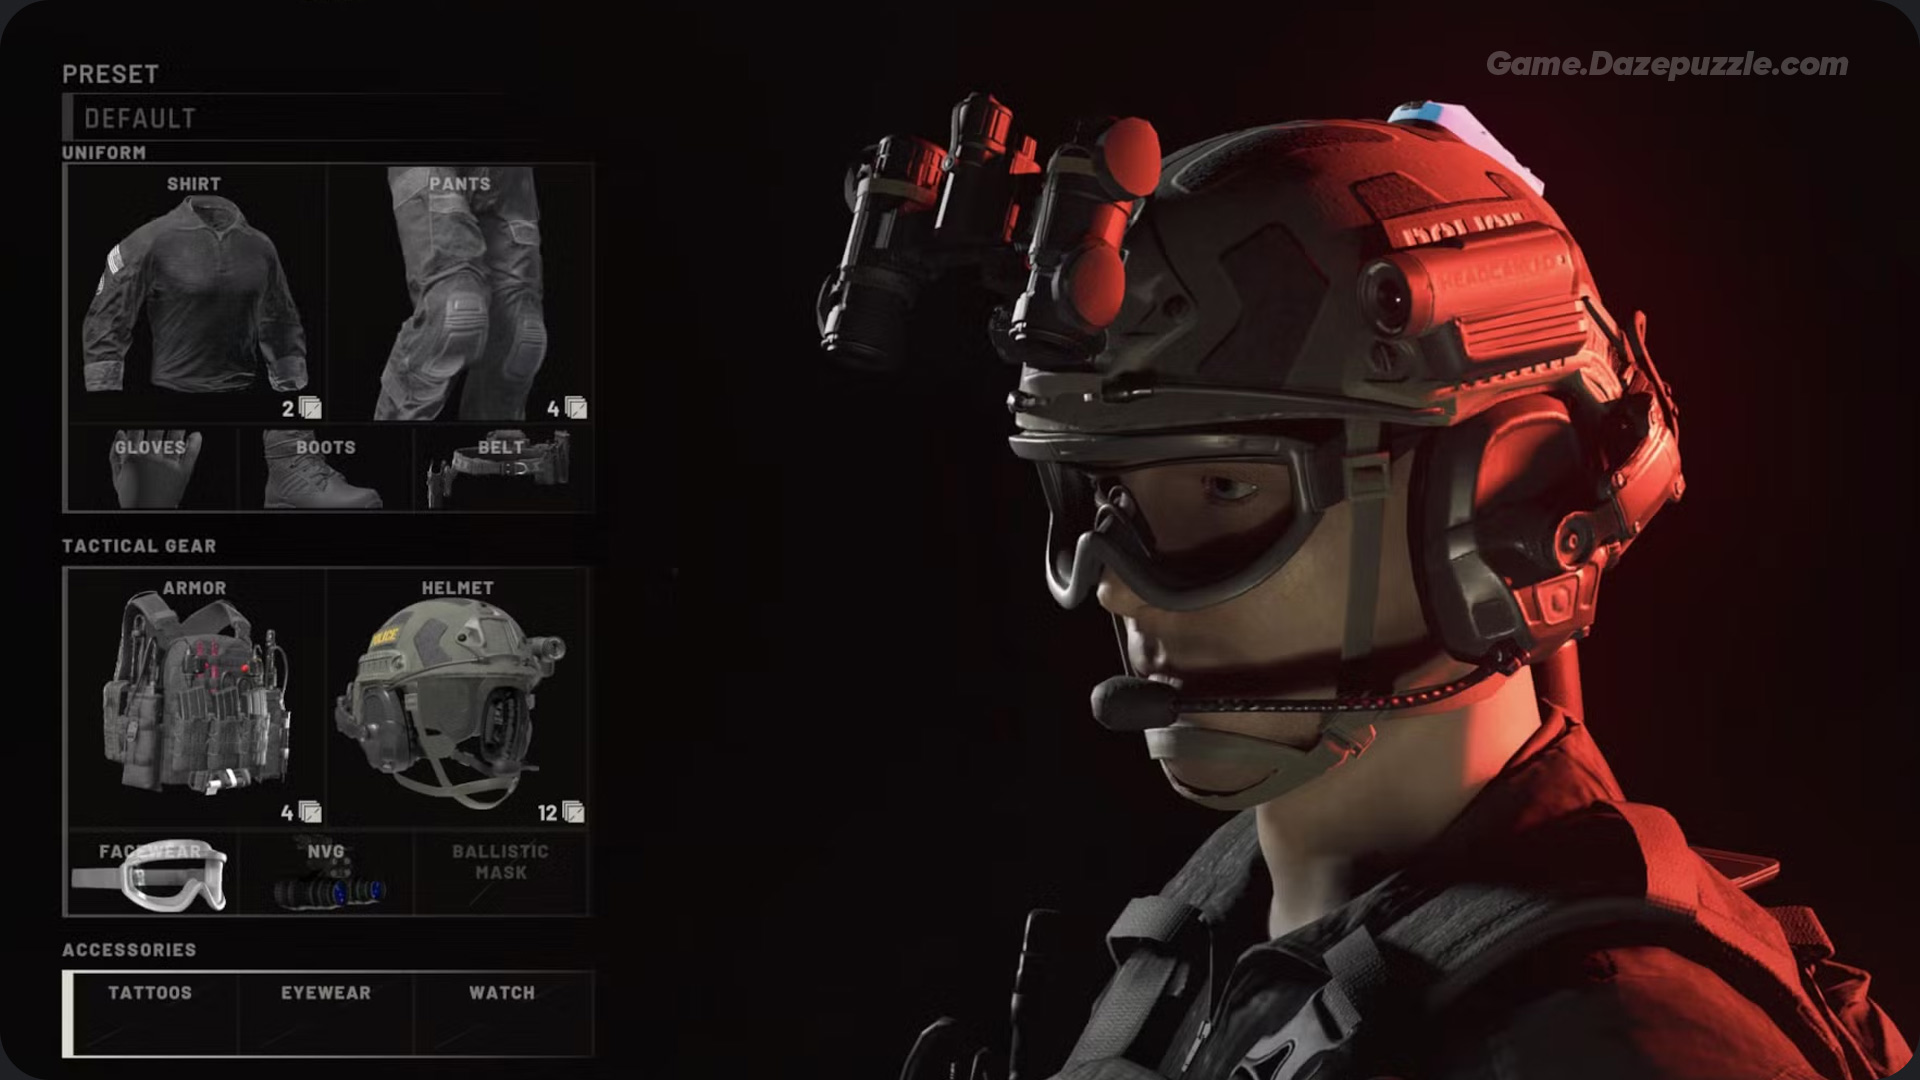
Armor Coverage: Heavy vs. Light
The trade off between protection and speed is heavily skewed in favor of protection. The movement penalty for wearing Heavy Armor is almost negligible, making its superior coverage the logical choice for nearly every loadout. Only use Light Armor if you are building a pure speed focused CQB loadout and are confident in your ability to not get hit.
Headgear Synergy
Your helmet choice should directly counter your team’s tactical grenades.
- If you’re using CS Gas or Pepperballs, the whole team needs Gas Masks.
- If you’re using Flashbangs or Stingers, the whole team needs Anti Flash Goggles.
- For everything else, the Ballistic Mask offers the best general protection.
The Tactical Toolkit: Grenades & Utilities
Your gadgets are just as important as your gun.
The Dynamic Entry Decision Matrix
The method of entry sets the tone for every room clear. Each breaching tool offers a unique balance of speed, stealth, safety, and psychological impact on suspects.
| Tool | Speed | Noise | Morale Effect | Safety | Best Use Case |
|---|---|---|---|---|---|
| Battering Ram | Fast | Very Loud | High | Low (Exposes operator) | Dynamic entry where speed and shock value are paramount. |
| Breaching Shotgun | Moderate | Very Loud | Moderate | High (Can be used from a distance) | Breaching potentially trapped doors or initiating entry from cover. |
| C2 Explosive | Fast | Extremely Loud | Very High | Moderate (Lethal to anyone near door) | Clearing a room with multiple, confirmed hostiles; maximum shock effect. |
| Lockpick Gun | Slow | Quiet | None | High | Stealthy entry when avoiding detection is the priority. |
Grenade Doctrine
Tactical grenades are force multipliers that allow a team to control space and manipulate enemy behavior. Flashbangs enable fast, aggressive pushes by disorienting targets, while CS Gas facilitates a slower, more methodical approach focused on area denial and forcing suspects from cover.
- The Mirrorgun (Optiwand): This is non negotiable. You must have it to gather intel before entering a room. It’s the single most important tool for survival.
- Door Wedge: The humble door wedge is your best friend for controlling the map. Use it to secure cleared areas and prevent suspects from flanking you.
Squad Architecture: Optimizing Team Loadouts
In Ready or Not, a loadout is rarely just for an individual. It is part of a larger team structure. In single player, treat your AI teammates as mobile “backpacks.” Limit their ammunition to maximize their capacity for grenades, C2 charges, and door wedges that you can then order them to deploy. In co op, define roles: have one player as a dedicated Breacher with a ram, another as Support with extra ammo, and one as Crowd Control with non lethal tools.
Template Loadouts: Your Go To Kits
Here are four mission ready loadouts, built on the philosophies we discussed.
1. The S-Rank Specialist (Non Lethal Purity)
- Primary Weapon: Beanbag Shotgun
- Secondary Weapon: Taser
- Armor: Heavy Armor, Ceramic Plates
- Headgear: Gas Mask
- Grenades: CS Gas x4
- Utilities: Mirrorgun, Door Wedges
2. The All Rounder Operator (Lethal Versatility)
- Primary Weapon: G36C (with suppressor and optic), AP Rounds
- Secondary Weapon: 57 USG, AP Rounds
- Armor: Heavy Armor, Ceramic Plates
- Headgear: Anti Flash Goggles
- Grenades: Flashbang x3
- Utilities: Mirrorgun, Door Wedge, C2 Charge
3. The CQB Aggressor (Dynamic Entry)
- Primary Weapon: MP7 (with suppressor), AP Rounds
- Secondary Weapon: 57 USG
- Armor: Light Armor, Ceramic Plates
- Headgear: Ballistic Mask
- Grenades: Flashbang x4
- Utilities: Battering Ram, C2 Charge x2
4. The Heavy Breacher (Overwhelming Force)
- Primary Weapon: SA-58 (with optic), AP Rounds
- Secondary Weapon: USP45
- Armor: Heavy Armor, Ceramic Plates
- Headgear: Ballistic Mask
- Grenades: Flashbang x2
- Utilities: Tactical Shield, C2 Charge x3
Ultimately, the “best” loadout is the one that best serves your strategy and the mission’s objectives. Use these templates as a starting point, experiment, and find the kit that makes you the most effective operator you can be.
Thanks for keeping up with Game.Dazepuzzle.com