I’ll be honest, when I first stepped into the Into The Unknown level in Escape Simulator 2, I was completely overwhelmed. The room is filled with mysterious obelisks, strange artifacts, and puzzles that seem to unlock other puzzles. After spending hours figuring out every single challenge, I’ve put together this complete Escape Simulator 2 Into The Unknown walkthrough to save you the headache. Whether you’re stuck on the plant puzzle or can’t figure out those constellation tablets, I’ve got every solution mapped out step by step. Plus, I’ll show you where to find all eight hidden tokens scattered throughout the level, including those tricky ones in the alternate dimension.
What you will read here:
Escape Simulator 2 Into The Unknown Guide
Into The Unknown presents you with a single massive room containing multiple interconnected puzzles. The key thing to understand is that you can’t access everything at once. You’ll need to solve the initial obelisk puzzle to unlock the rest of the challenges, and certain puzzles will spawn new ones once completed. The room features various themed puzzle stations including shadow puzzles, plant growth mechanics, constellation tablets, and even an alternate dimension you can peek into with a special mirror artifact.
The good news is that most puzzles can be tackled in any order once they’re unlocked, so you’re not locked into a rigid sequence. Just make sure you collect items as you complete each challenge since you’ll need them later.
Escape Simulator 2 Into The Unknown Solution
Lit Obelisk Puzzle
Your journey begins with the only illuminated obelisk in the room. This starting puzzle is all about pattern recreation. On the right side of the obelisk, you’ll see circles displaying five different patterns. Your job is to recreate each pattern on the board by clicking the arrows.
- Pattern 1 goes on the middle/bottom
- Pattern 2 belongs on the top right side
- Pattern 3 should be placed on the top left side
- Pattern 4 fits on the bottom left side
- Pattern 5 goes on the middle right side
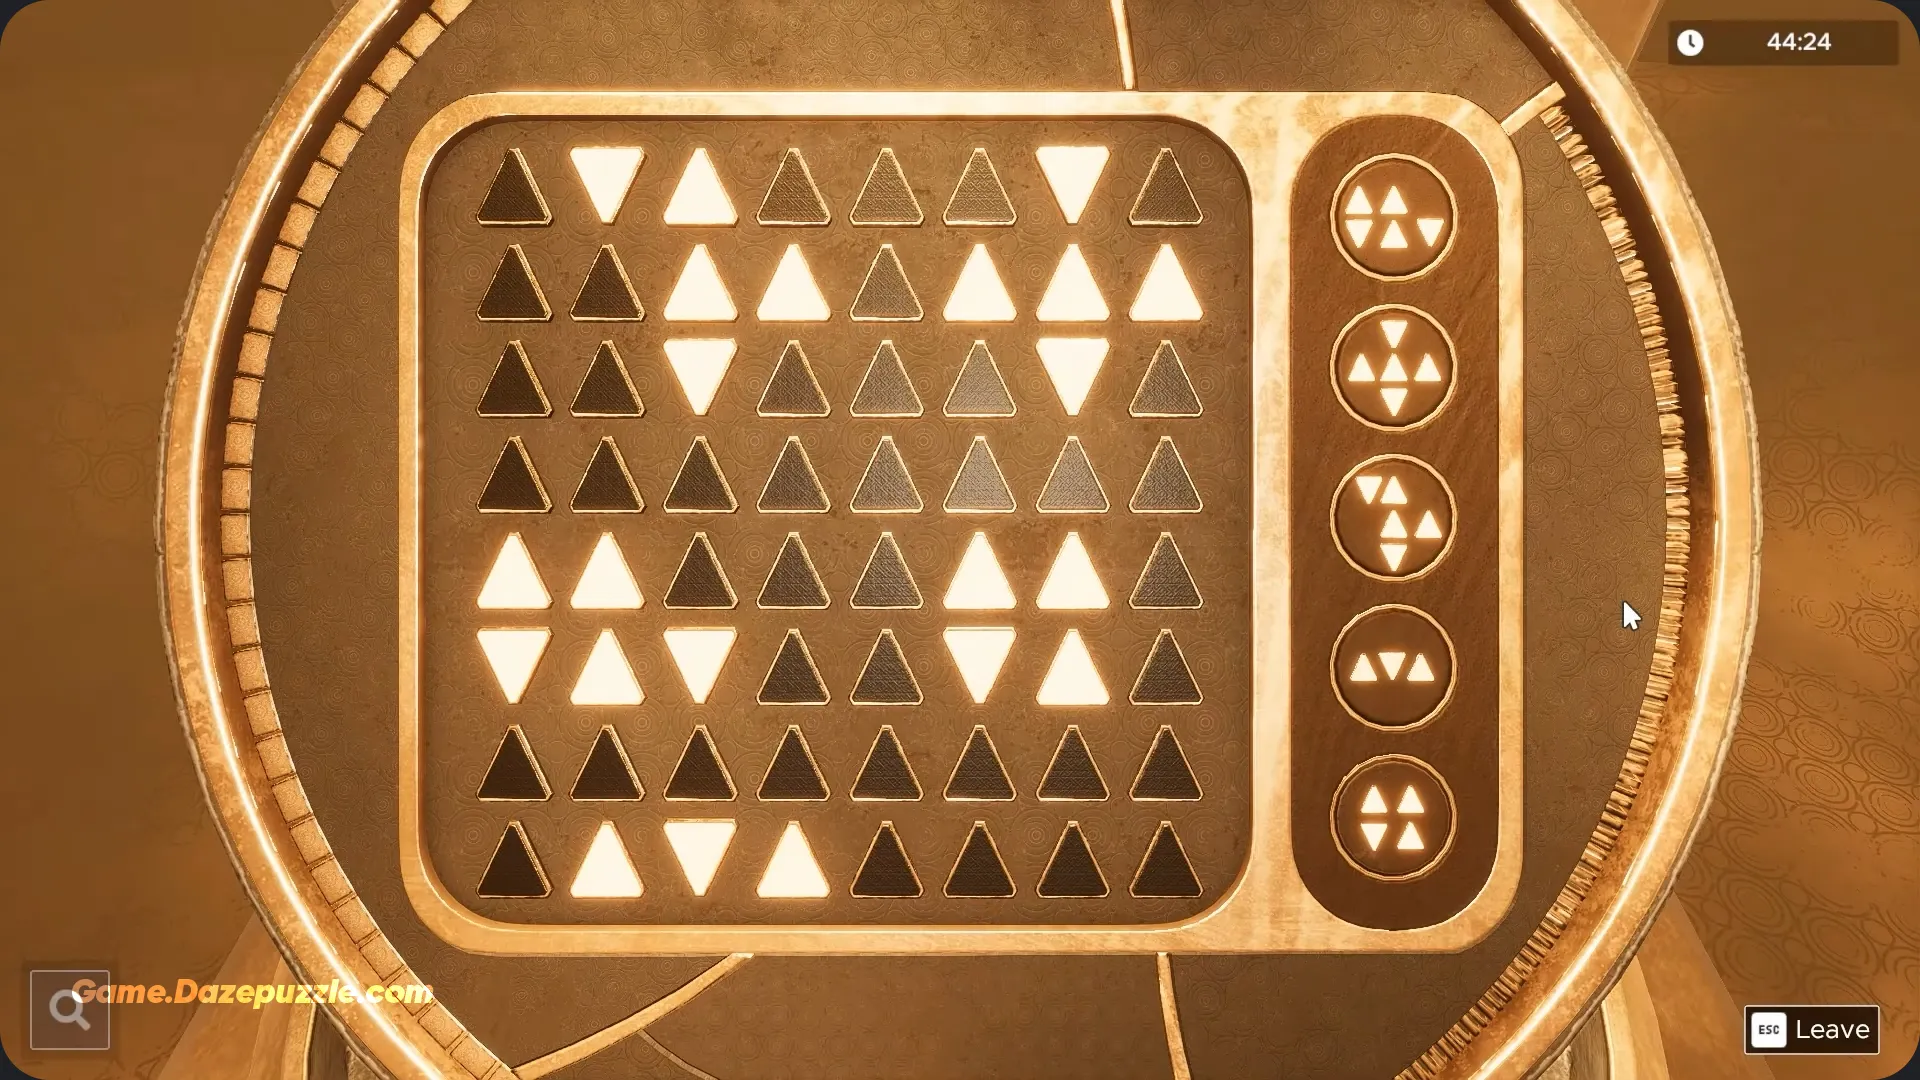
Once you nail this puzzle, the room comes alive and several new puzzle stations appear around you. Now the real fun begins with this Escape Simulator 2 Into The Unknown walkthrough.
Pillars and Wall Shadows Puzzle
This sliding puzzle requires you to arrange pieces on a board to match the shadow patterns shown on the outer edges. It’s like a jigsaw puzzle where you need to slide everything into the correct positions.
The Horizontal Wall piece goes in the top left position. Place the Back Tall Pillars in the bottom left spot. The Circle piece belongs right in the middle. Move the Vertical Wall to the bottom middle position, and finally, put the Right Tall Pillars in the middle right slot.

After completing this puzzle, grab the Kinetic Core that appears. You’ll need this important item later in the Escape Simulator 2 Into The Unknown walkthrough.
Plant Puzzle
The plant puzzle is probably the most complex challenge in this level. You’ll find tablets on the middle podium that explain the mechanics, but let me break it down simply. The floor strips control water levels, with the leftmost strip providing maximum water and the rightmost giving minimal water. Moving plants forward or backward controls sun exposure, with the front position giving the most sun and the back position giving the least.
Start by taking the bud with the pointed sprout on top. Move it to the first floor strip on the left for 5 Water, then bring it almost all the way forward to get 3/4 Sun. Collect the Ring Seed that appears.

Next, grab the smallest bud that looks like a little dome. Place it on the middle floor strip for 3 Water and push it back toward the wall for 1 Sun. It’ll open up, and you’ll place the Ring Seed inside it.

Take that same bud with the Ring Seed now inside and move it to the second to the left floor strip for 4 Water and all the way forward for 5 Sun. You’ll collect an Egg-shaped Seed.

Now grab the bud with small rounded sprouts on the top. Move it to the same floor strip for 4 Water and push it all the way against the wall for 1 Sun. When it opens, place the Egg-shaped Seed inside.
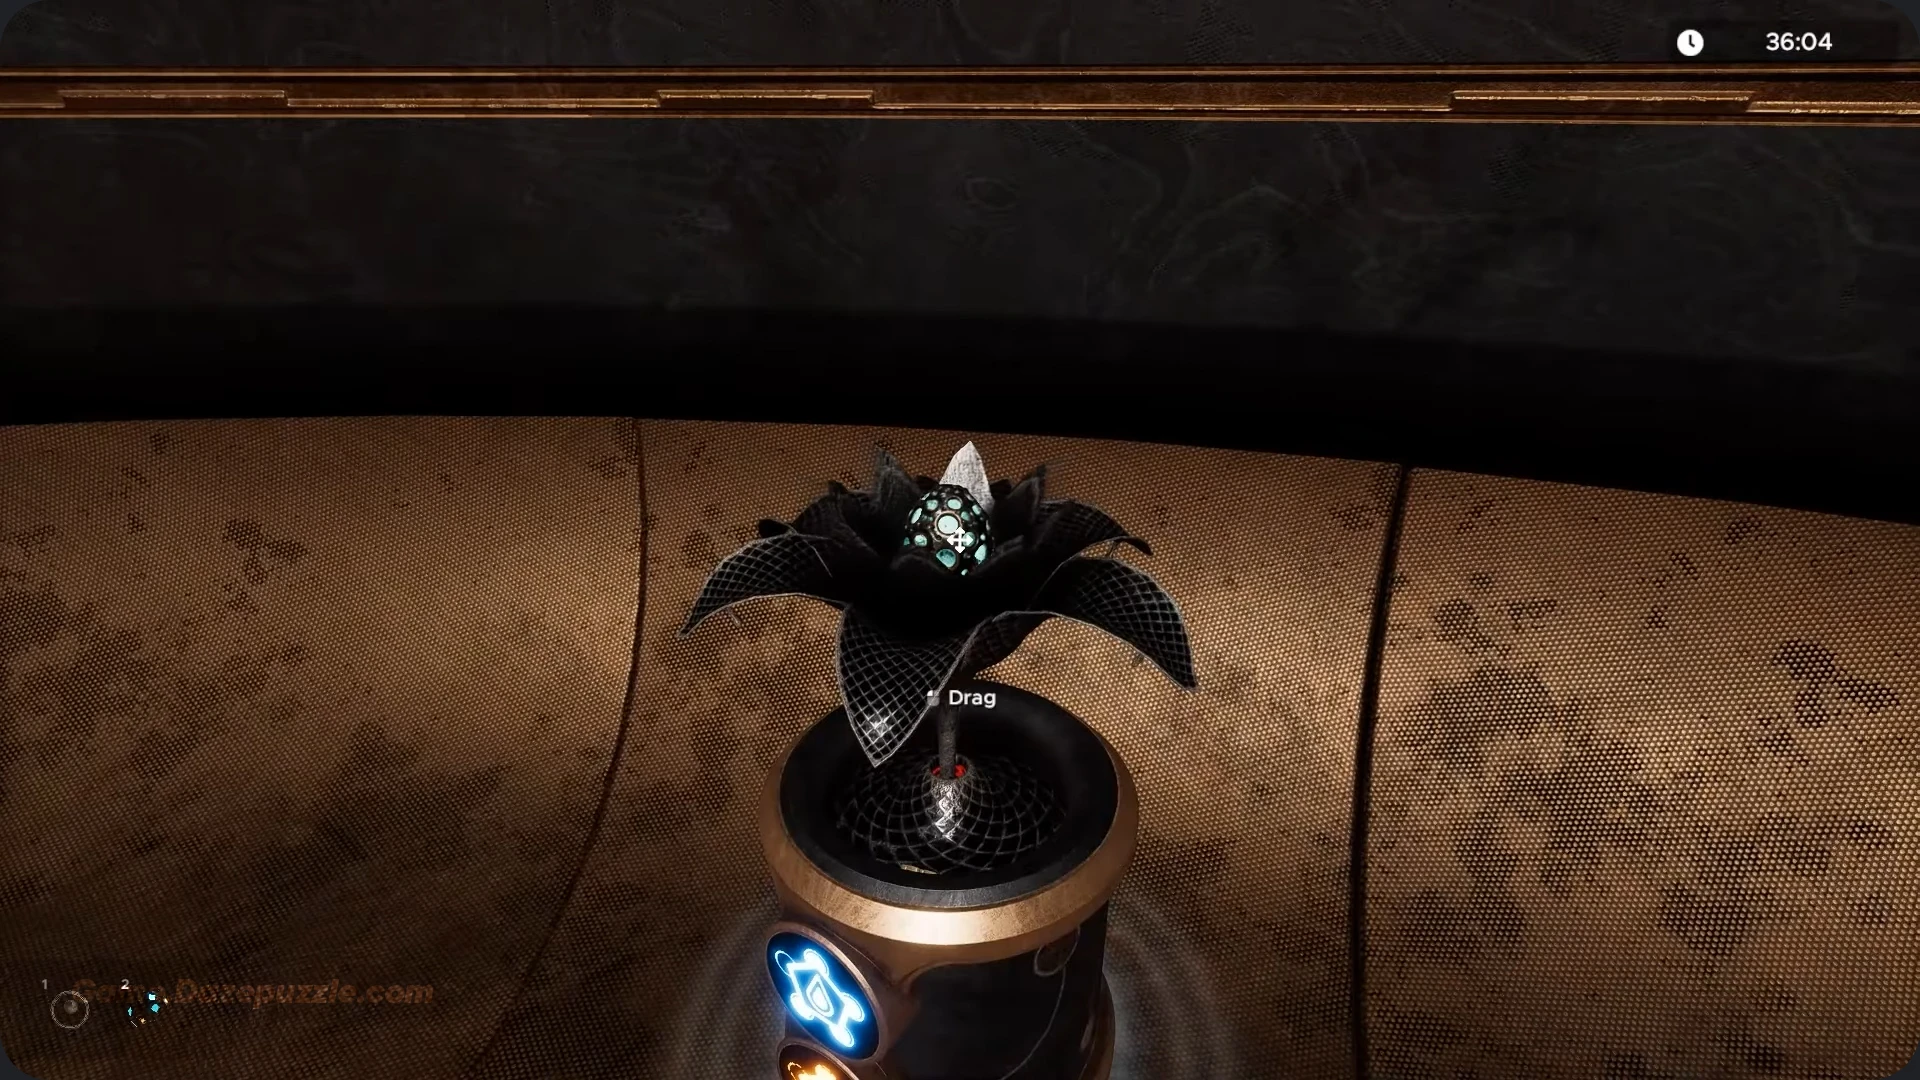
With the seed placed, move this plant to the farthest right floor strip for 1 Water and almost all the way forward for 4 Sun. Grab the new seed that appears.
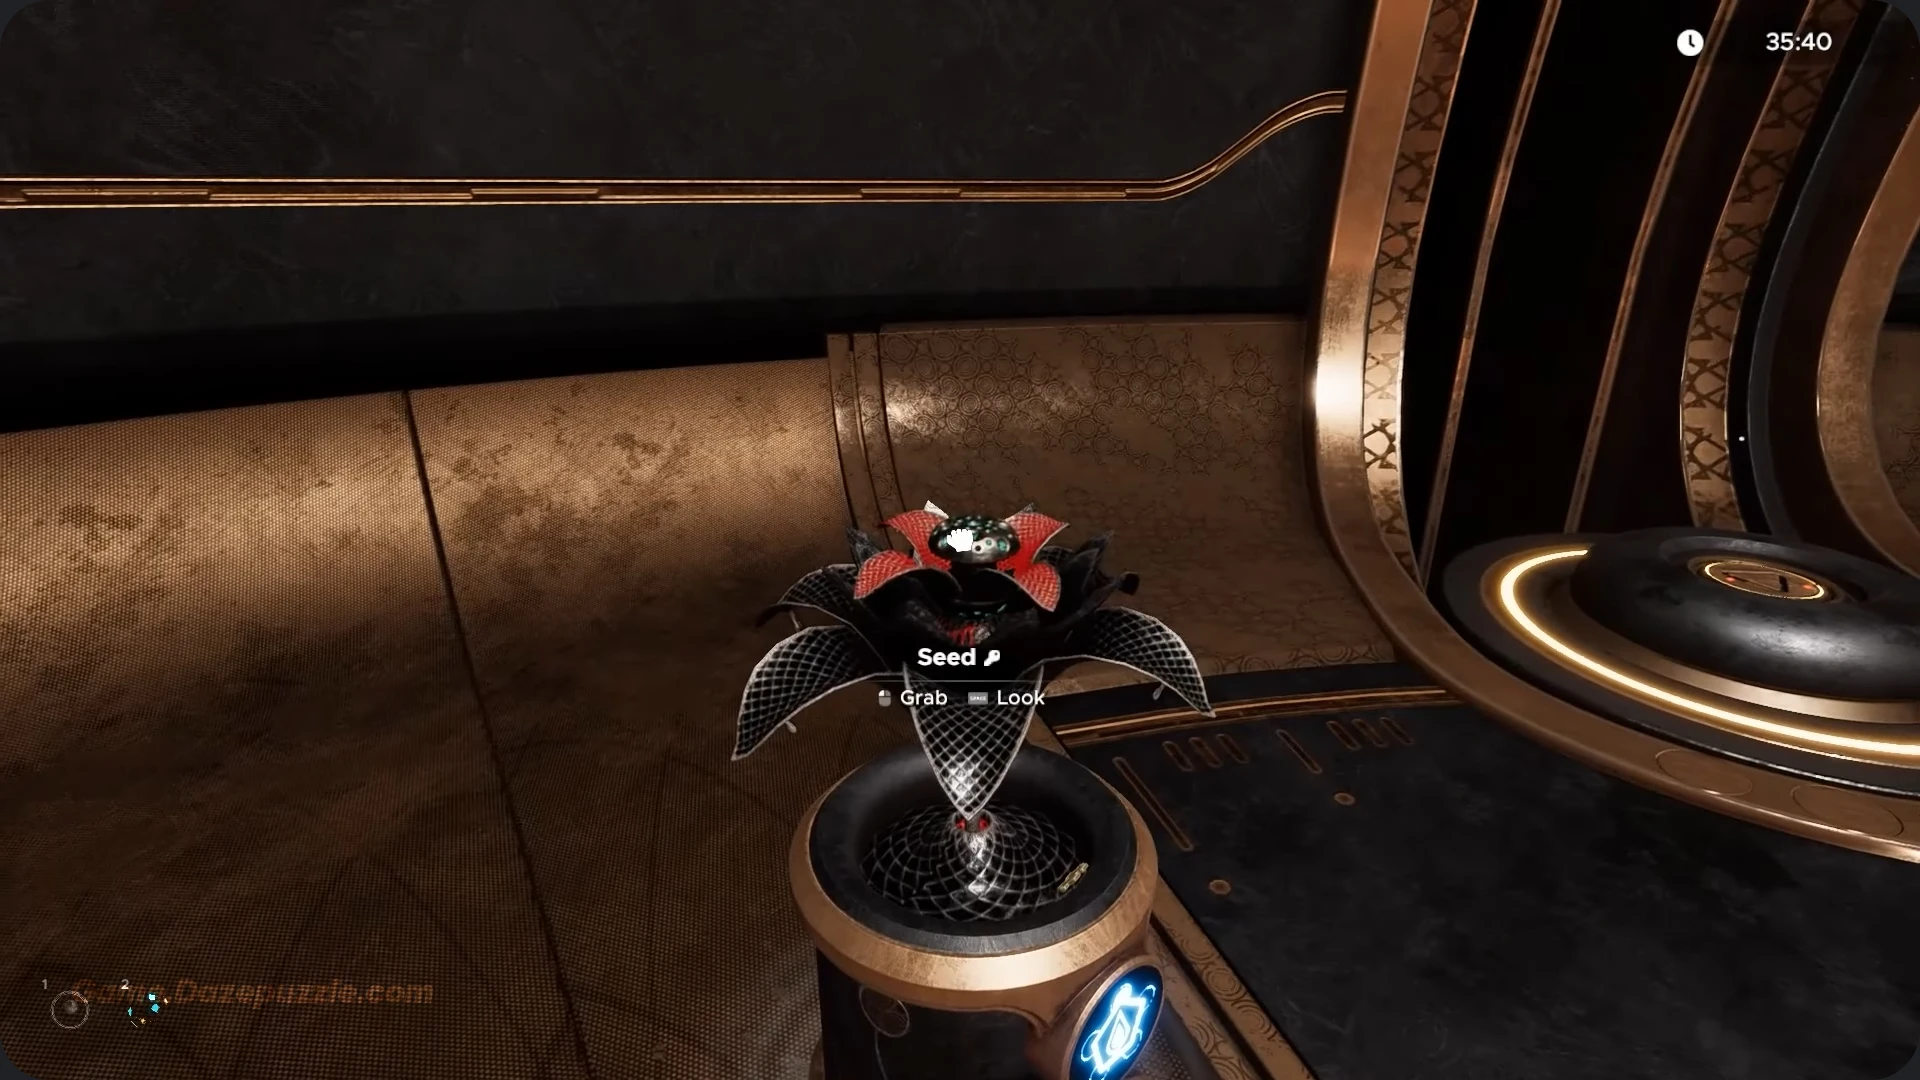
Finally, take the last remaining bud and bring it to the farthest right strip for 1 Water and all the way against the wall for 1 Sun. Place your seed inside and collect the Triangle Artifact.

Triangle Artifact Puzzle
Take the Triangle Artifact you just earned and walk to a nearby podium where you can slot it in. This raises a new puzzle table featuring a laser challenge.

The goal here is crossing out all the dots on the board using three different laser shapes at the bottom. Click on a laser shape, then click on a square to place it. The trick is positioning them so their beams intersect with every dot on the board. Once you’ve placed all three lasers correctly and eliminated every dot, grab the tablet piece from the top of the puzzle.
Star Map Puzzle
Walk to the left of the plant area and grab the Star Map from the podium. Then head to the Star Map puzzle screen nearby. Your task is using the map to figure out which symbols connect to each other, then label them correctly.
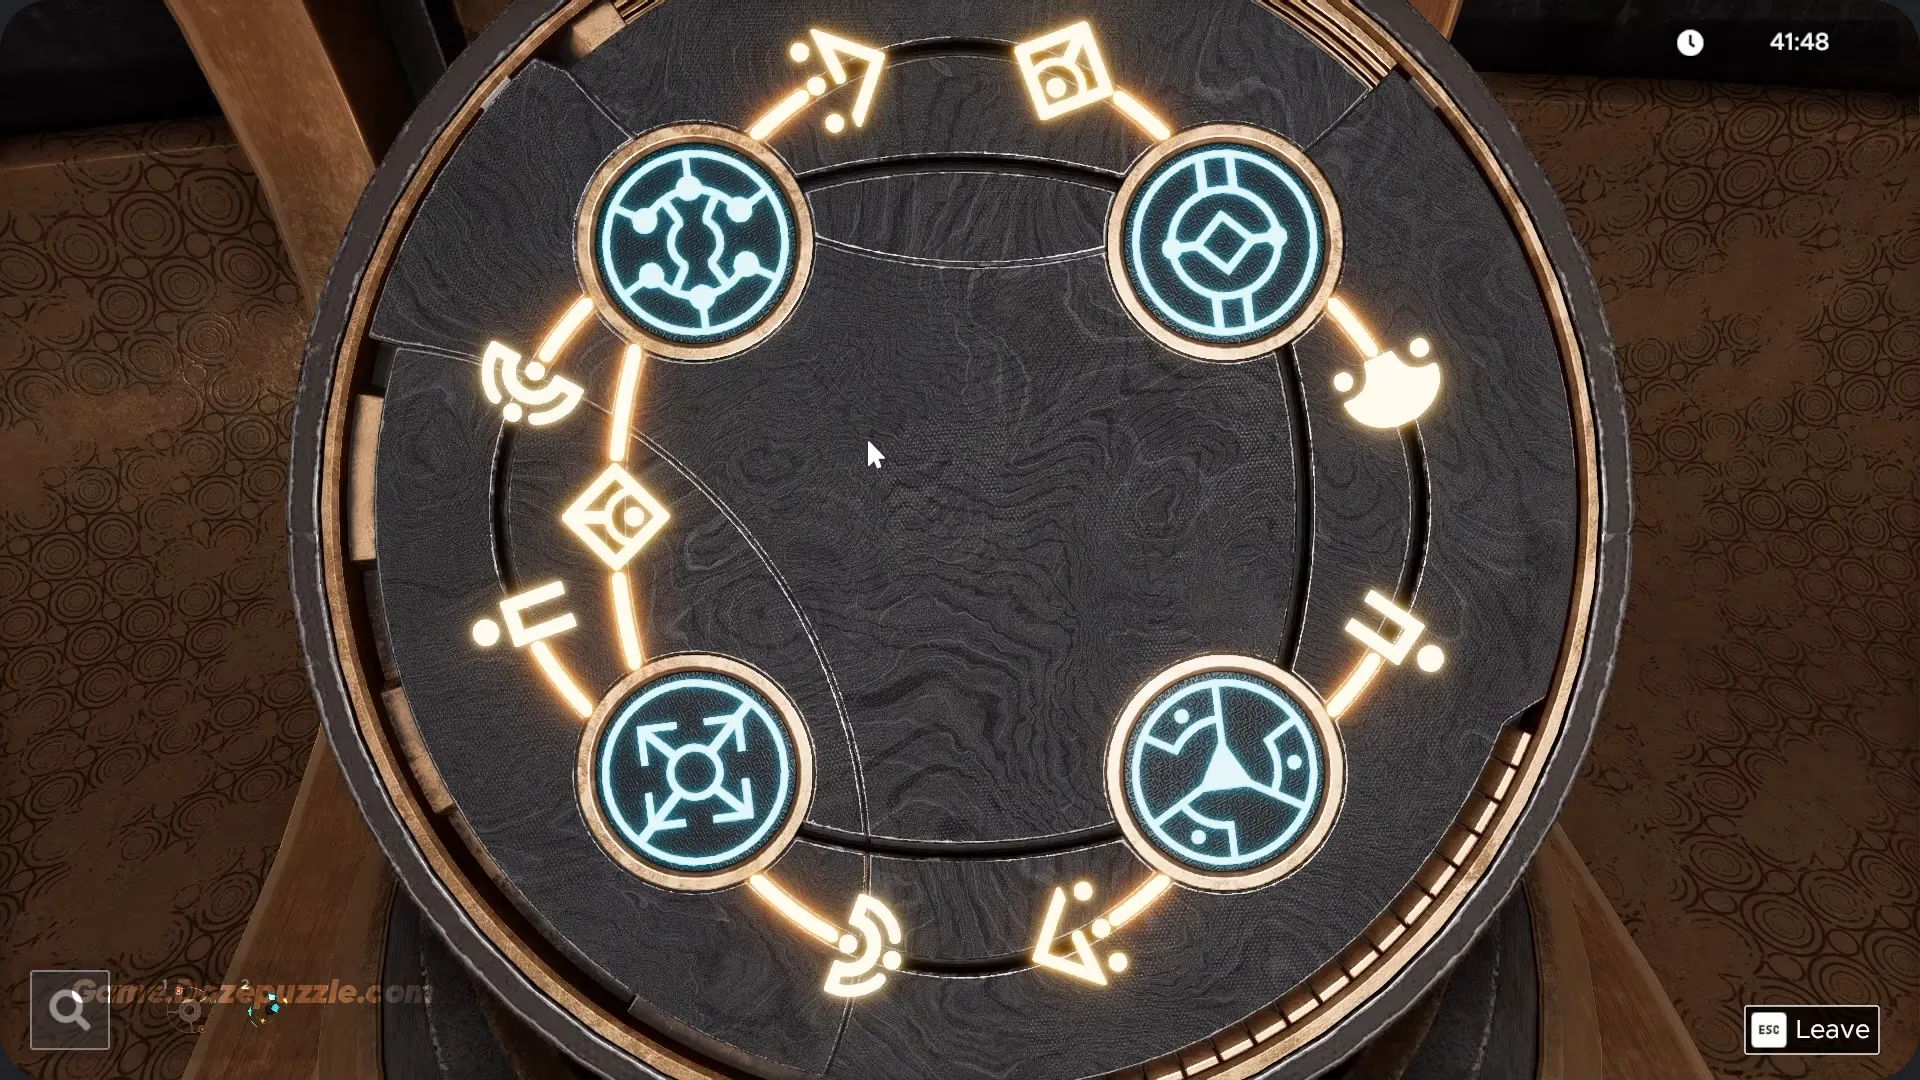
The symbol connected to a Diamond and Upside-Down Umbrella is the Circle with Diamond. The symbol connected to Triangle with 3 Dots and U with 1 Dot is the Filled Triangle with 3 Dots. The symbol connected to Semicircle, U with 1 Dot, and Diamond is the Square Outline with Unfilled Circle. Finally, the symbol connected to Diamond, Semicircle, and Triangle with 3 Dots is the Target with lines pointing out.
Complete this correctly and you’ll earn another tablet piece for your collection in this Escape Simulator 2 Into The Unknown walkthrough.
Diamond Space Puzzle
This puzzle is visually stunning but tricky to explain. You’ll see a diamond-shaped display showing fragmented space images. Use the ball on the podium to adjust your viewing angle by dragging your mouse.
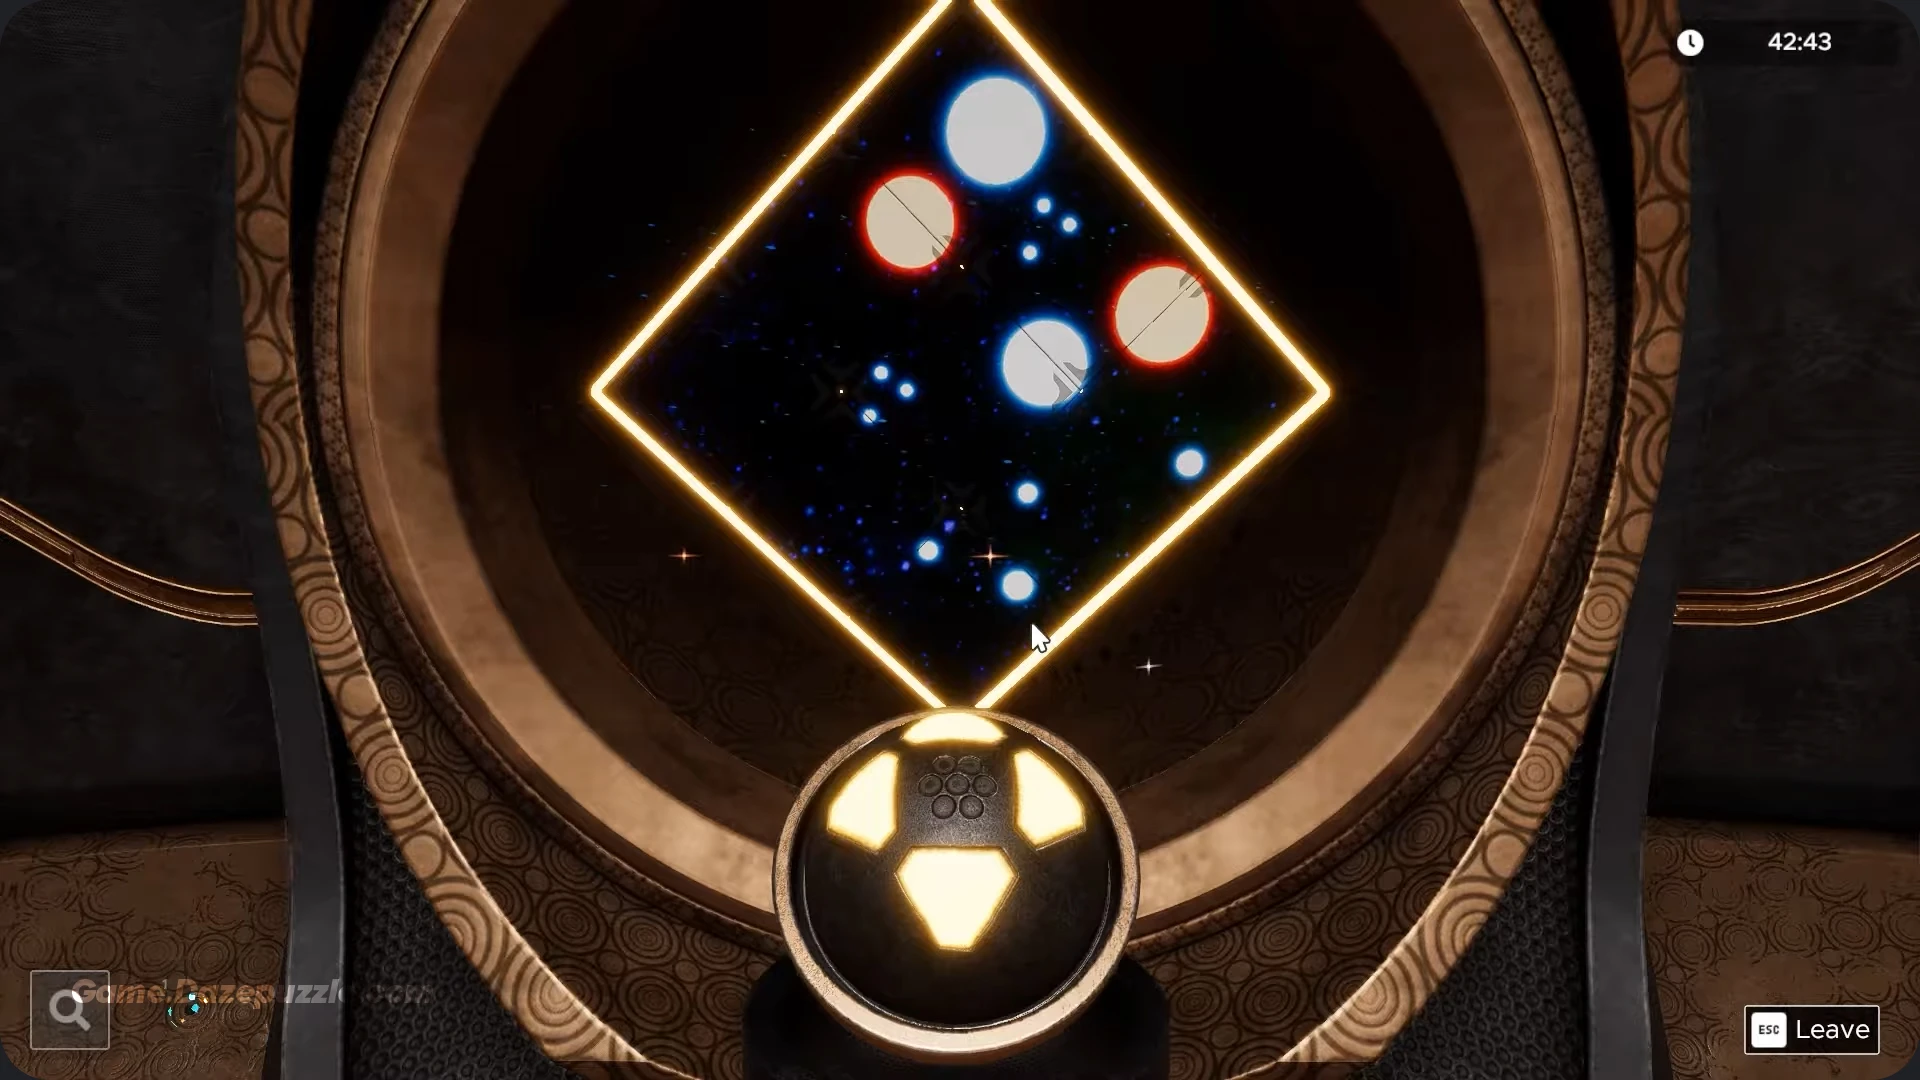
The goal is rearranging the image pieces like a 3D jigsaw puzzle until everything fits together seamlessly with no overlapping sections. Keep rotating your view and clicking on spots in the diamond to move pieces around. Look for edges that clearly match up and work systematically until the complete image forms.
Once solved, grab the Mysterious Object from the top and bring it to the slot in the ground where it fits, similar to what you did with the Triangle Artifact.
Domino Puzzle
This puzzle involves pressing unfilled circles on a domino at the top right to fill them in and move the dominoes below, creating a clear path for the green laser to travel all the way through to the right side.

Press them in this exact order: Top Left, Middle – Third Down, Middle – Fifth Down, Bottom Left, Top Left again, Top Right, Middle – Second Down, and finally Middle – Top. When the laser successfully reaches the end, grab the last tablet piece.
Triangle Constellation Tablet Puzzle
Now that you’ve collected all tablet pieces, place them around the middle orb. The Tablet with Holes goes on the Triangle Constellation spot. The Tablet with Cube and Lines fits on the Pentagon Constellation. The Tablet with Pentagon and Blue Circles belongs on the Upside-Down Y Constellation.

For the Triangle Constellation tablet, you need to recreate the constellation shown on the top right by rotating the inner circles to move the strings. Rotate the smallest ring clockwise first. Then rotate the second ring counterclockwise. Finally, rotate the outer ring so the triangle is angled upside down.
Pentagon Constellation Tablet Puzzle
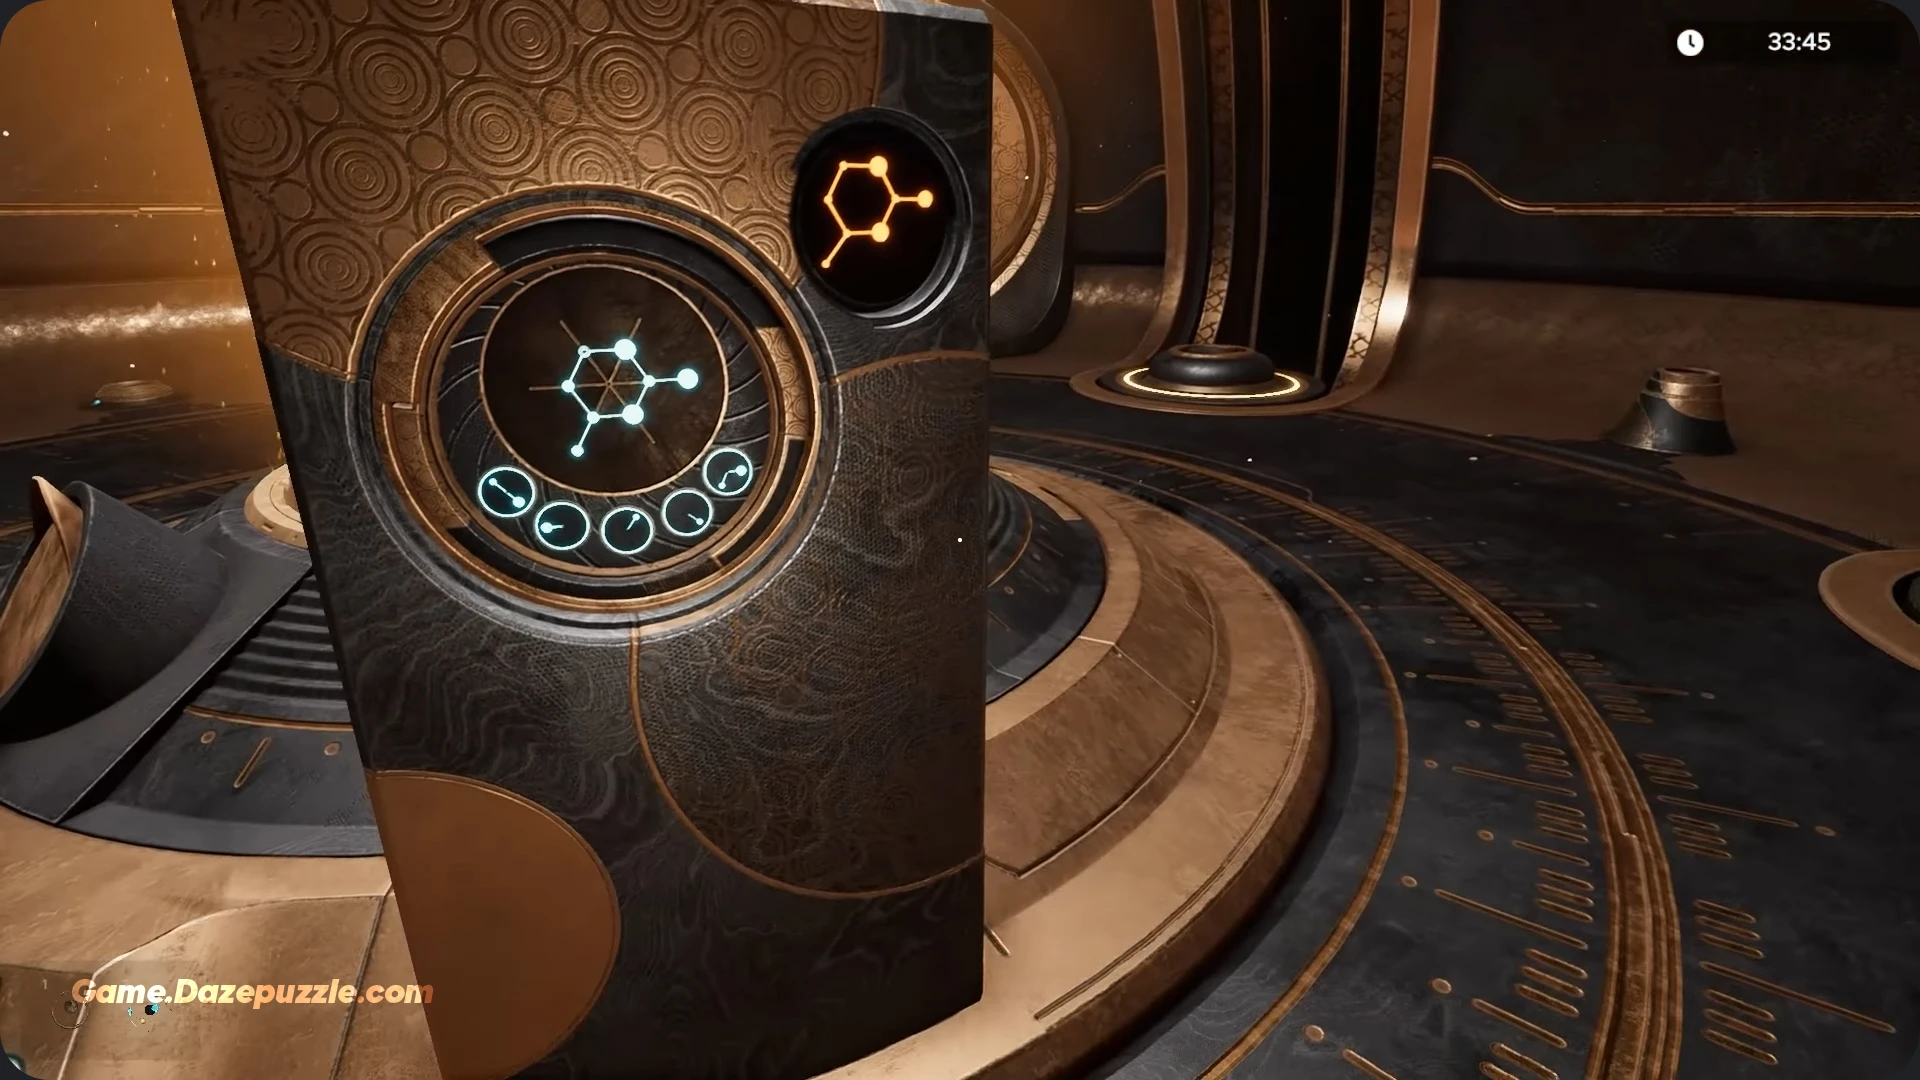
This tablet uses buttons at the bottom to recreate the pentagon constellation. Count the buttons from left to right, numbering them one through five. Press button 5, then button 4, then button 5 again. The constellation will form perfectly when you get the sequence right.
Upside-Down Y Tablet Puzzle
This is the simplest tablet puzzle in the entire Escape Simulator 2 Into The Unknown walkthrough. Just press inside the unfilled dots to create the upside-down Y constellation pattern. Make it on the bottom left side of the tablet and you’re done.

After completing all three constellation tablets, the orb opens up. Place the Kinetic Core you collected earlier from the shadow puzzle into it. This spawns the final major puzzle.
Symbols Puzzle
Walk to the podium and grab the Mirror Artifact. This special item lets you see into an alternate dimension, which is absolutely wild. The goal is recreating the right symbols on the wall with empty marks by following a path you can only see through the mirror.

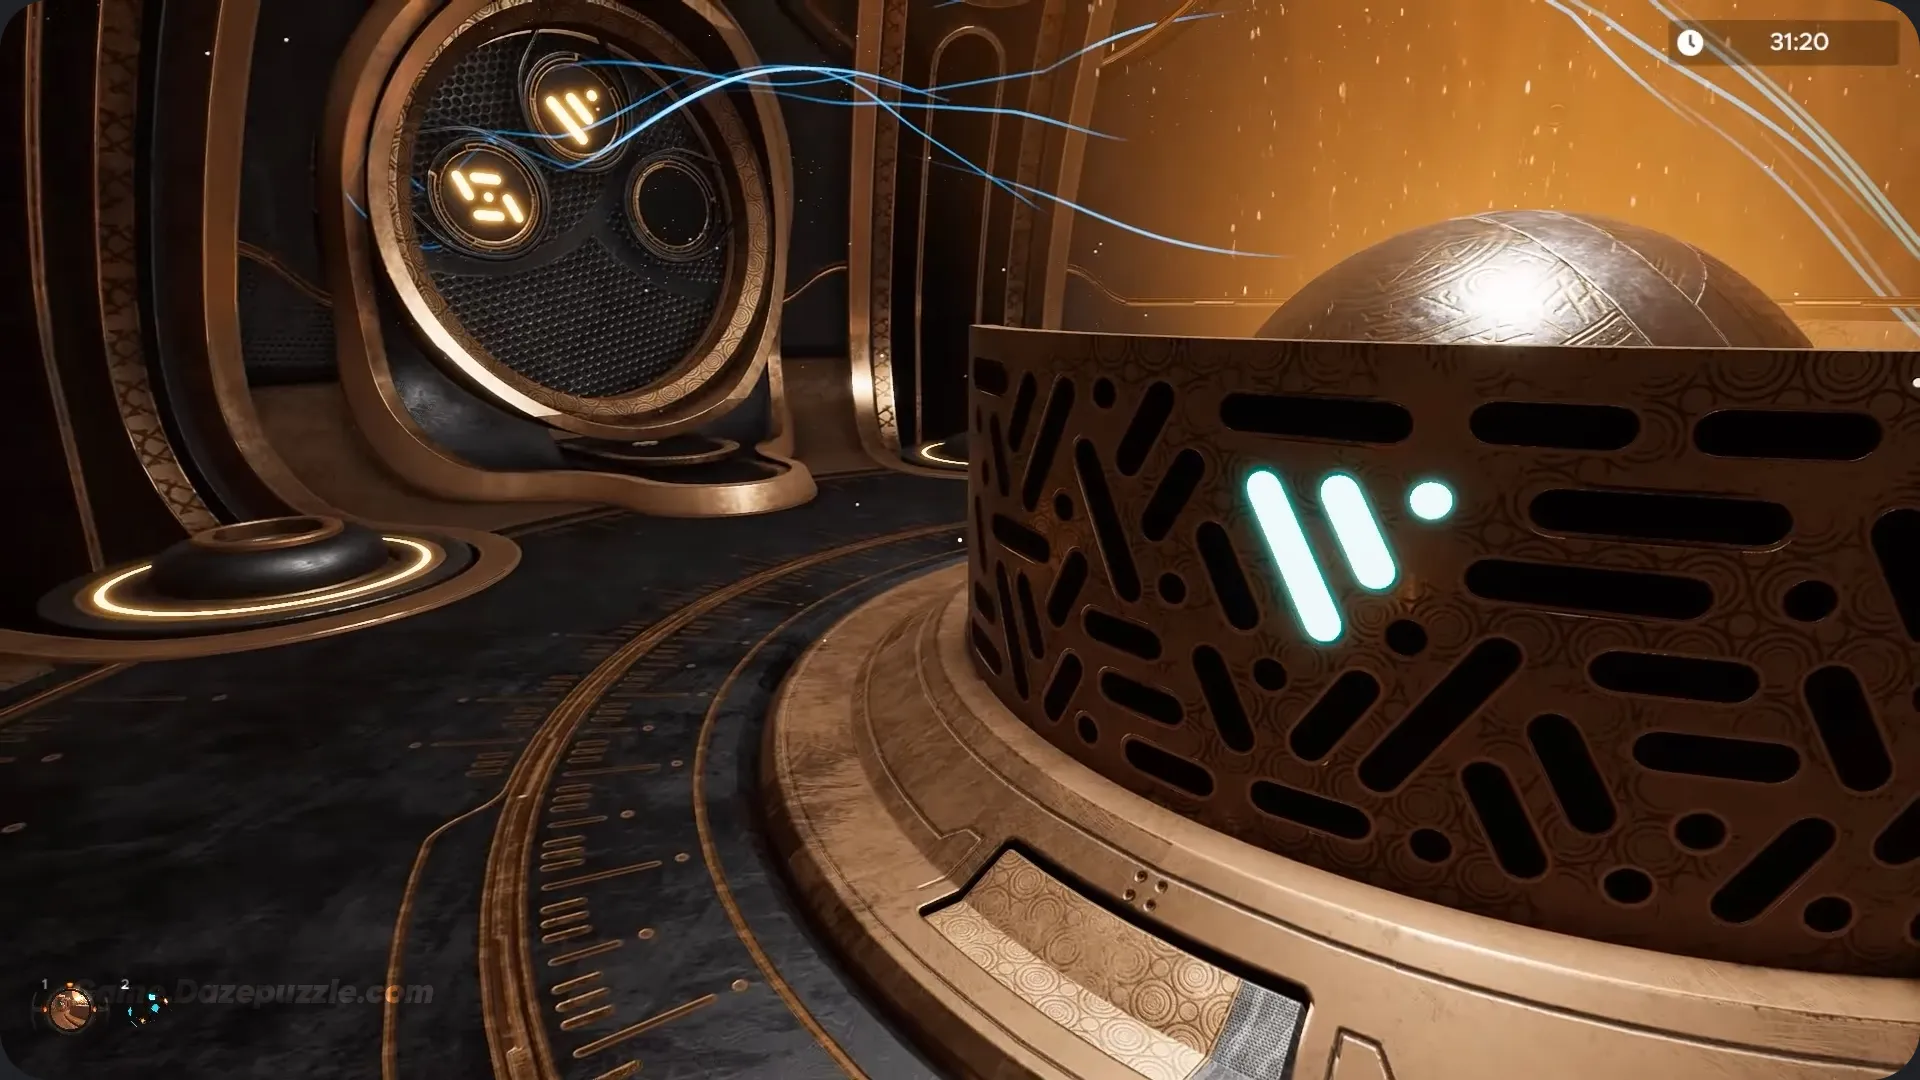
Find the person outline near the core and follow the path under the arches. The arches display the symbols you need to input on the wall. Symbol 1 is three lines forming a triangle shape. Symbol 2 consists of two lines and a dot arranged as long line, short line, then dot. Symbol 3 is four lines surrounding a dot, with the top and bottom lines straight and the side lines diagonal.
Input all three symbols correctly on the wall and the exit finally opens, allowing you to escape and complete the level.
All Escape Simulator 2 Into The Unknown Tokens Location
There are eight collectible puzzle piece tokens hidden throughout this level. Some are easy to spot while others require the Mirror Artifact to find in the alternate dimension.
Floor Token Location
You’ll find this token on the floor directly in front of the recycling bin near the outer edges of the room. It’s pretty easy to spot once you know where to look.

Hidden Token Location
This one’s tricky because it’s transparent. Look to the right of the plant area where you’ll see a floating token in mid-air. You need to look very closely since it’s nearly invisible.

Ceiling Token Location
Look up to the left side of the plant area on the wall, close to the ceiling. There’s a circular wall decoration with a token hidden inside it.

Bud Vase Token Location
After completing the plant puzzle, look inside the top of the bud vase with the small round sprouts on it. The token is tucked away inside this particular bud.

Moving Monoliths Token Location
You’ll find this token just to the left of the Moving Monoliths shadow puzzle, specifically underneath the circular wall piece.

Archway (Alternate Dimension) Tokens Location
These two tokens require the Mirror Artifact from the final puzzle. Use it to see into the alternate dimension and look at the first archway on the right path. Toward the top right, you’ll spot a puzzle piece floating in the air. Lower the mirror and click in the air directly where you saw the piece to collect it.

For the second archway token, take the path branching right instead of left while viewing through the mirror. Walk straight on the path and look through the archway to the left at the dead end. You’ll see the token on the ground, which corresponds to the area near the recycling bin in the real dimension.
Sky (Alternate Dimension) Token Location
The final token requires approaching the large orb in the center of the area with your Mirror Artifact equipped. Look up toward the sky and ceiling through the mirror to spot this last collectible piece floating above.

With all puzzles solved and every token collected, you’ve officially mastered Into The Unknown. This Escape Simulator 2 Into The Unknown walkthrough should help you breeze through what initially seems like an impossible challenge. The key is staying organized, remembering where you placed important items like the Kinetic Core, and not getting frustrated with the more complex puzzles like the plant sequence or the diamond space arrangement.
Thanks for Staying with Game.Dazepuzzle