You’ve navigated the treacherous hallways of the Clemente Hotel and survived the chaos of the Neon Tomb. You’ve mastered the art of the breach and can command your squad with your eyes closed. But one final challenge remains, the true peak of tactical perfection in Los Sueños: that elusive, glowing S-rank. If you’ve been trying and failing, you’ve probably realized that achieving this isn’t about being a better shooter. It’s about solving a puzzle.
What is In Our Ready or Not S Rank Guide?
Let’s be clear: getting a Ready or Not S rank isn’t a test of real world SWAT tactics. It’s a rigid, unforgiving challenge of procedural perfection that forces you to play in a very specific, non lethal way. This guide is your key to solving that puzzle. We will break down the exact rules, the mandatory loadouts, and the precise tactics you need to adopt to finally unlock those exclusive S-rank rewards and prove you’re the best of the best.
The Unforgiving Rules of S Rank
There is zero room for error. A single mistake will void your S-rank run, forcing a restart. You must internalize these rules before every deployment.
- Arrest Every Suspect: Every single suspect on the map must be arrested. They cannot be killed. Even incapacitating them (knocking them down but not killing them) will fail the run.
- Secure Every Civilian: All civilians must be found, restrained, and reported. No civilian casualties are permitted.
- Collect All Evidence: Every weapon dropped by a surrendering suspect must be collected and bagged.
- Complete All Objectives: You must complete all primary (hard) and secondary (soft) objectives for the mission.
- No Officer Deaths: No member of your AI squad can be killed.
- Zero Penalties: You cannot receive any point deductions for “Unauthorized use of force” or “Friendly fire.”
The mission must end automatically with the “Put ’em on safe and let ’em hang” voice line from TOC. If you have to manually end the mission, it means you missed something.
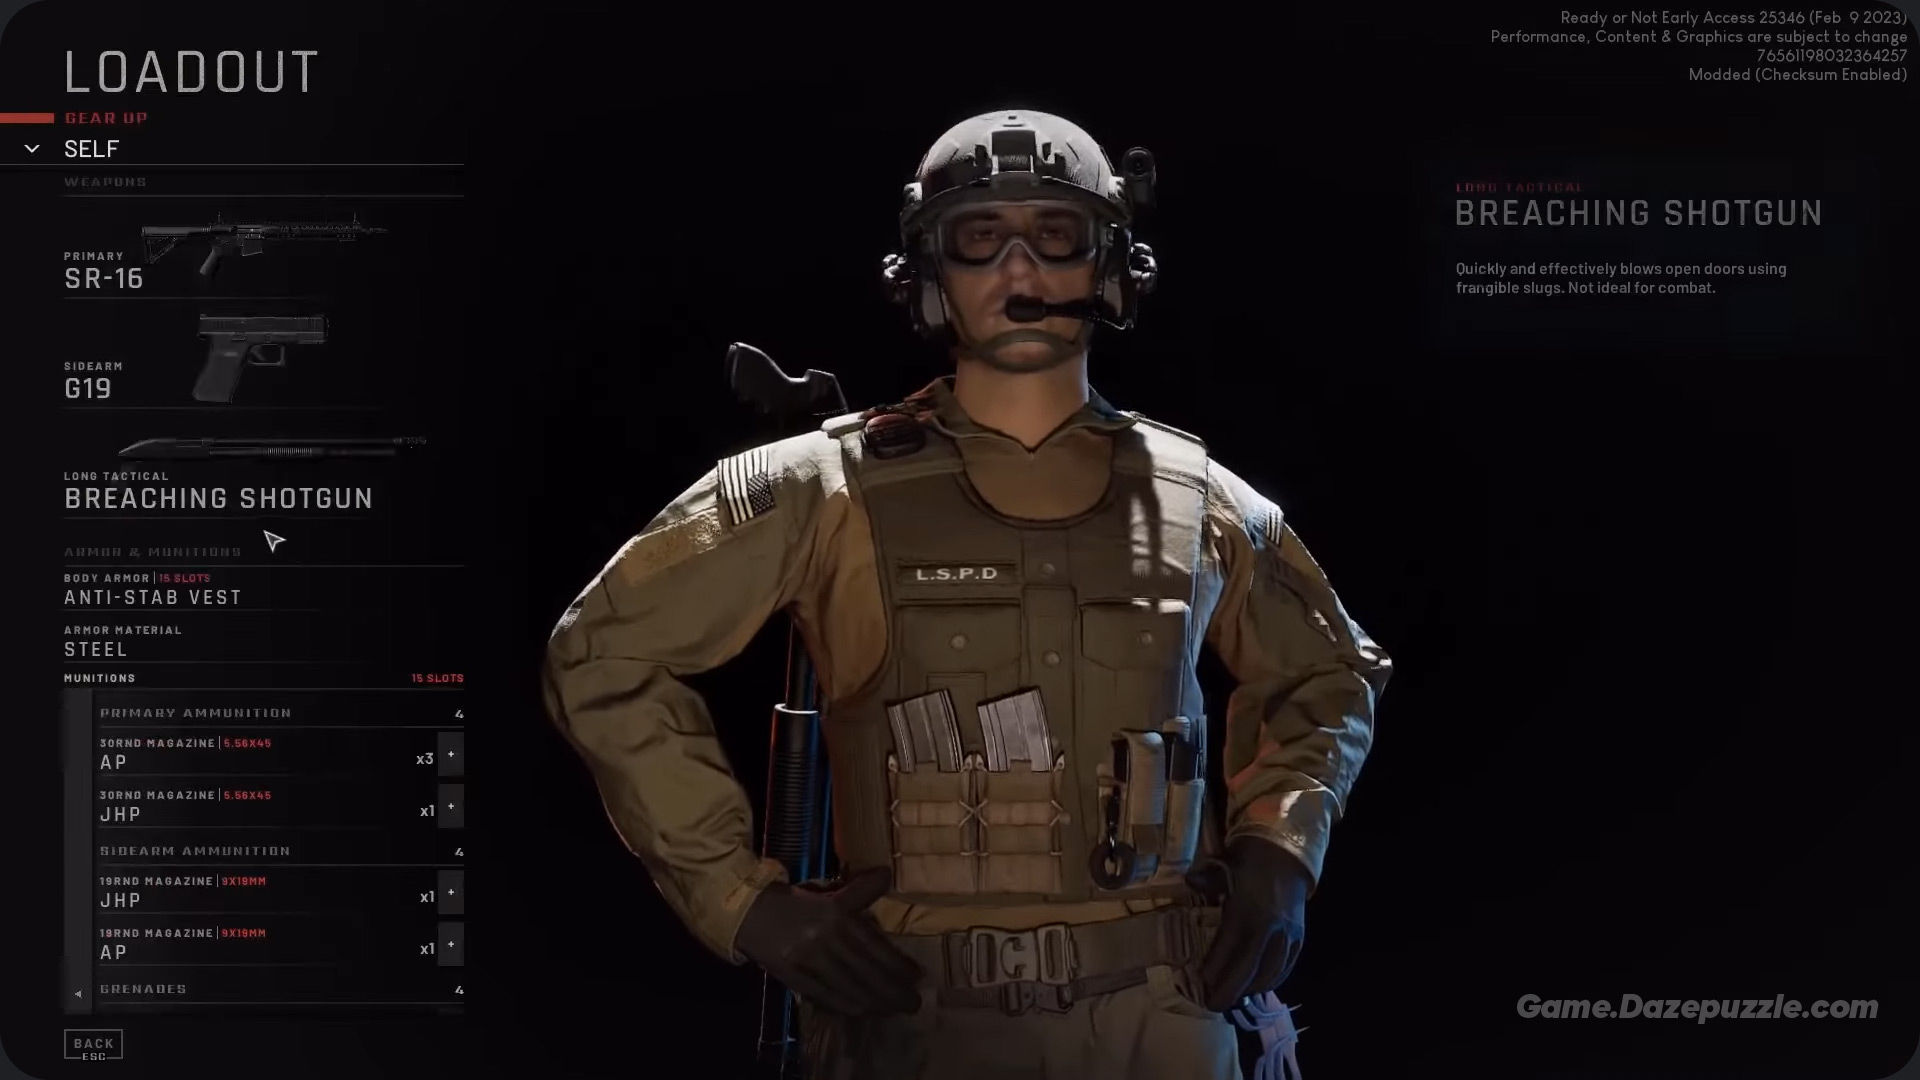
The Non Lethal Doctrine: Loadout is Everything
Your success is decided before you even step foot on the map. Your loadout must be perfectly optimized for non lethal control. This is not optional.
The Golden Rule: The “Empty Sidearm” Protocol
This is the most important trick in the entire guide. You must remove all ammunition from your AI teammates’ secondary weapons (pistols). If your AI officers run out of primary ammo or panic, they will switch to their sidearms. If those pistols are loaded, they will use lethal force, instantly killing a suspect and ending your S-rank attempt. To do this, go into each officer’s loadout, select their pistol, and click on the ammunition to unload it completely.
Your Primary Weapons: Pepperball vs. Beanbag
For your AI squad, the VKS Pepperball Rifle is mandatory. This is the only safe primary weapon for your teammates because it cannot cause a lethal headshot, guaranteeing they won’t accidentally fail the run for you. You must equip all four of them with it.
As the player, you have a choice. While you can also use the VKS, the Beanbag Shotgun is often the better tool. A single hit can make a suspect stumble, giving you a crucial moment to shout for compliance or close the distance. It’s a high risk, high reward weapon, as a headshot is lethal, so your aim must be disciplined and focused on the body or legs.
Gear and Armor: The Unchanging Essentials
- Armor: Equip your entire AI squad with Heavy Armor and full Ceramic plate coverage. There is no speed penalty for them, so give them maximum protection. You should use Light Armor to maximize your own equipment slots.
- Headgear: Gas Mask. This is non negotiable for the entire team. It makes you immune to the effects of CS Gas and, just as importantly, the pepperball clouds created by your team’s VKS rifles.
- Tactical Grenades: CS Gas. Your primary tool for controlling rooms. Load up on CS Gas for every officer. Flashbangs or Stingers can be a secondary option, but gas is king for forcing mass surrenders.
- Long Tactical: The Mirror Gun is essential for gathering intel and should be carried by you, the player. Distribute other tools like the M320 Gas Launcher and breaching tools (Battering Ram, Breaching Shotgun) among your AI teammates.
The Commander’s Doctrine: Tactics & AI Management
Your role is not to be the primary fragger. You are the commander. Your job is to process information and direct your AI team, who are your instruments of non lethal force.
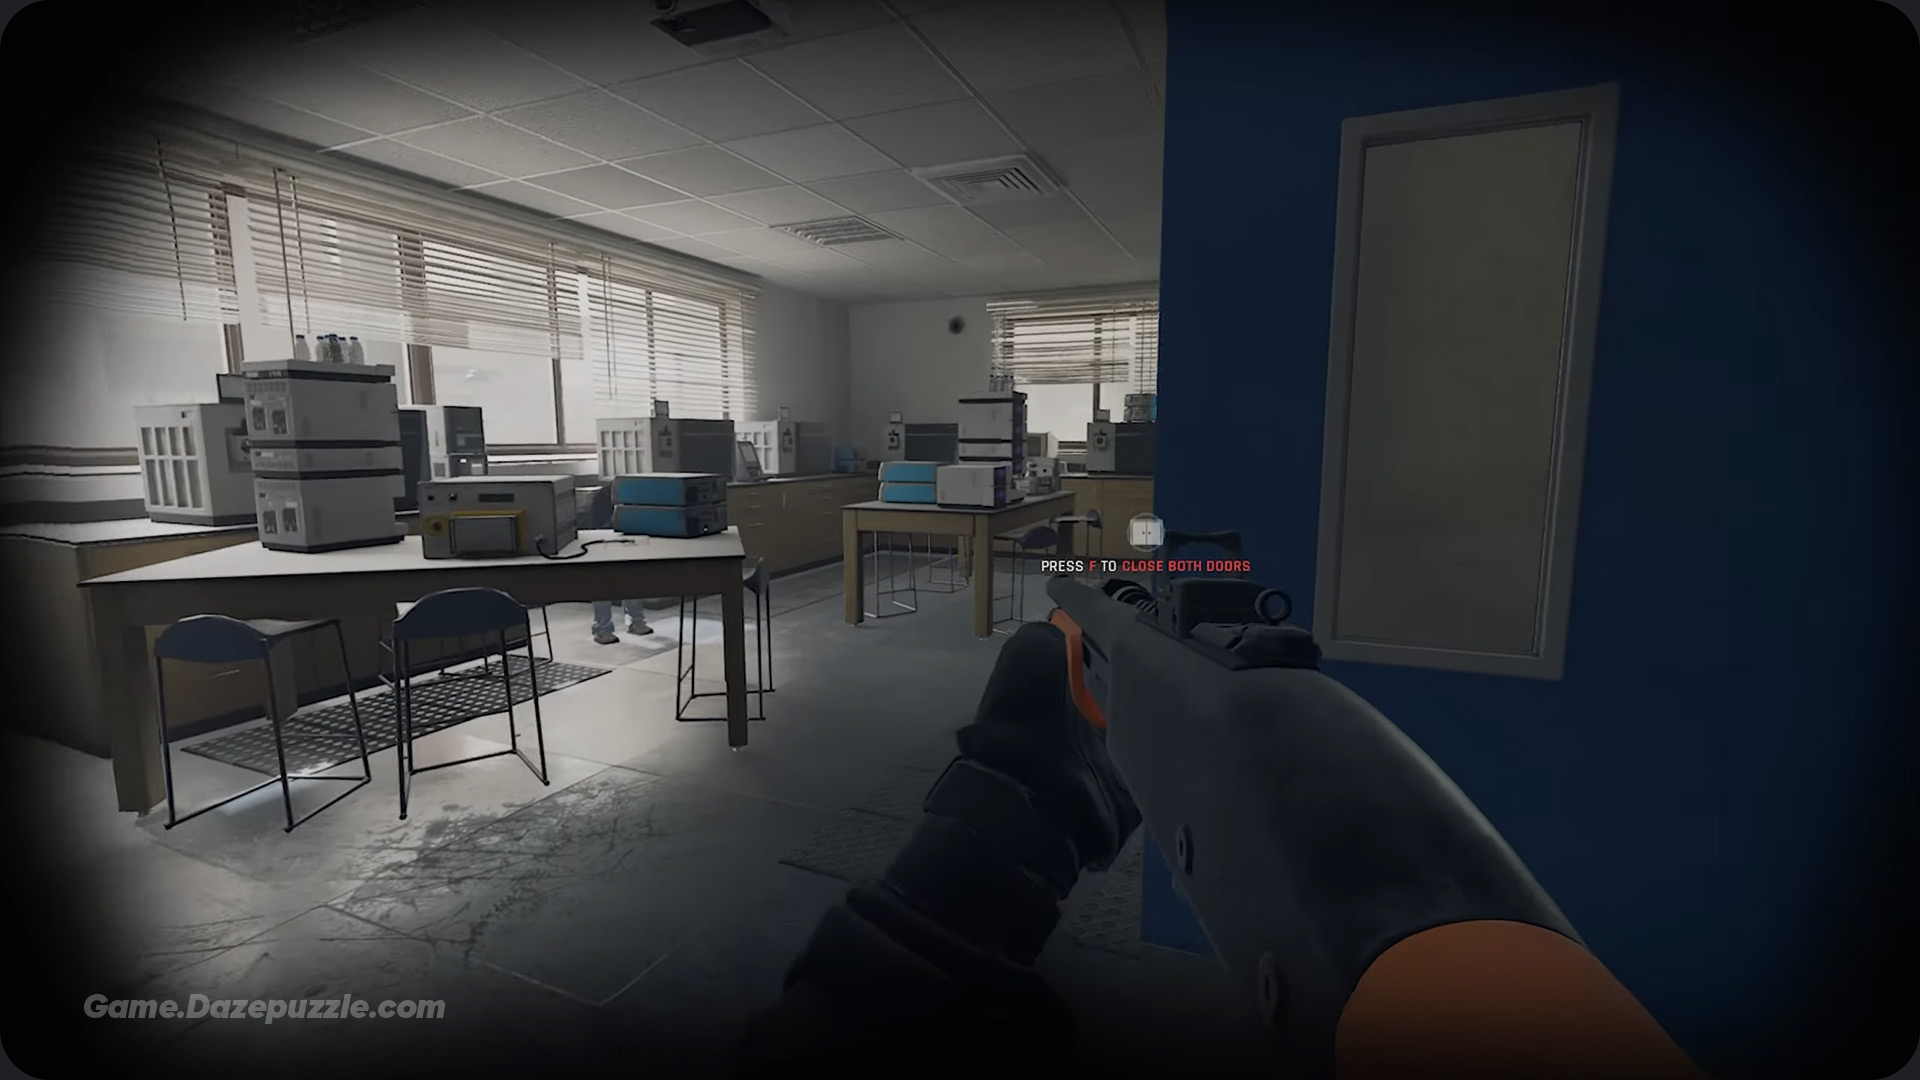
The Standard Breach Protocol
For 90% of encounters, you will use this exact, repeatable protocol:
- Stack Up: Order your entire team to stack on the target door.
- Mirror: Use your Mirror Gun to check for suspects, civilians, and traps.
- Breach & Gas: Order a breach (e.g., “Breach and Clear with CS Gas”). Your team will open the door and throw in the gas.
- Enter & Control: Let your AI enter first. They will engage with pepperballs, saturating the room. Follow behind them.
- Shout & Secure: Spam the compliance key (“F” by default) to pressure suspects. As they surrender, order your AI to restrain them while you cover other angles.
This methodical, assembly line approach minimizes risk and maximizes control. For a deeper dive into general tactics and equipment, refer to our Ready or Not Complete Guide.
Field Guide for Key Missions
While the doctrine above works for most maps, a few missions require special consideration. For a full breakdown of all mission objectives, check our Complete Mission Dossier.
A Lethal Obsession
This map is filled with deadly tripwire traps. It is often safer to order your AI team to hold at the spawn and clear the house solo. The AI is notoriously bad at avoiding traps, and one mistake can kill an officer. Move slowly and peek every door.
Elephant
This is a race against the clock. After a few minutes, the shooters will begin executing civilians, instantly failing the mission. You must abandon the slow and methodical approach. Speed is everything. Kick doors open, rush the shooters, and neutralize them as quickly as possible. Worry about securing civilians and defusing bombs after the four main threats are down.
Greased Palms
The main warehouse is a massive open killzone. Do not rush it. Methodically clear all the surrounding office buildings first, using door wedges to block off every entrance to the warehouse as you go. Once the perimeter is secure, launch a coordinated assault on the warehouse, blanketing the interior with CS Gas from multiple angles before you enter.
The Final Word: Patience is Your Ammunition
Achieving an S-rank in Ready or Not is a test of discipline and patience above all else. You will fail. A suspect will refuse to surrender and get killed by your AI. You’ll miss one piece of evidence. It’s part of the process. The key is to learn from each failure, refine your approach, and execute your plan with precision. Follow this doctrine, stay patient, and you will earn that coveted Hawaiian shirt. Good luck, officer.
Thanks for keeping up with Game.Dazepuzzle.com