Ever feel like a god in Megabonk one minute, only to get absolutely wrecked the next? You’re not alone. This is the ultimate guide to the best megabonk builds, designed to transform you from a struggling survivor into an unstoppable force. The secret isn’t just grinding levels; it’s about creating a scaling loop using what the top players call “The Holy Trinity,” a combo of the Curse, XP Gain, and Luck Tomes.
By pairing this meta strategy with smart stat priorities (hint: Luck and Movement Speed are king) and focusing on broken combos like the “Walking Apocalypse” Aura build or the absurd Dice weapon, you’ll break the game’s difficulty curve and start chasing leaderboard spots. To help you make the best choices on your run, this guide also includes a megabonk tier list for the most important weapons and tomes in the game.
Your Quick Guide to a God Run
| Strategy Element | What to Do |
|---|---|
| Core Meta | Always aim for “The Holy Trinity”: Curse, XP Gain, and Luck Tomes. |
| Early Game Stats | Prioritize Luck and XP while using the Shotgun or Katana for serious damage. |
| Top-Tier Build | The “Walking Apocalypse” build. Stack Attack Size and just walk. |
| Game Breaker | Unlock the Dice weapon. It permanently raises your crit chance. |
What is in our The Only Megabonk Best Build Guide You’ll Ever Need
Megabonk Best Builds That Actually Slap
Once you understand the core strategy, you can focus on these proven builds that actually shred. Choosing the right can be the reason why you’re leveling up every time you blink and your clueless friend… sucks!
You have two ways to approach your build: 1. Build around a character, 2. Build around your playstyle. Below, I’ve listed all of the S-Tier builds based on character and playstyle. Check it out and pick your pick.
Note: All weapons, Tomes and items are listed in order of their priority for that specific build.
Best Megabonk Builds Based on Characters
| Image | Character | Weapons | Tomes | Items |
|---|---|---|---|---|
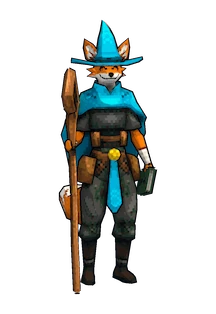 |  Fox Fox | Revolver, Bow, Sniper Rifle, Lightning Staff, Aegis, Aura | Quantity, Damage, Cooldown, Luck, Shield, XP | Clover, Battery, Forbidden Juice, Tactical Glasses, Eagle Claw, Mirror, Phantom Shroud, Power Gloves, Time Bracelet |
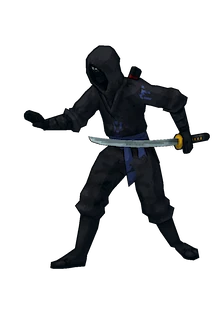 | Ninja | Katana, Aegis, Dexecutioner, Aura | Size, Quantity, Damage, Cooldown, Precision, Precision | Turbo Skates, Gym Sauce, Beefy Ring, Backpack, Time Bracelet |
 | Megachad | Aura, Aegis, Lightning Staff | Damage, Cooldown, Size, XP & Luck, Cursed/Difficulty | Mirror, Campfire, Medkit, Spiky Shield, Idle Juice, Sucky Magnet |
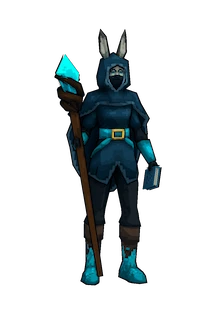 | Noelle | Frostwalker, Lightning Staff, Black Hole, Aura, Firestaff | Size, Cooldown, Damage, Quantity, XP + Luck (+ Curse later) | Ice Cube, Ice Crystal, Battery, Gym Sauce, Forbidden Juice, Mirror |
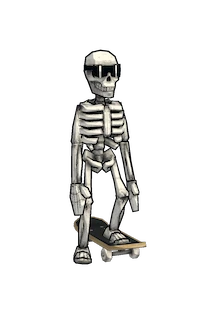 | Calcium | Bone, Bananarang, Flamewalker, Lightning Staff | XP → Luck → Cursed (early opener), Agility, Cooldown, Quantity, Projectile Speed, Damage | Turbo Socks, Coward’s Cloak, Slippery Ring, Phantom Shroud, Battery, Turbo Skates, Lightning Orb, Power Gloves, Golden Sneakers, Scarf |
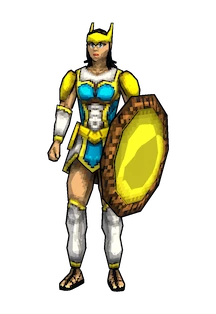 | Athena | Aegis, Lightning Staff, Bananarang, Revolver | Early Snowball, Cooldown, Agility, Precision (Path A), Quantity (Path B), Damage | Turbo Socks, Battery, Turbo Skates, Mirror, Slippery Ring, Phantom Shroud, Power Gloves, Thunder Mitts |
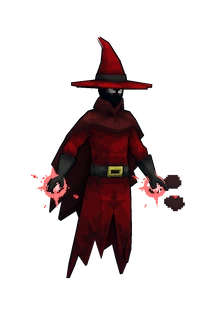 | Vlad | Blood Magic, Sword, Katana, Aura | XP → Luck → Cursed (early economic), Bloody, Cooldown, Damage, Size, Quantity | Slurp Gloves, Battery, Mirror, Chonkplate, Demonic Blade, Gym Sauce |
Best Megabonk Builds Based on Playstyle
| Playstyle | Difficulty | Weapons | Tomes | Items | Notes |
|---|---|---|---|---|---|
| Close‑range kiting / execute bursts / lane control 🗡️ | Medium (early discipline; big payoff mid‑late) | Katana, Dexecutioner, Bananarang, Black Hole (or Aegis) | Size, Cooldown, Quantity, Precision (with Damage) | Golden Shield, Turbo Socks, Gym Sauce, Brass Knuckles, Sucky Magnet | Works on: Melee‑leaning kits (e.g., Ninja) Best For: Elites/bossing, dense waves, melee mains |
| Macro control / grouping / execute cleanup 🌀 | Medium (slow early, explosive mid-late) | Black Hole, Dexecutioner, Katana, Aura, Bananarang, Lightning Staff | Size, Quantity, Cooldown, Luck, XP, Damage | Battery, Echo Shard, Energy Core, Sucky Magnet, Time Bracelet, Golden Shield, Turbo Socks | Works on: Size (e.g., Noelle) Best For: High scores, timer pushes, dense maps |
| Kitting 💀⚡ | Hard | Bone, Lightning Staff, | XP, Cursed, Agility, Luck | Turbo Socks, Holy Book, Oats, Leeching Crystal, Chonkplate, Turbo Skates | Works on: Calcium Best For: Speed and perfect dodging |
| AFK 💪🌪️ | Easy | Aura | XP, Cursed, Luck | Mirror, Kevin | Works on: Megachad, Sir Oofie Best For: Low effort crowd killing |
| RNG 🦊 | Easy | Firestaff, Lightning Staff | Luck, XP, Cursed | Clover, Mirror | Works on: Fox Best For: Looters and Shrine collectors |
Megabonk Best Character
Choosing the Megabonk Best Character often depends on your preferred playstyle and the build you’re aiming for. However, some characters offer more consistent advantages, especially for newer players.
CL4NK is widely considered a top-tier character due to his starting weapon, the Revolver, and his passive ability that increases Crit Chance with every level. For players who prefer a high-speed, aggressive playstyle, Calcium is an excellent choice as his damage scales with his movement speed. Robinette also has an incredible passive that causes a 1% increase in gold per level, and with more gold, her damage increases.
For gamers who like to feel big and safe, I recommend Noelle. She has the Frostwalker weapon, which creates a circle that damages and slows down enemies. Her size also increases 1% for each level. Another S-tier starting character is Fox. Not only does he start with a decent Luck stat, but it also increases by 1% per level. So he’s the perfect choice if you look forward to receiving higher-tier rewards from Shrines, chests, and weapon upgrades.
Ultimately, the best character is one that synergizes well with your chosen tomes and weapons.
Megabonk Best Weapons Tier List
Not all weapons are created equal. Knowing what to grab and what to use your precious “Banish” on is a huge advantage. As a general rule, weapons that can upgrade their own crit chance and crit damage are almost always better.
- S-Tier (God Tier): Dice, Aegis, Aura, Flamewalker, Dexecutioner, Katana, Blood Magic
- A-Tier (Very Strong): Bananarang, Lightning Staff, Corrupted Sword, Bow
- B-Tier (Situational): Revolver, Frostwalker, Bone, Axe, Sniper Rifle, Hero Sword, Wireless Dagger
- C-Tier (Probably Banish): Firestaff, Sword, Shotgun, Black Hole, Tornado, Space Noodle, Dragon’s Breath, Slutty Rocket, Mines, Chunkers, Poison Flask
Megabonk Best Tomes
Tomes provide the core passive bonuses that define your build’s power. While the best choice depends on your character and weapons, some Tomes are universally powerful.
- S-Tier (Always Pick): XP Tome, Cursed Tome, Luck Tome. These Tomes are the Holy Trinity we discussed before. But I recommend avoiding them if you’re a beginner.
- A-Tier (Excellent Support): Cooldown Tome, Damage Tome, Agility Tome, Precision Tome, Quantity Tome. These significantly boost your survivability and efficiency, making your run much smoother.
- B-Tier (Situational): Size Tome, Health Tome, Shield Tome, Armor Tome, Bloody Tome, Thorns Tome, Duration Tome, Attraction Tome, Regen Tome. These are useful for specific builds or when S-Tier options are not available.
From Hero to Zero: Why You Suddenly Suck at Megabonk
You’ve been cruising through the early game, bonking enemies left and right. Then you hit Tier 2, and suddenly, the boss’s health bar jumps from a measly 20k to a whopping 500k.
This isn’t just you. It’s a massive, intentional difficulty spike. Your old tactics of just picking whatever does a little more damage stop working. The enemies scale up so quickly that a simple, linear power increase won’t cut it. To survive, you need to get stronger fast.

Megabonk Holy Trinity Tomes
One of the core strategies used by top players to achieve “God Runs” is built around three specific Tomes. These core items are known as the “Holy Trinity”.
What are the “Holy Trinity” Tomes?
It’s the powerful synergy between three key items:
- Curse Tome: This makes the game harder by spawning way more enemies. Sounds bad, right? Wrong! This is the most important step.
- XP Gain Tome: This one’s simple. It boosts the experience you get from all sources.
- Luck Tome: Luck is described as the most important stat in the game. It directly improves the quality and rarity of the choices you get every time you level up.
Why are the Holy Trinity Tomes THE BEST?
These three Tomes create a beautiful, broken cycle of power: The Curse Tome fills your screen with enemies. More enemies mean a map flooded with XP gems and gold. The XP Gain Tome lets you suck up that XP at a ridiculous rate. This makes you level up constantly.
Finally, the Luck Tome ensures that every one of those frequent level-ups offers you god-tier upgrades instead of garbage. You’re not just getting stronger; you’re accelerating the speed at which you get stronger. This feedback loop is the absolute core of dominating the game.

Warning: I recommend beginners to avoid the Holy Trinity! With no defensive basis at the beginning, it can lead to frustrating early deaths. Start with more defensive stats like Megachad or Sir Oofie as a stepping stone.
For a more detailed breakdown and examples of this in action, you can check out this ultimate Megabonk walkthrough, which also explores the Holy Trinity concept.
How to Spend Your Tome Level Ups in Megabonk?
Every level up is a choice. Making the right one, especially early on, is crucial. Besides the Holy Trinity, other Tomes make you a serious competition too. Here’s my recommended list:
S-Tier Tomes: The God-Tier Stats (Always Pick These)
If you see these, just take them. Don’t think twice.
- Cooldown Tome: You can get this from the get-go. As the name suggests, Cooldown reduces the cooldown between attacks. It also increases +7.5% Attack Speed per level. Although this tome is more useful for beginners and is not as effective in high levels.
- Damage Tome: This is essential for any build to increase damage on any weapon. It also offers a +0.08x damage multiplier per level.
- Agility Tome: You can’t kill what you can’t catch, and you can’t dodge what you can’t outrun. Agility is essential for slower characters and critical for Calcium. It provides +15% movement speed per level. Overall, acquiring Agility helps you dodge better and survive more.
- Precision Tome: Precision is specifically made for crit builds as it increases +7% crit chance per level. It also enables Overcrit after 100%, which makes you OP. Precision works perfectly on CL4NK. Also, you MUST synergize with Giant Fork for maximum results.
- Quantity Tome: Get this if you like hitting each enemy multiple times. It offers +1 projectile count per level. Quantity is essential for Bullet Hell builds. Unlike the other Tomes, you unlock this after firing 5,000 projectiles.
A-Tier Tomes: The “Yeah, That’s Good” Stats
These are next in line after you have a solid base of Damage and Speed:
- Size Tome: If you like your space and want more of it, get this. It’s incredible for Aura builds as it increases the AoE area.
- Health Tome: If defense is your strong suit, Health offers +25 max HP per level. Just don’t forget to get the Beefy Ring for a better synergy.
- Shield Tome: This Tome regenerates shield, and it works great with CL4NK. However, Kevin disables regenerating! So pick your pick.
- Armor Tome: Armor is essential for defensive builds like Sir Oofie. In fact, you need to kill 5,000 enemies as Sir Oofie to unlock it.
- Bloody Tome: If you have Vampire fighting style, the Bloody Tome provides +10% lifesteal per level. It also gives you the chance to heal 1 HP on hit. Synergize with poison builds for max effect. You have to kill 12,500 enemies to unlock this. So develop a taste for blood if you’re aiming for it.
- Thorns Tome: This only works for Athena and unlocks after blocking 250 attacks with Aegis.
- Duration Tome: This Tome extends projectile lifespan and buff duration. So it’s perfect for freeze builds like Noelle. Upgrade Axe to level 10 to unlock Duration.
- Attraction Tome: Get this if you love raiding Shrines. It increases +75% pickup range per level and provides faster XP collection.
- Regen Tome: Can’t help taking damage? Regen offers +40 HP regeneration per minute per level. Synergize with the Holy Book and just don’t die.
A Quick Guide to Shrines
Those little interactive objects on the map can make or break your run.
- Always Use: Moai Shrine (free items), Gold Chest (free item).
- Use Strategically: Shrine of Succ / Magnet (pulls all XP, great before a boss), Microwave (duplicates an item, amazing if you get a good one early).
- High-Risk, High-Reward: Challenge Shrine (tougher enemies, better loot), Greed Shrine (gives gold but increases difficulty by 5%).
A pro tip on the Greed Shrine: if you’re running The Holy Trinity, the “downside” of increased difficulty is actually an upside. It synergizes with your Curse Tome and fuels your XP engine even more. Always take it.
Time to Go Bonk Some More
If you’re dying (literally!) to master Megabonk, you need to play smarter, not just harder. Once you’ve built a solid foundation, embrace the Holy Trinity and prioritize long-term stats. Don’t be afraid to make the game harder for yourself on purpose. Once you’ve secured that God Run and are looking for the next challenge, you can tackle all 100 trophies with this complete achievement guide. Now get out there and bonk!
Thanks for keeping up with Game.Dazepuzzle